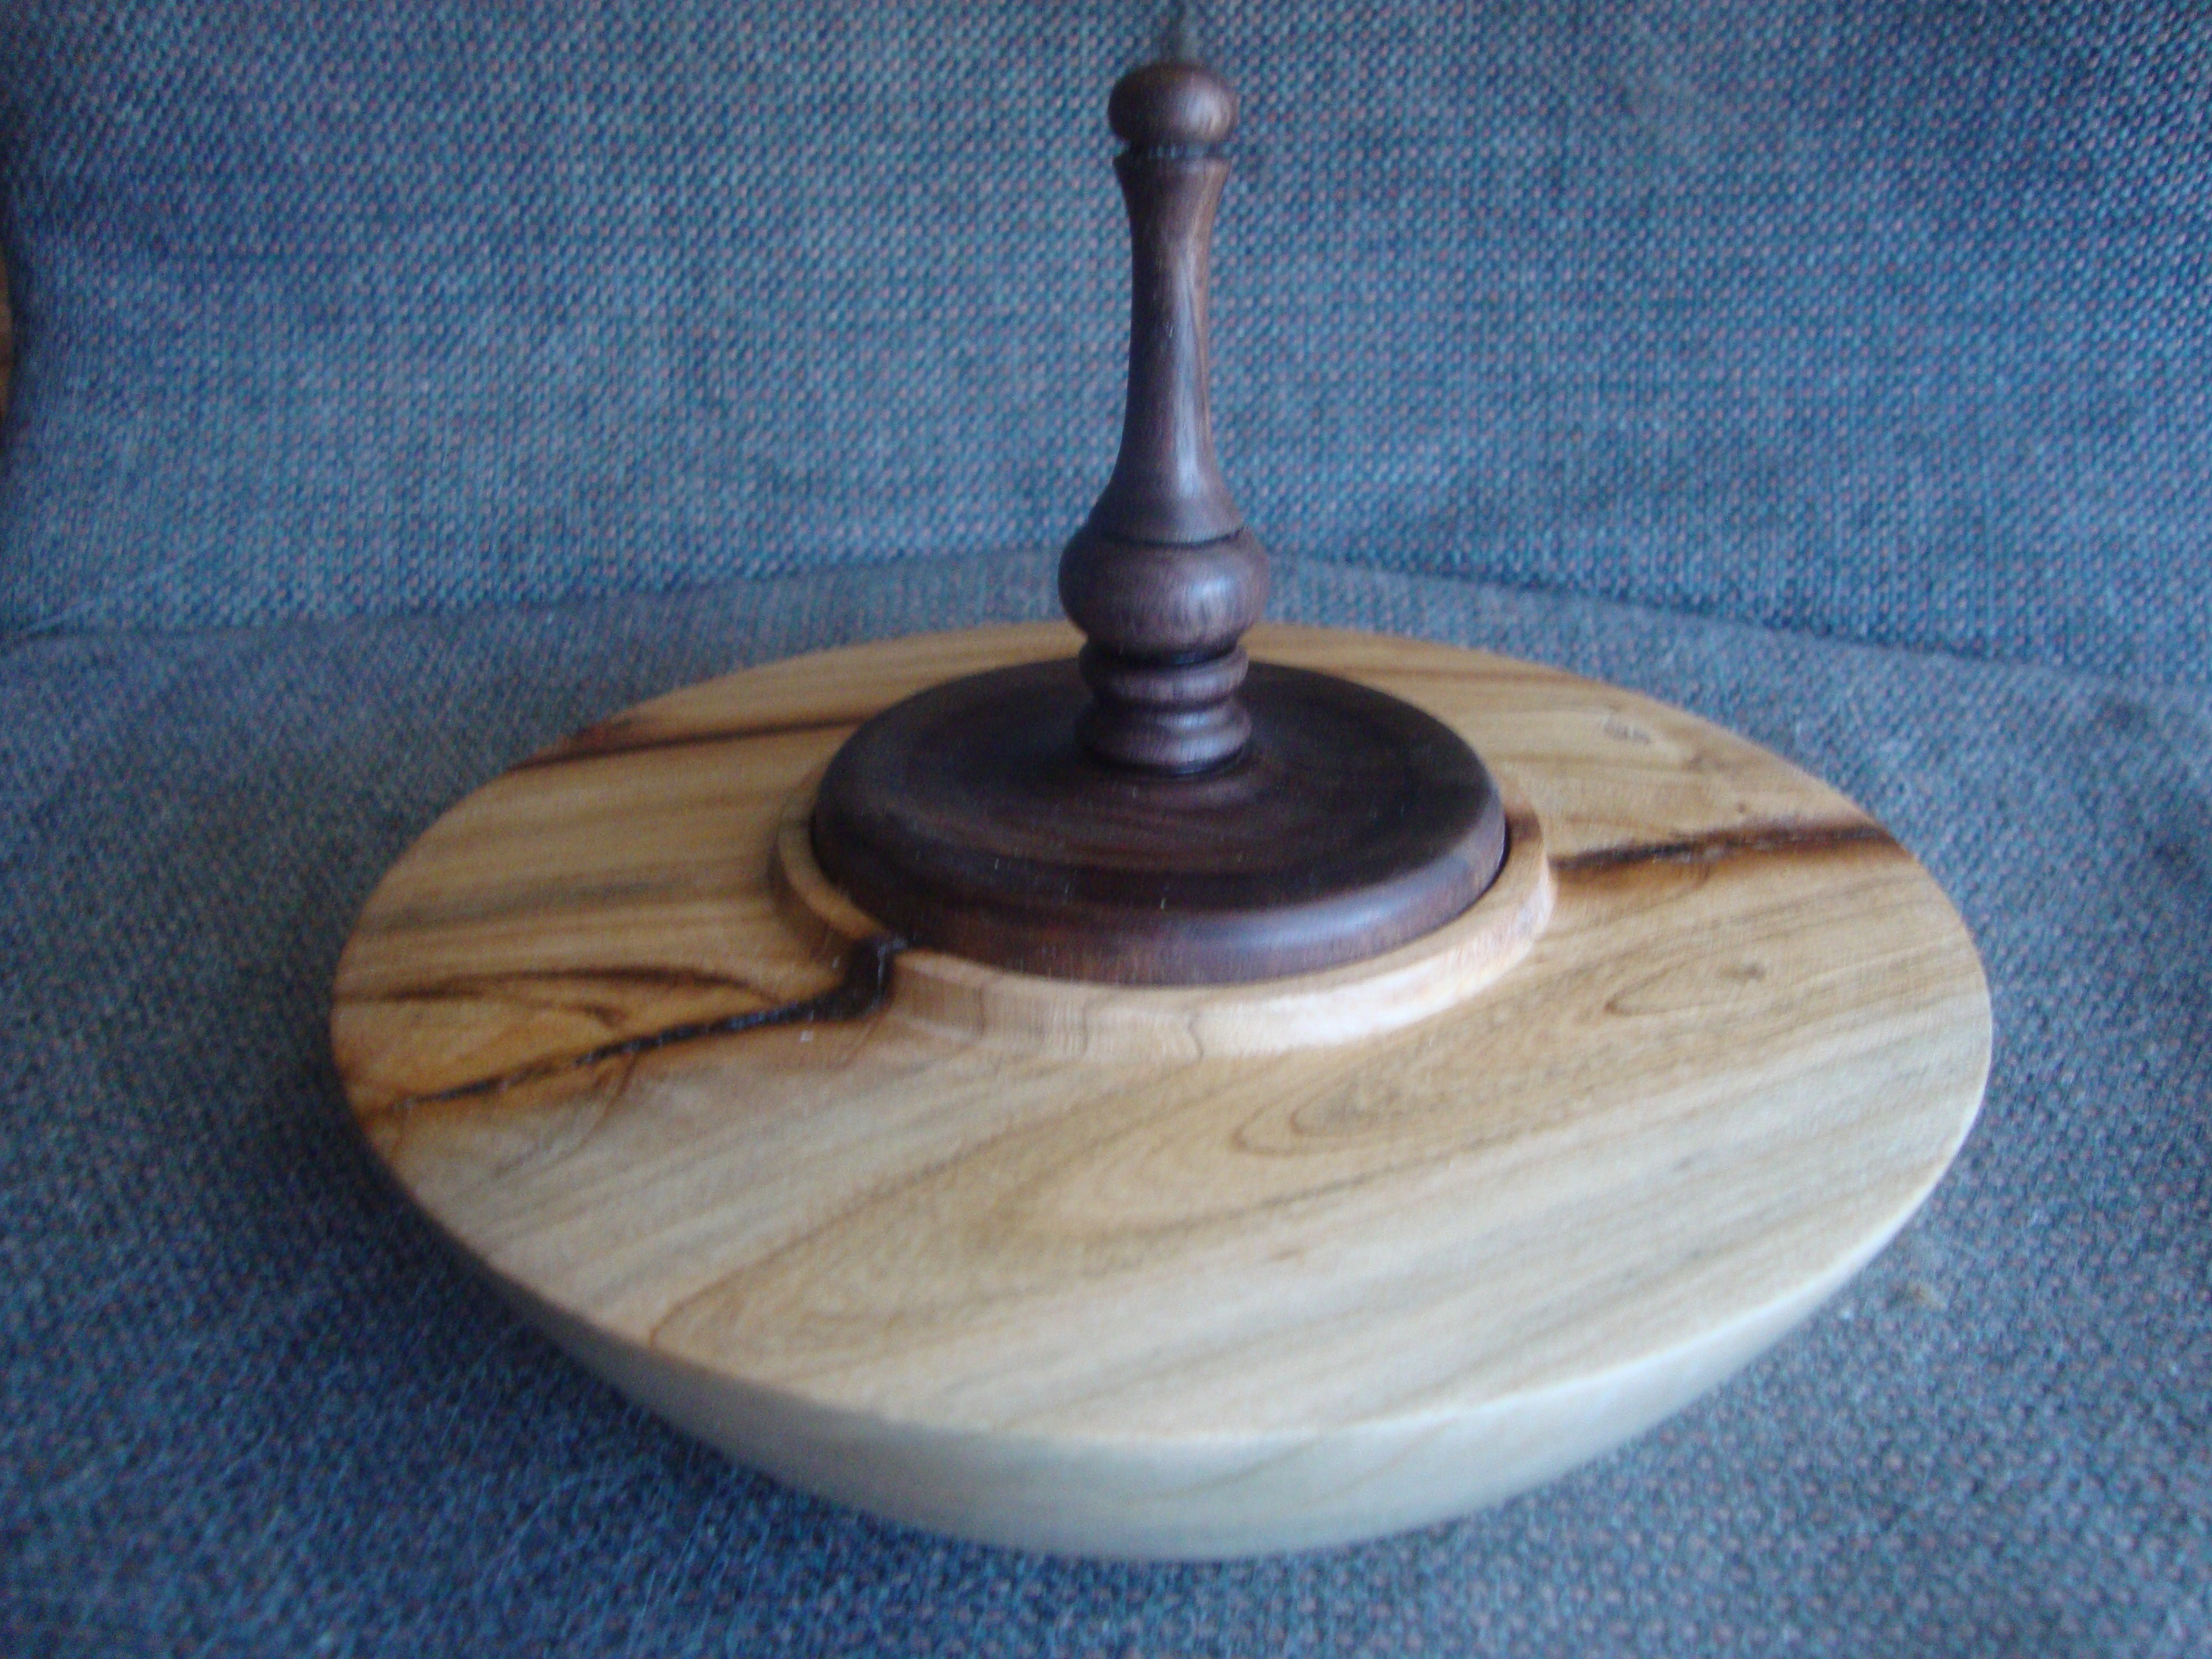
My job had another all night implementation, so I spent the wee hours of the morning working in the shop between status meetings. Using another piece of the wood my second daughter found, I started to make a bowl. Didn’t take too long to realize that between the deep crack that was uncovered when the bark came off and the pith of the tree that couldn’t be used, the bowl was going to get really shallow. When I got the outside shape done, I didn’t want to do just another bowl, so since this had a line of bark inclusions across the top, I’d make it into a hollow form. This thing has had all the wood removed from the middle, leaving a disk that’s about 1 1/2″ deep in the middle. The finial is walnut, which I think matches pretty well.
Those dark streaks across the top are where two limbs of the tree grew together, leaving a line of bark that is squished in between the wood of the tree. Not sure what I’ll do with this one, but I like it!
The woodturning club I’m in has a challenge every other month to make something specific. Usually, it’s something to “force” the members to make something they wouldn’t normally do. Kinda shake people out of their comfort zone. The current challenge is to make something where you have to structurally change the wood. The piece below was supposed to be my entry, but unfortunately, now it’s firewood. I took a piece of wood my daughter found that was incredibly dry. Might have been some kind of ornamental pear, but I suspect it had been sitting in someone’s firewood pile for years. I made a bowl, cut the top off, then segmented a ring of cottonwood bark and put the top of the bowl back on. Then, I carved out the bark to where all that was left was some kind of tree like structure. The goal was to make it look like there were limbs holding up the rim.
This one’s most likely going in the weeny roast because to two specific reasons. First, the texture I put on the bark made it look more like coral than wood. I figured once the final turning part was completed, I could always go back and take the texture off the cottonwood, then maybe carve in wood grain to make it look like timber. That was the plan, anyway… Second, cottonwood bark actually has a grain to it, like a whole bunch of layers of paper, all stacked up on each other. Because that that, it can get pretty “chippy” and splits between the layers of bark are pretty common as it is carved. For this bowl, as I was actually doing the final turning it to get the tenon off the bottom of the bowl, disaster struck. All of the bark “failed” at once, and the bowl split in about 10 pieces. Once the swearing tirade ended, one of my daughters helped me scour the shop to find the missing pieces of bark that had gone flying. We found all of the bits, so I figured I’d glue it back together and see what there was to see. From a distance, it looks ok. When you get up close enough to see the horrible texture and the numerous glue lines from the CA glue reconstruction, it’ll cause a little shudder to escape.
I still like the concept, so maybe before the next meeting, maybe I’ll try again.
This thing was tricky to make, especially to get the top of the bowl to align back with the bottom of the bowl. Look closely and you can see the CA glue stubbornly clinging to the edges of the bark.
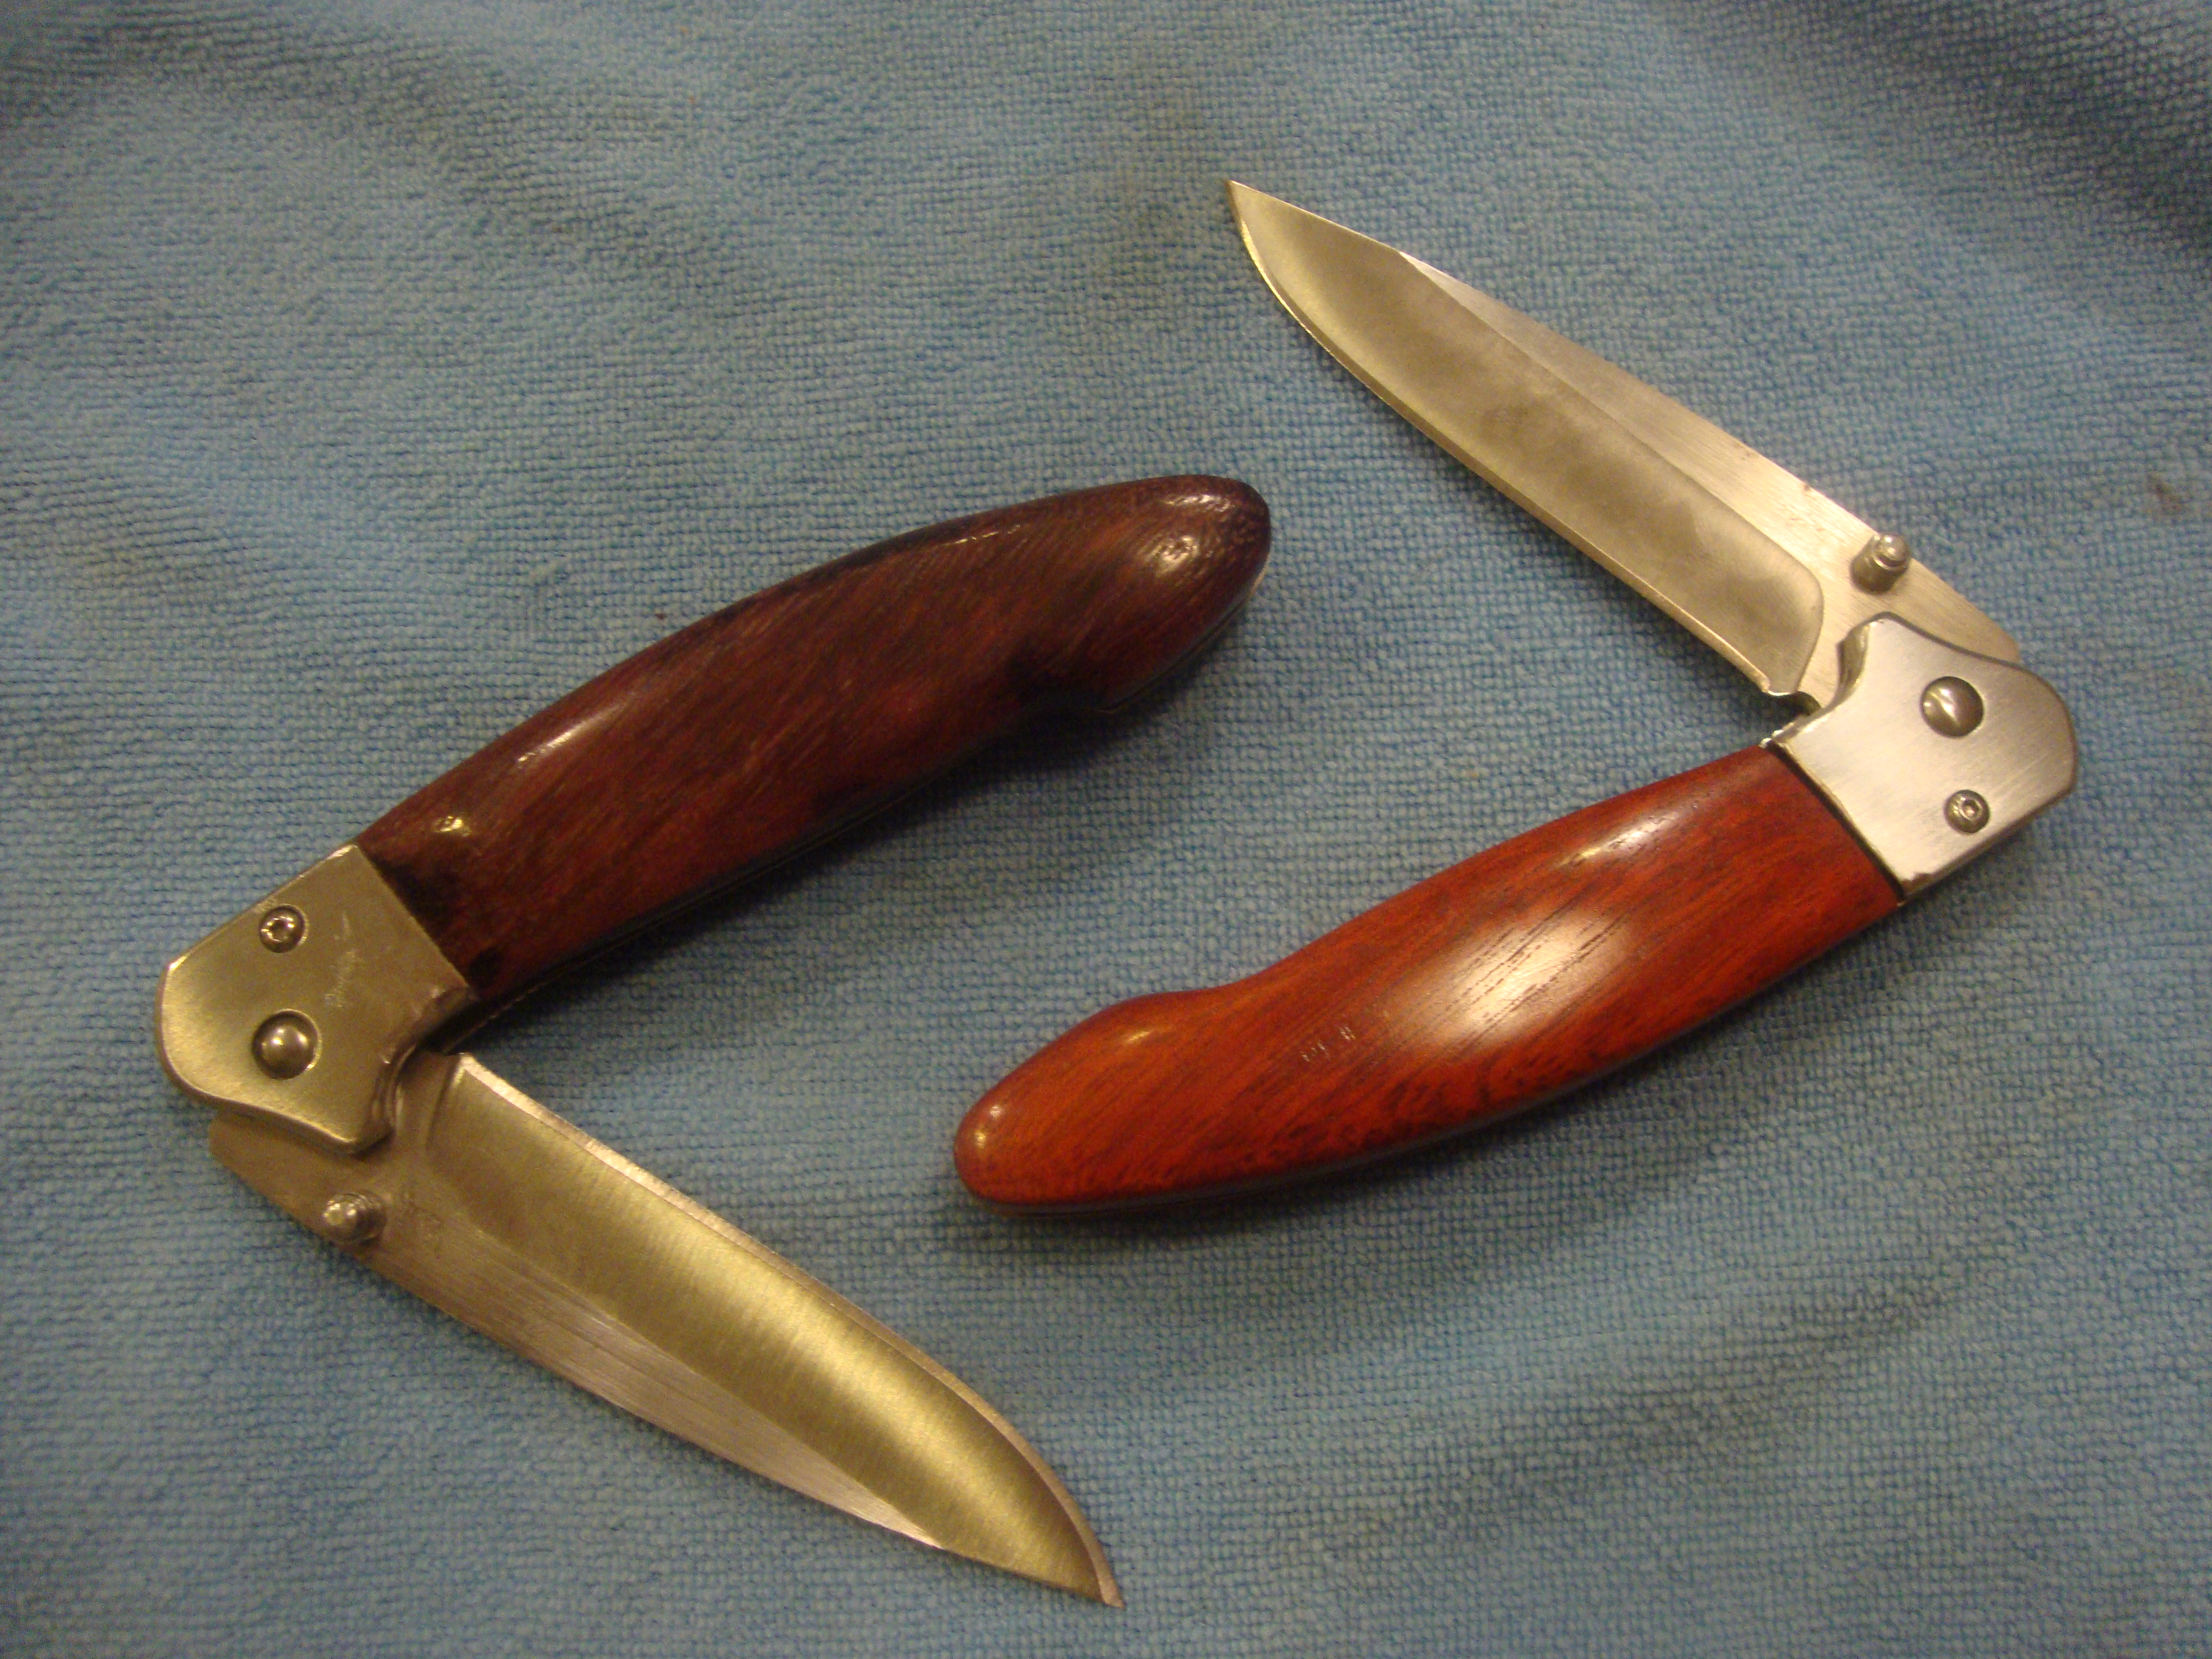
My son used to have a knife, but it was apparently “lost” as his mother cleaned out his room. (That’s a whole different story that I may put in the off-topic blog.) For his 17 birthday, I bought two knife kits and we made a pocket knifes: one for him, one for me. When we sent to the shop to select the wood that we’d use, I told him he could use anything in the shop that wasn’t already being used in a project. He went straight for the “special reserve” pile and pulled out a piece of purpleheart that I had been saving. The kid has taste! The one of the left is the one that Quintin made, but the purpleheart never really got all that purple, instead it became a dark brown color. I suspect it had something to do with the epoxy we used to secure the wood to the handles, but that’s just a guess. His is on the left. Mine’s on the right, made from bloodwood (also from the special reserve pile). Not too shabby for a first attempt!
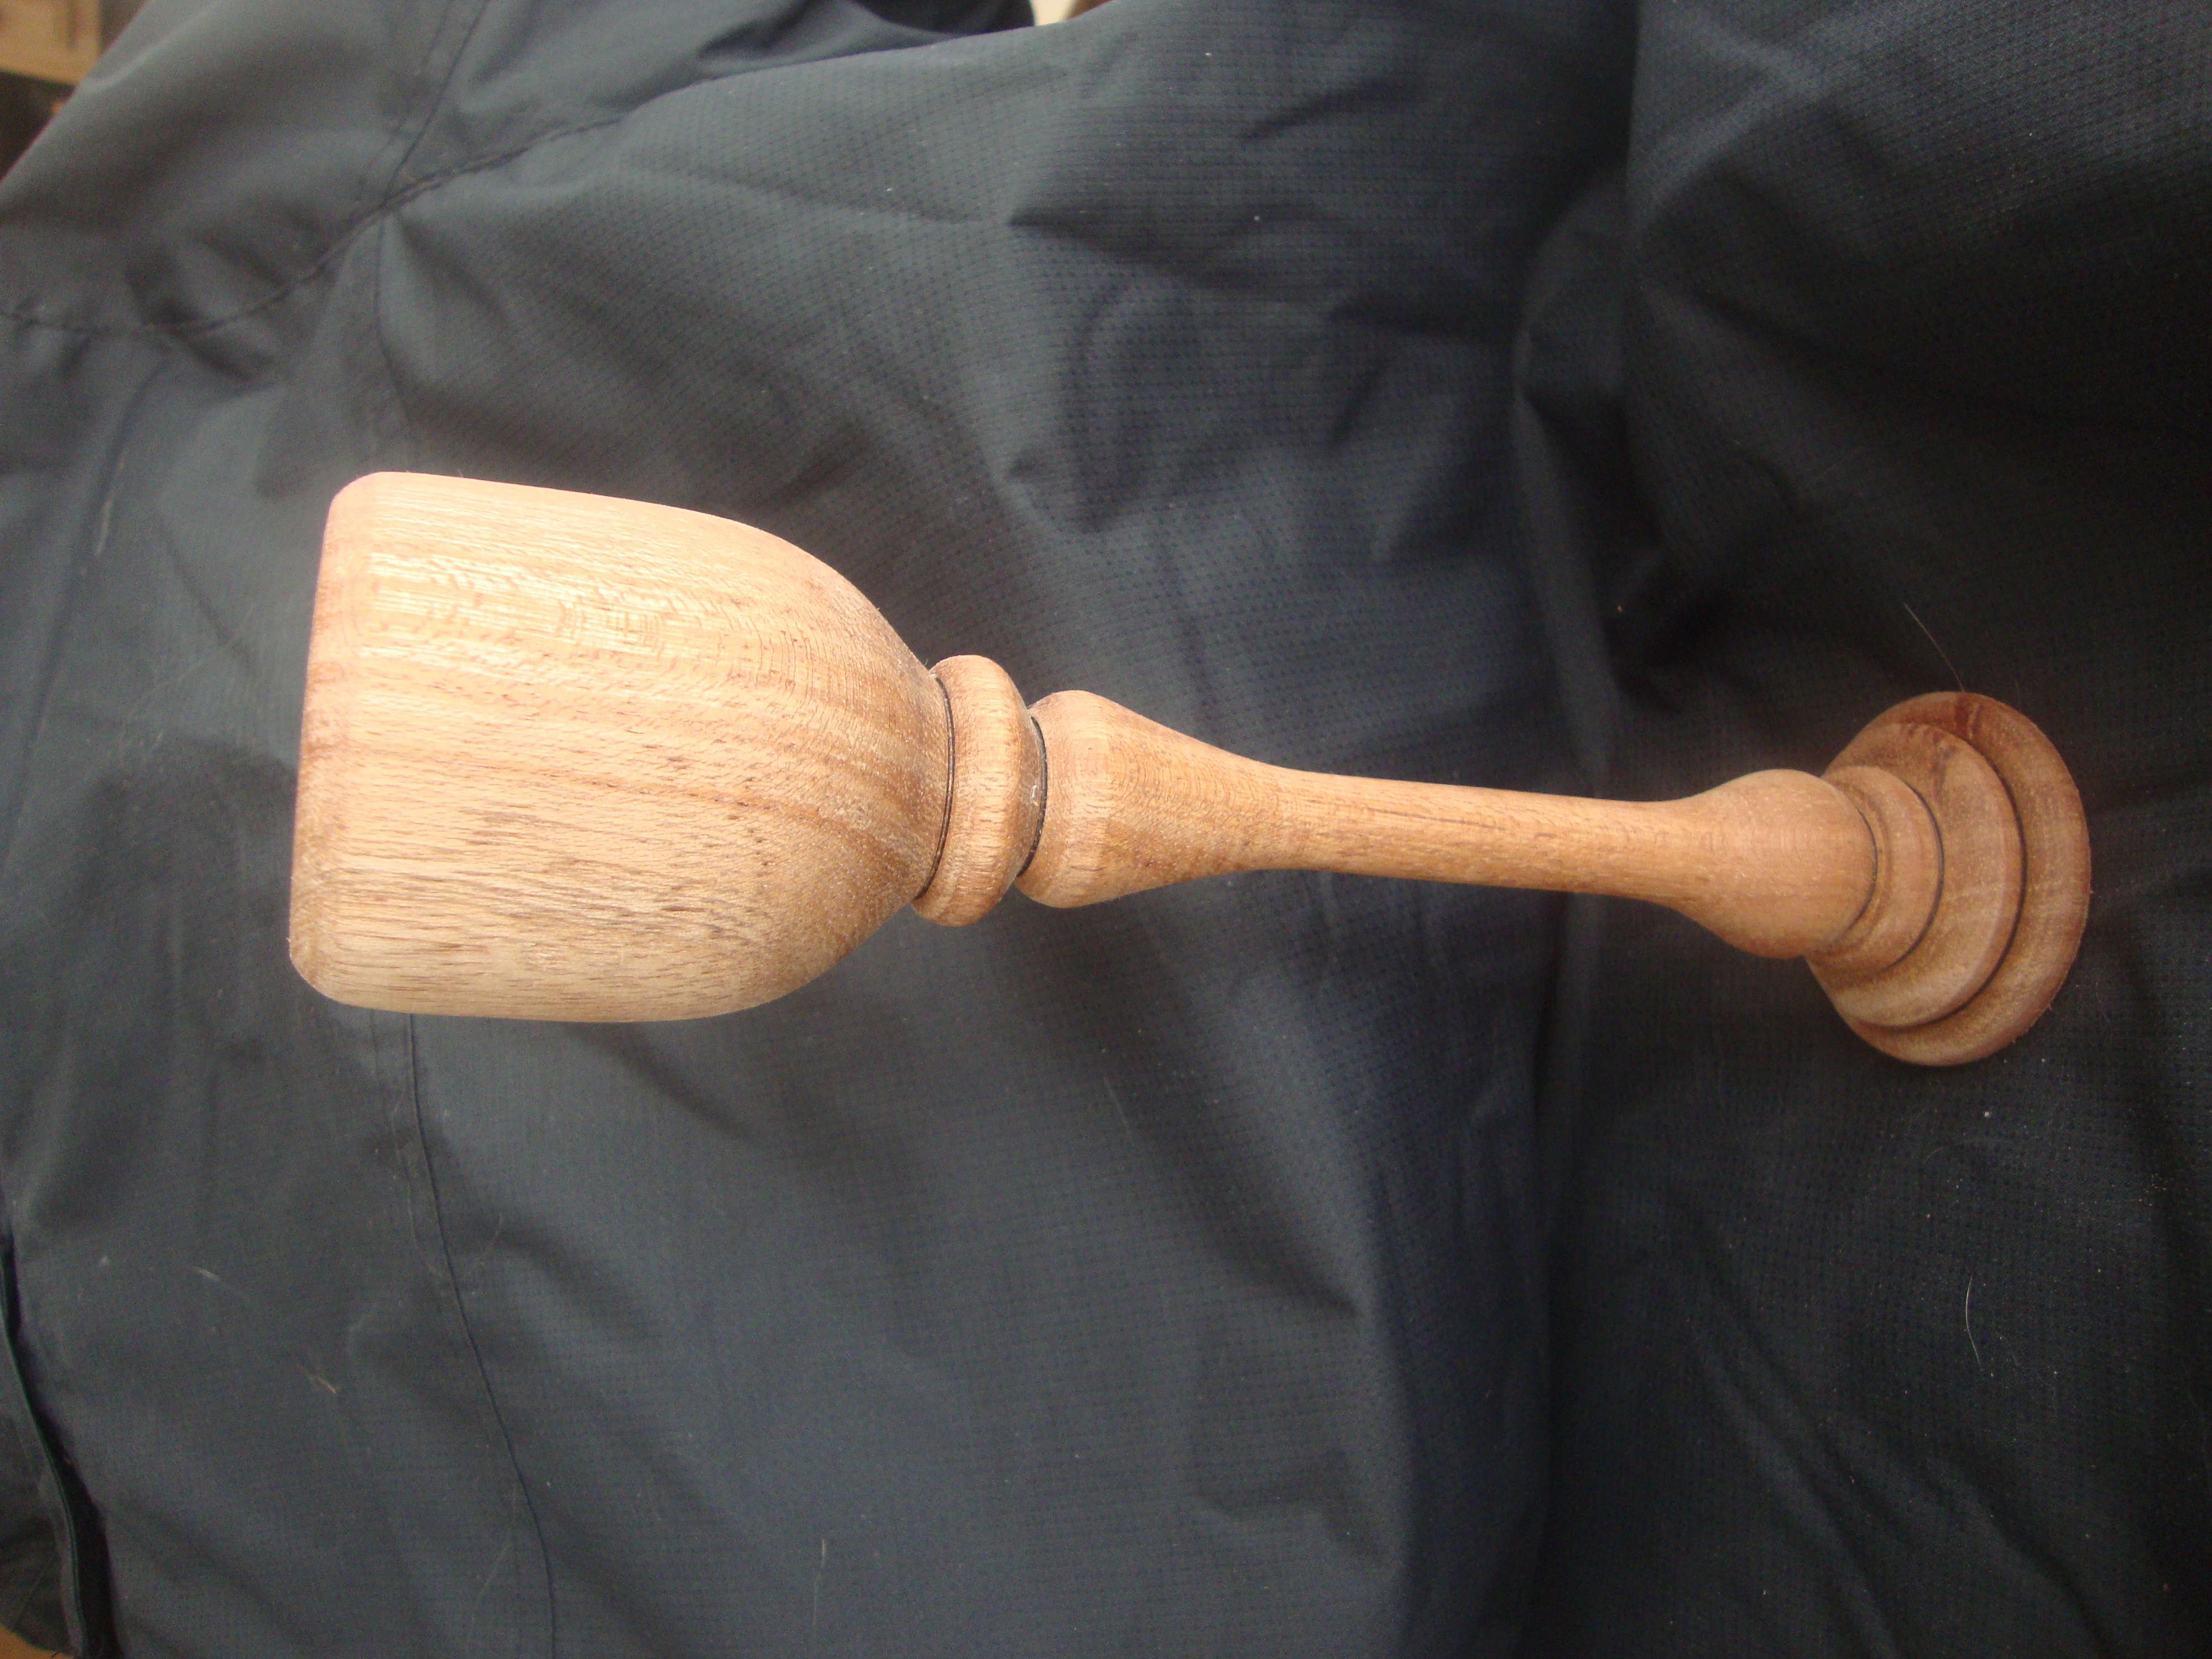
A LONG time ago, I got some free wood from Lumber Liquidators that came out of pallets shipped from South America. Apparently, because of the crazy US import/export laws, the “raw wood” can’t be shipped in, but if they process the raw wood into flooring, there are no restrictions. The shipping pallets are made from whatever they have laying around. Cumaru is an odd wood to work with. It is hands down the most splintery wood I’ve ever seen! If you get a splinter, it will fester almost immediately. BUT… once you put sandpaper to it, the grain lays down and it becomes smooth as glass. It’s also something like 4 times harder than oak!
Since I’m supposed to help teach a class this next week on spindle turning, I figured I’d better get in a little practice. Here’s the result. The stem is MUCH, MUCH thicker than I would have normally made it, but since I’m taking it as a piece to be shown and handled, I left it a little thicker. If the wood wasn’t “exotic”, this would definitely be in the “destroy all evidence” burn pile.
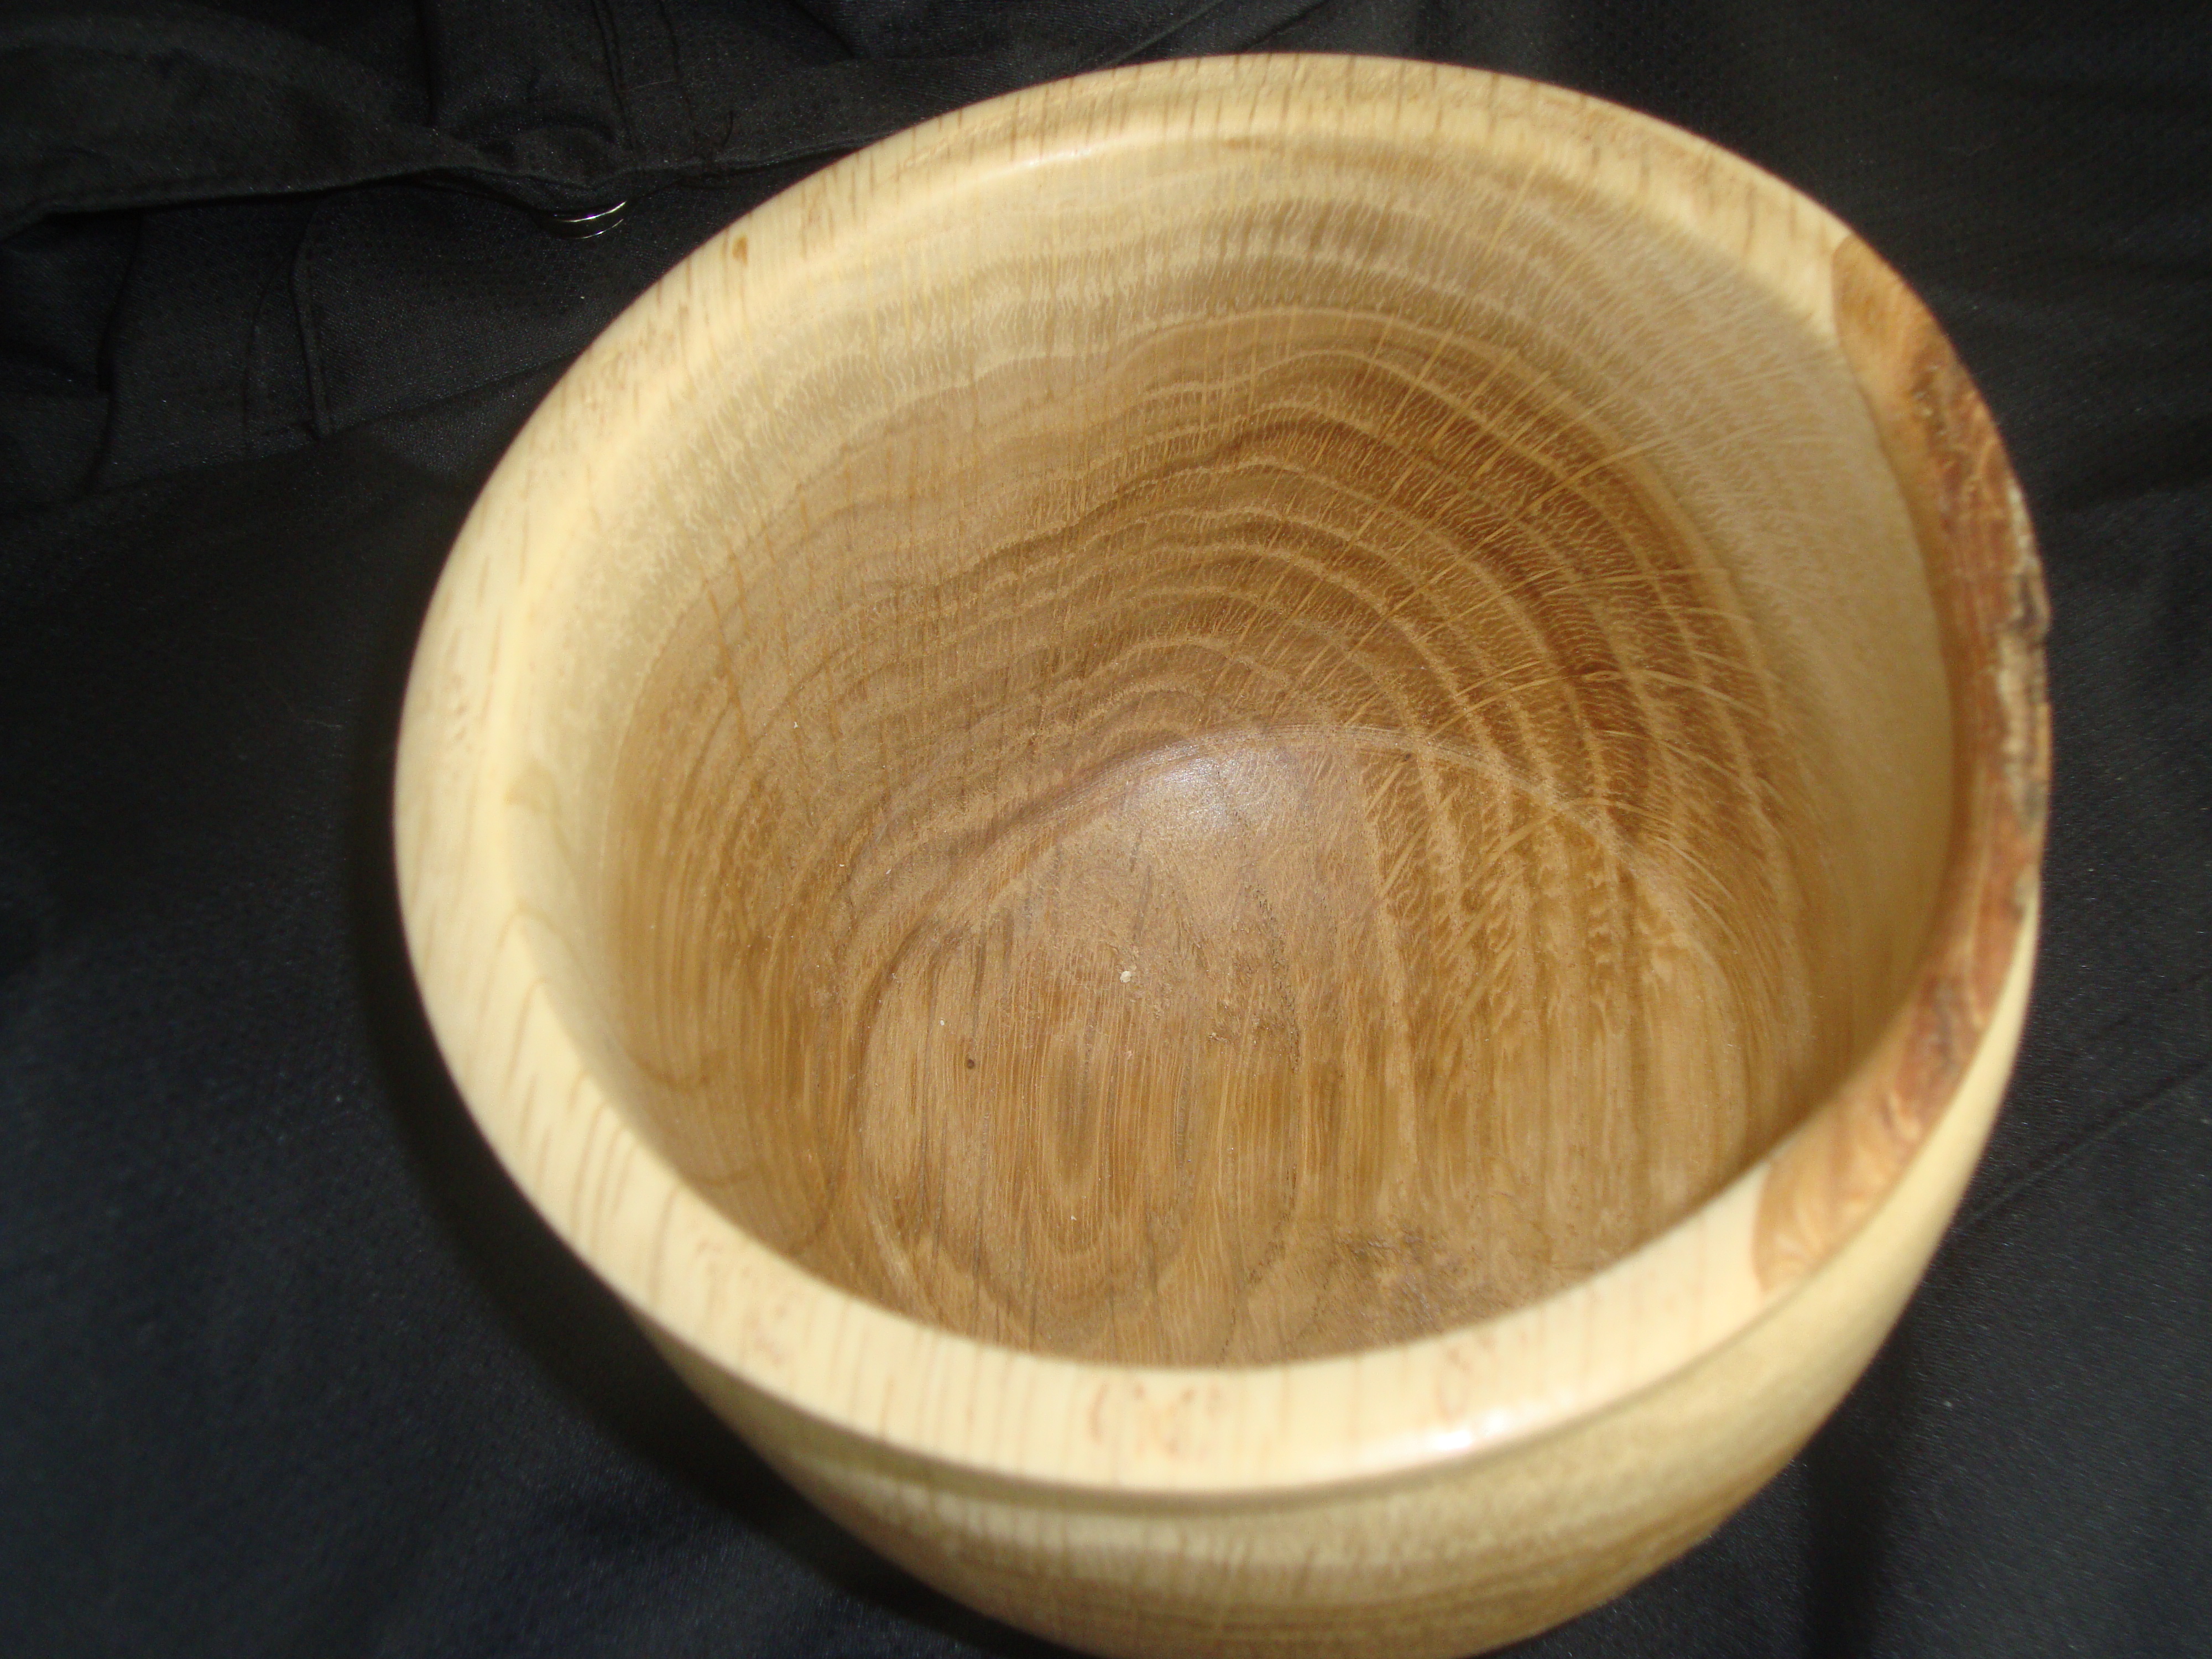
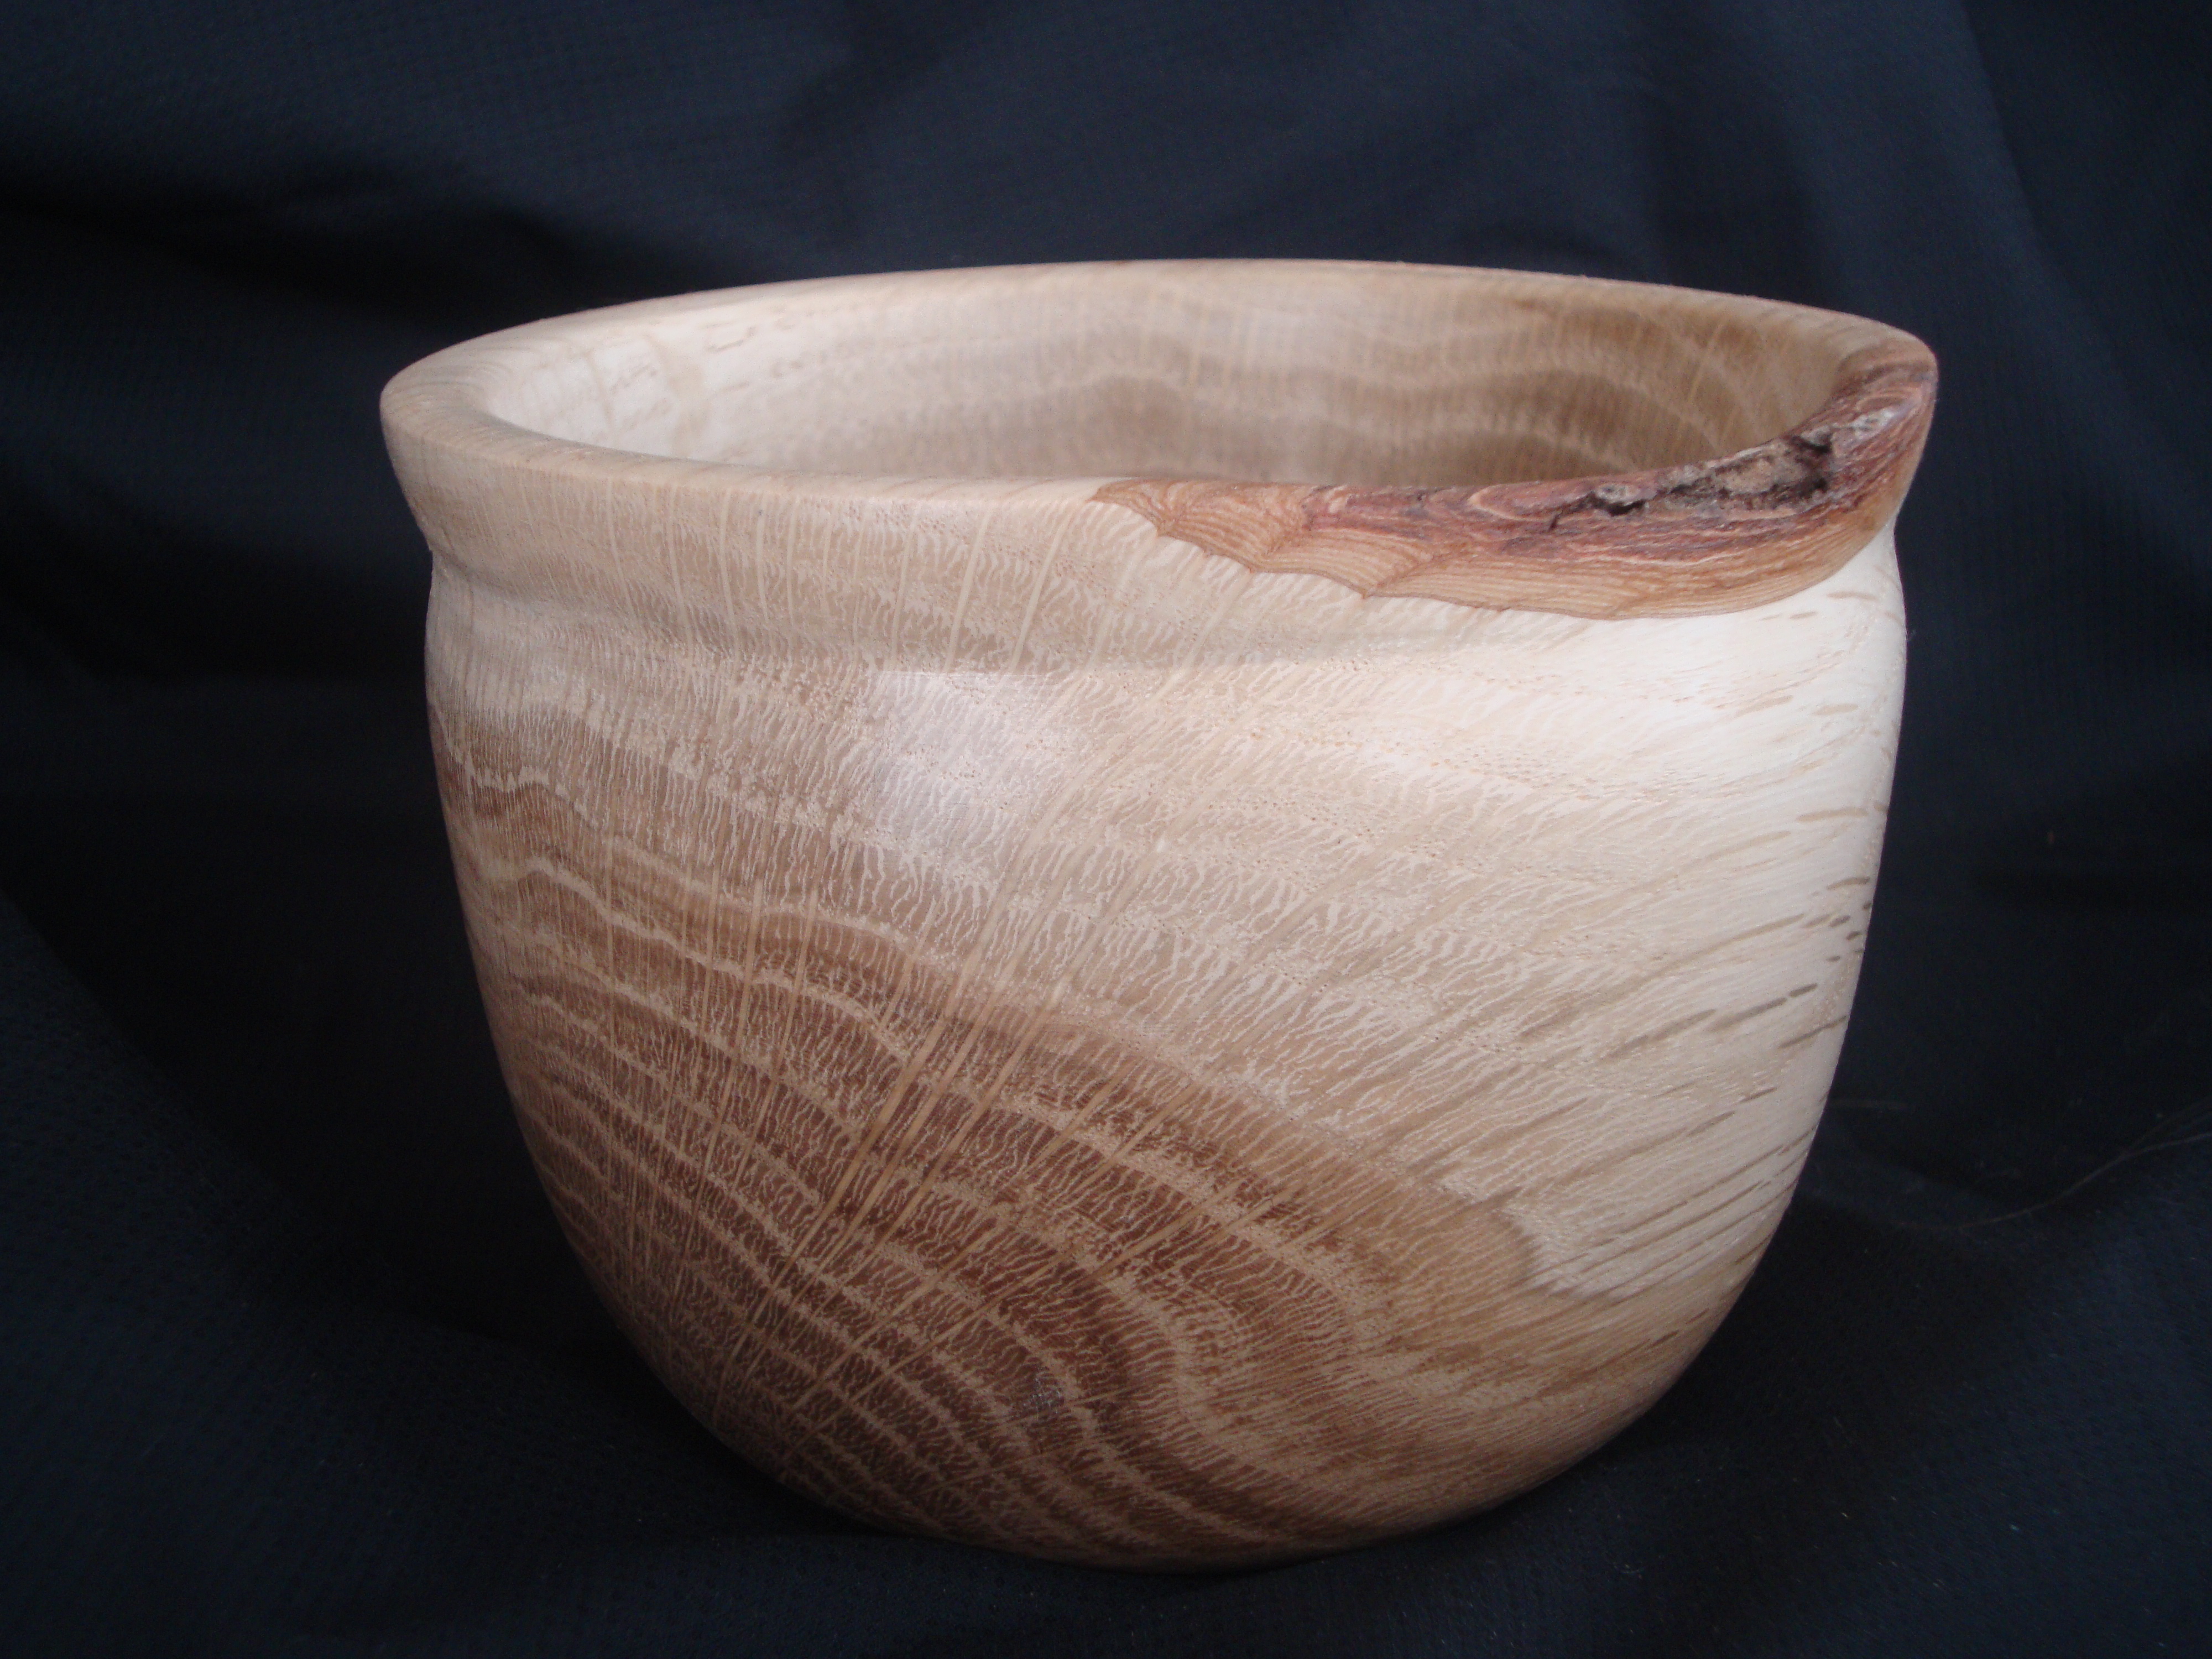
Lately, I’ve been researching different methods I could use to sharped my tools. I already have system that will put a consistent, repeatable, bevel on the tools, but reading articles about changing the angle of the grind got me thinking. To test out the impact of the changes, I’d need a piece of wood to practice on, so I started looking around. I finally found a chunk of white oak that had been kicked under the table at some point in the past and decided it would be my practice block. After awhile, I discovered there wasn’t really anything wrong with the way I had been sharpening the tools, and the “new and improved” methods really didn’t work any better than what I was used to. By the time I had this epiphany, There was already a rough shape of a small bowl, so I finished it up. It’s only about 4 inches high by 4 inches wide…
Top view. The thing I like about turning white oak is the color difference that comes between the lighter sap wood and the darker heartwood. Leaving a little bit of the bark on the rim also turned out kinda nice.Side view, that show the color difference and remaining bark much better.
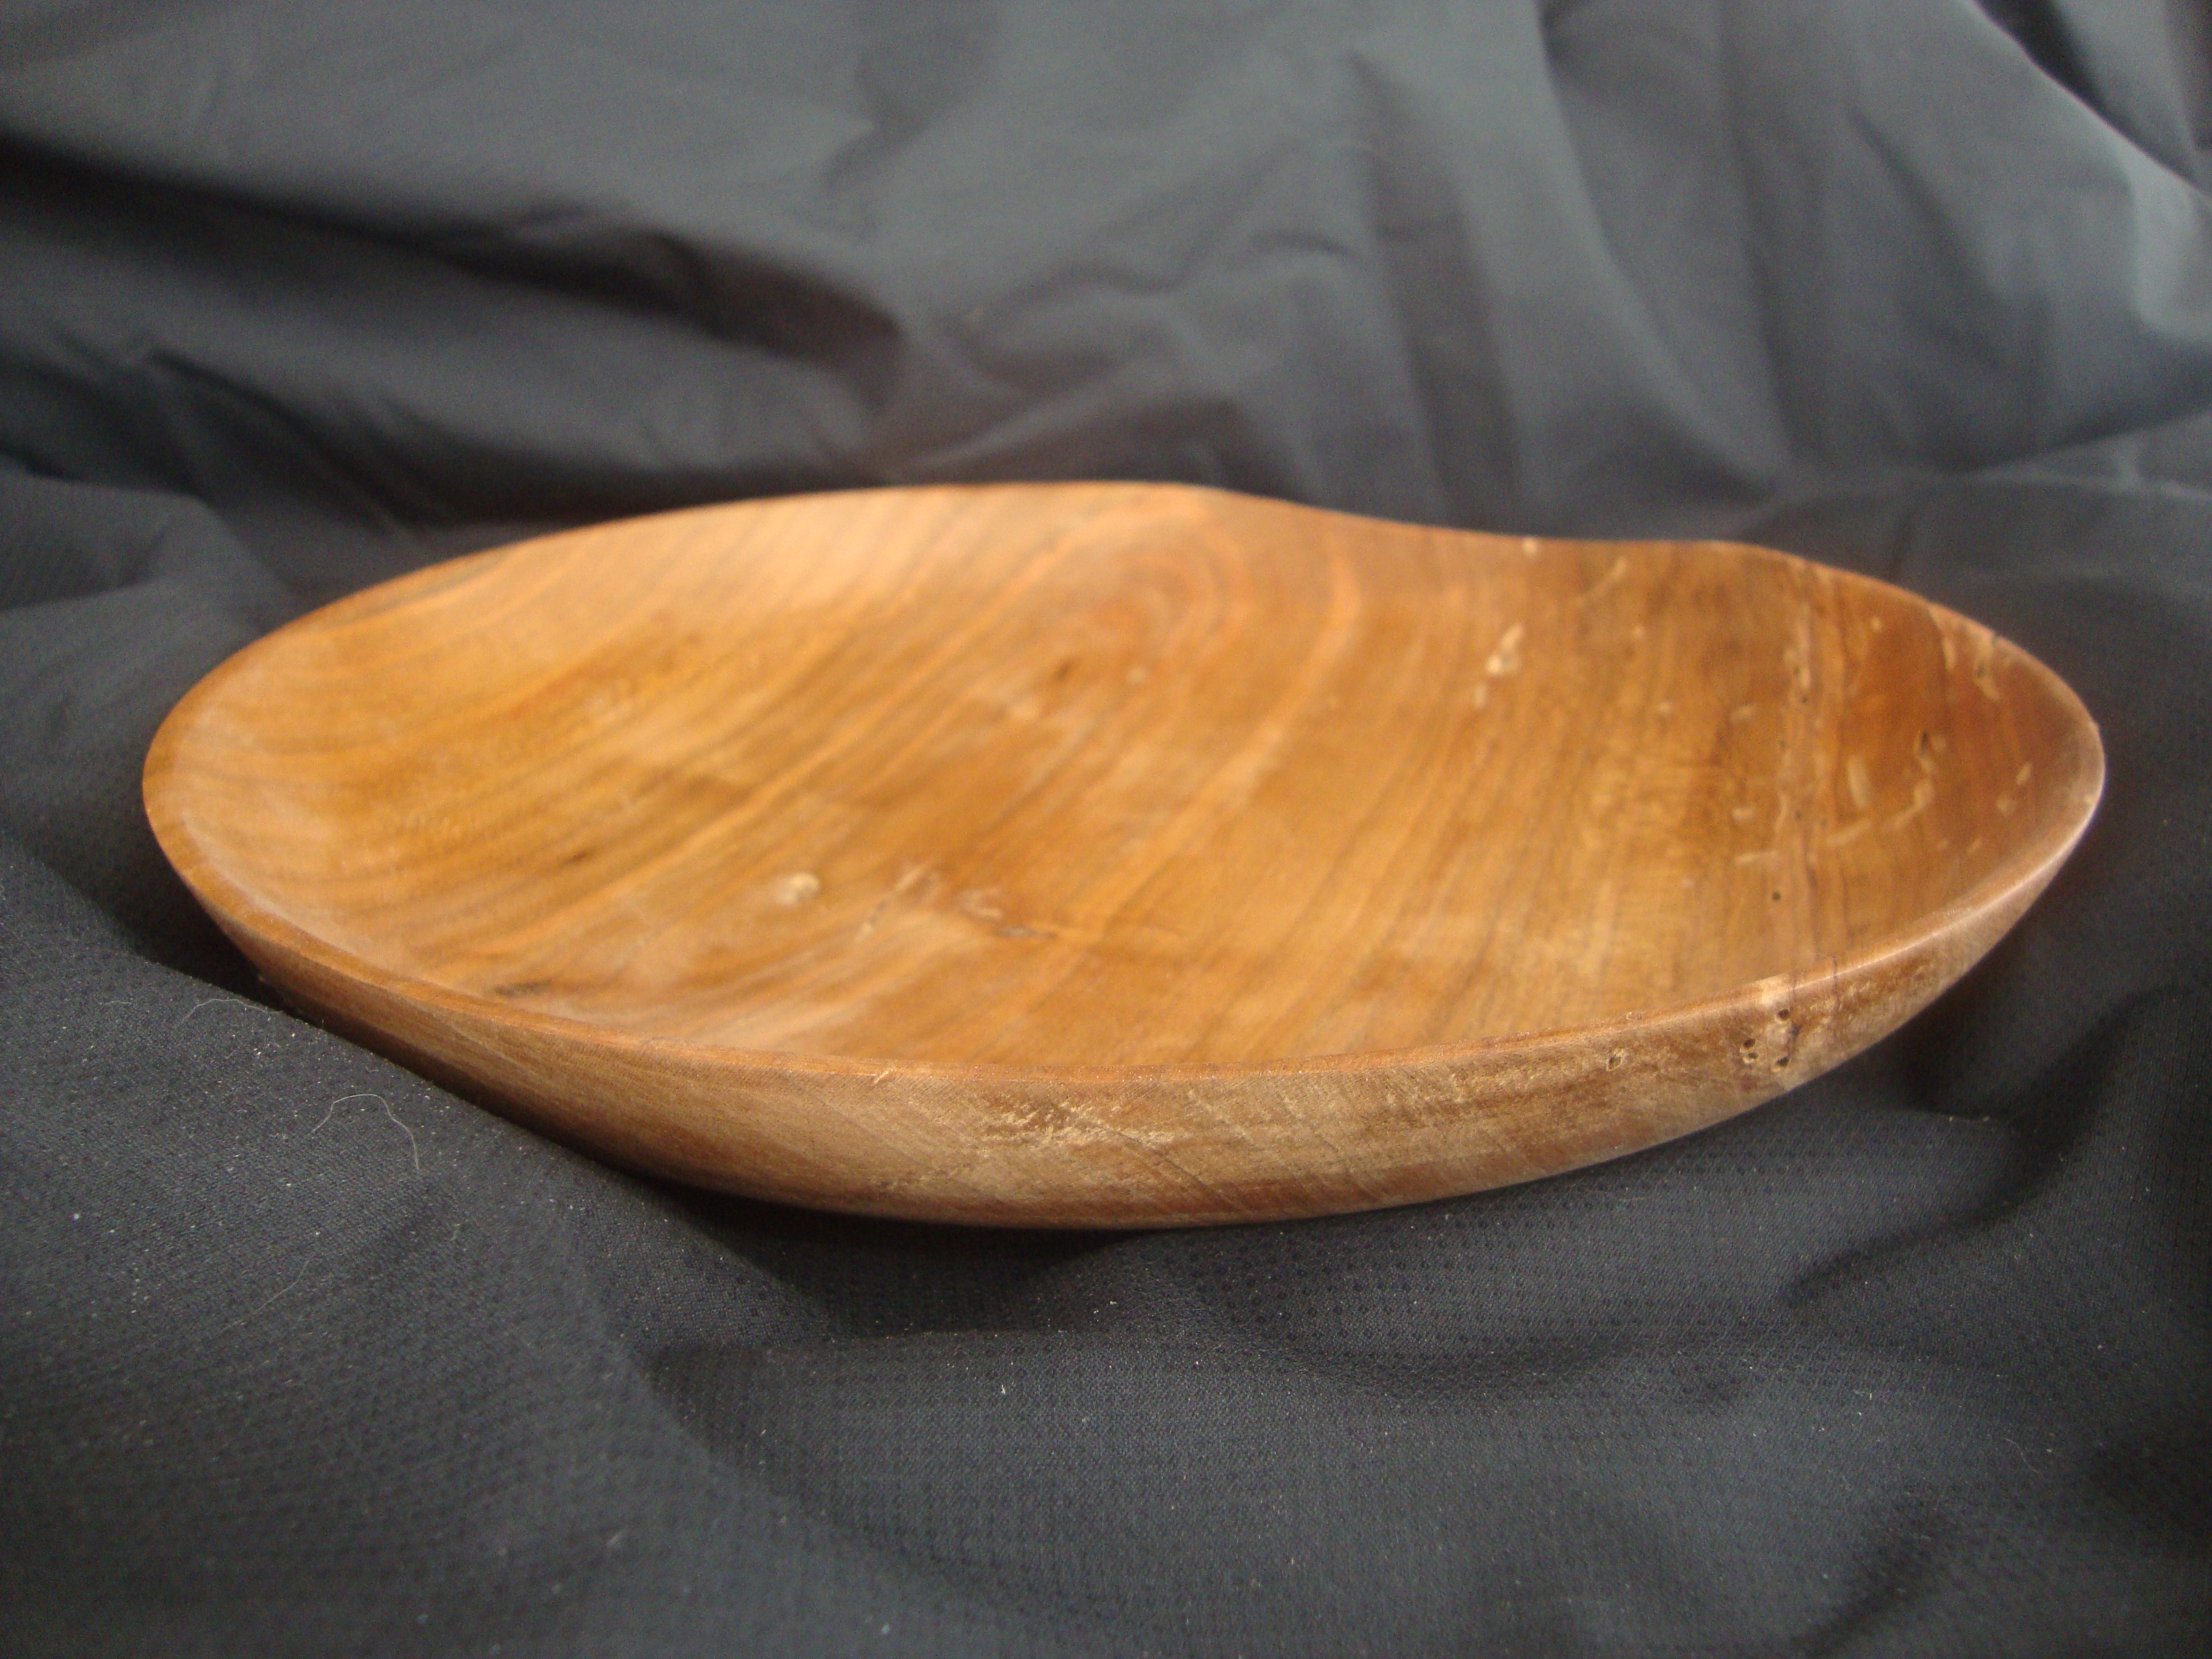
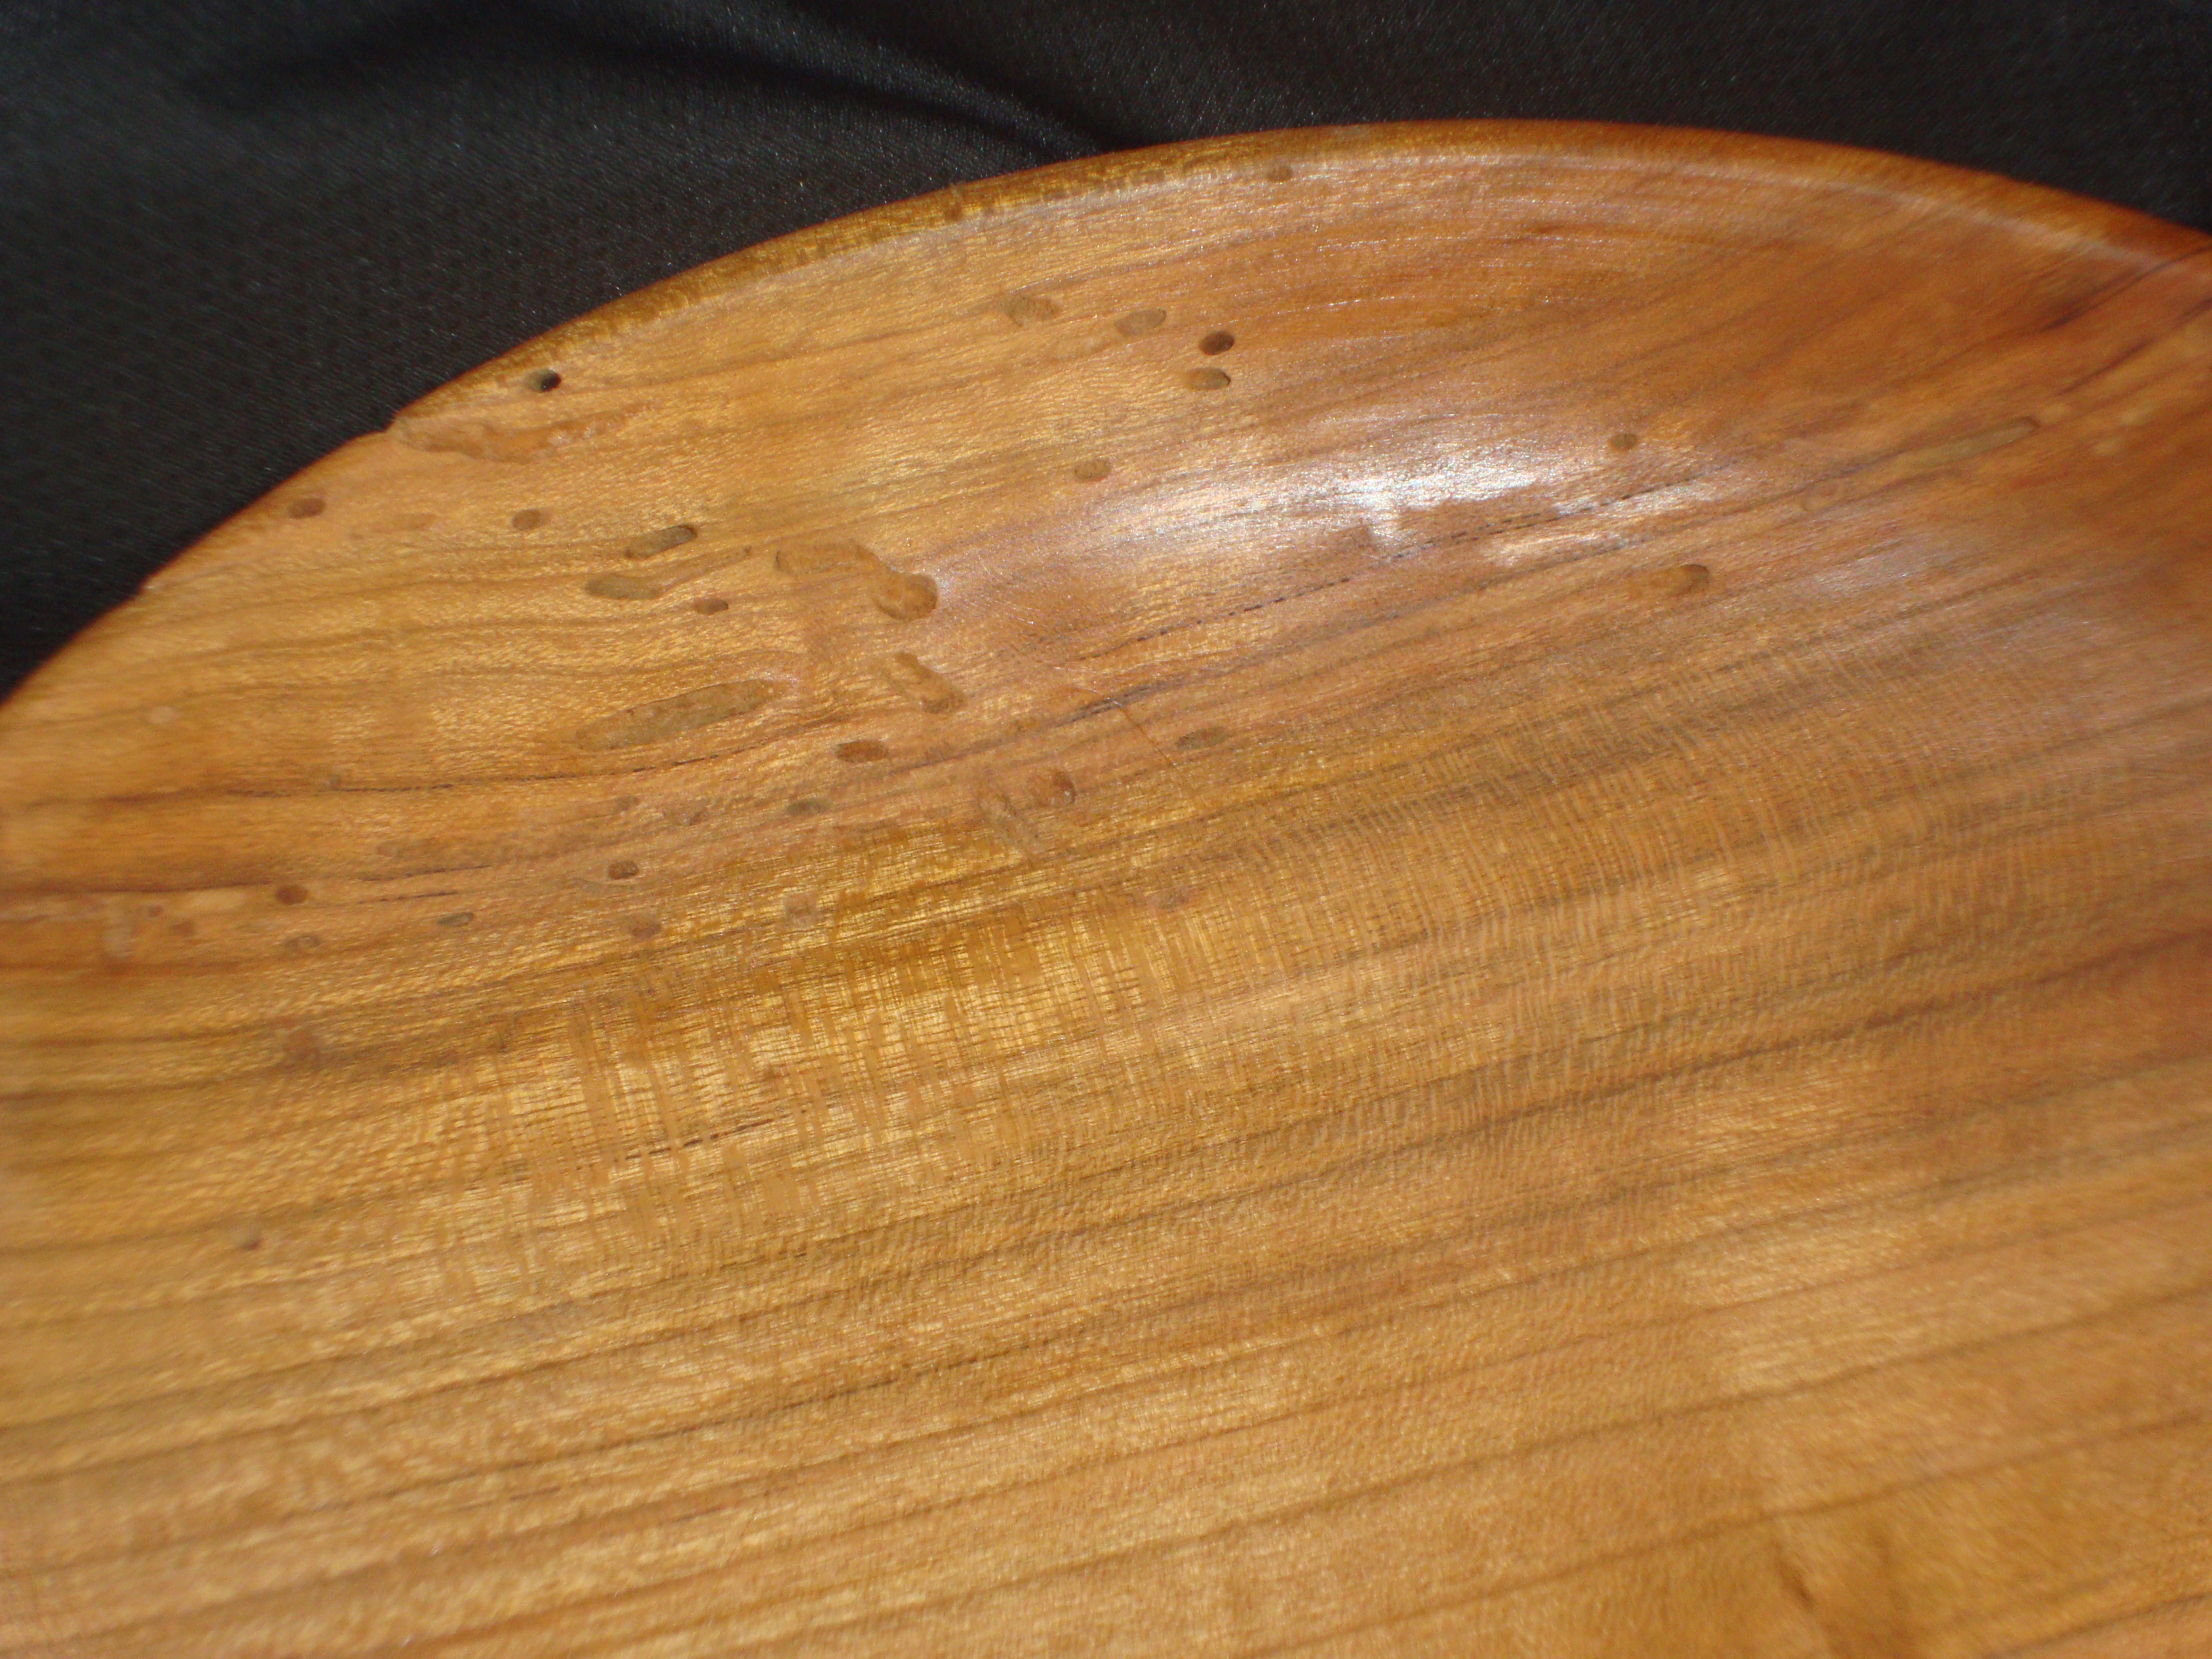
As I was in the shop this weekend, I found a project I had started some time ago and discarded for no reason that I can remember. Looking at the piece, I can vaguely remember two things that had bothered me, so I put it away and figured inspiration would strike at some point. One was a chunk of wood that had splintered off around the rim and the second was “weak spot” running through the bottom of the plate that had been attacked by bugs.
For the splintery part, I just sanded the lip down until the broken pieces of wood were smooth, and left it that way. For the parts where the wood was starting to break down, I don’t think any more sanding would have helped. If you look at the picture closely, you can see that a lot of the color variation in the wood is from the decay. I don’t think this one will see the fire pit, but I doubt it will be displayed proudly. Perhaps I’ll give it to one of the girls to help corral “dresser crap”.
Cherry plate, with a whole lot of bug damage and a missing piece on the lip.Cherry plate, top view, showing where the bugs had been snacking and the wood is discolored. I like the bug holes in the wood, but the discoloration isn’t all that appealing.
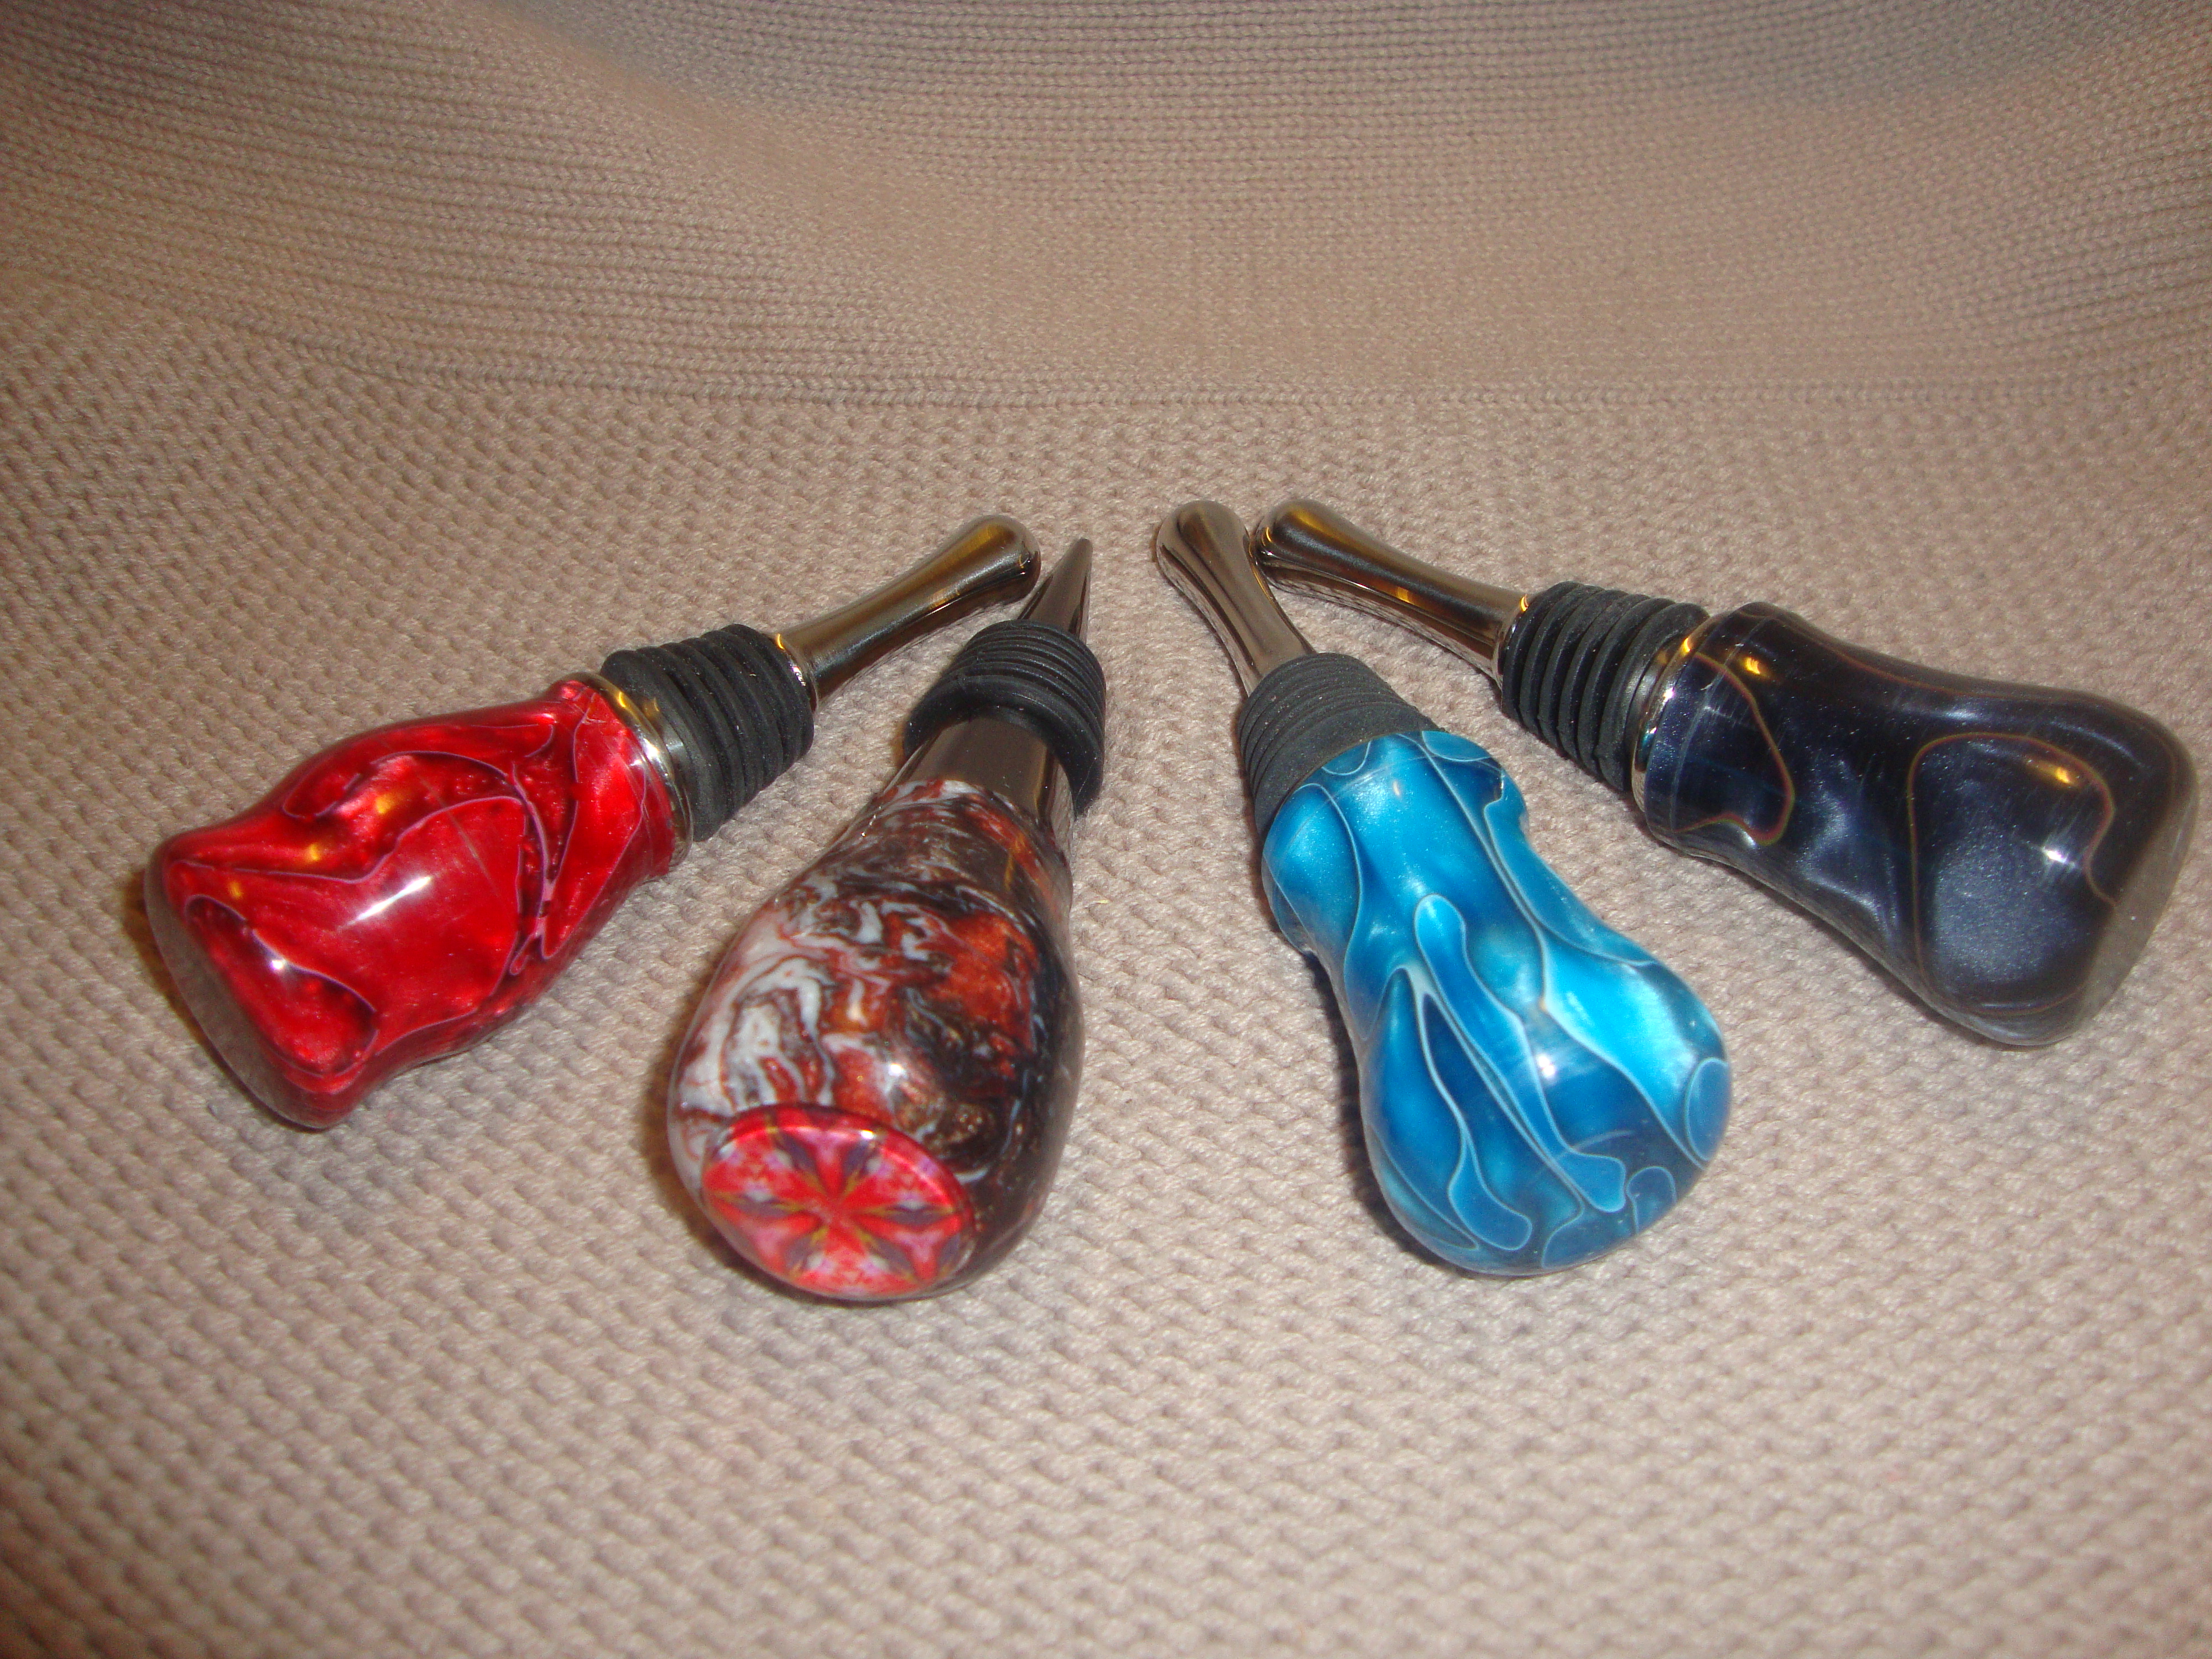
After making the “peacock stoppers”, I decided to get some different materials and try my hand at making some more. Below are the next four that were completed today. Three of them don’t have an insert, because when looking at the designs in the blanks, I didn’t have anything to insert that I thought would enhance the look. Once my Chinese friends get their kids in the factories to finish and ship the rest of the cabochons I ordered, I may go back to putting inlays in them.
Here’s the second batch. I also got some black titanium drops to give them a little different look. Making these could get addicting…
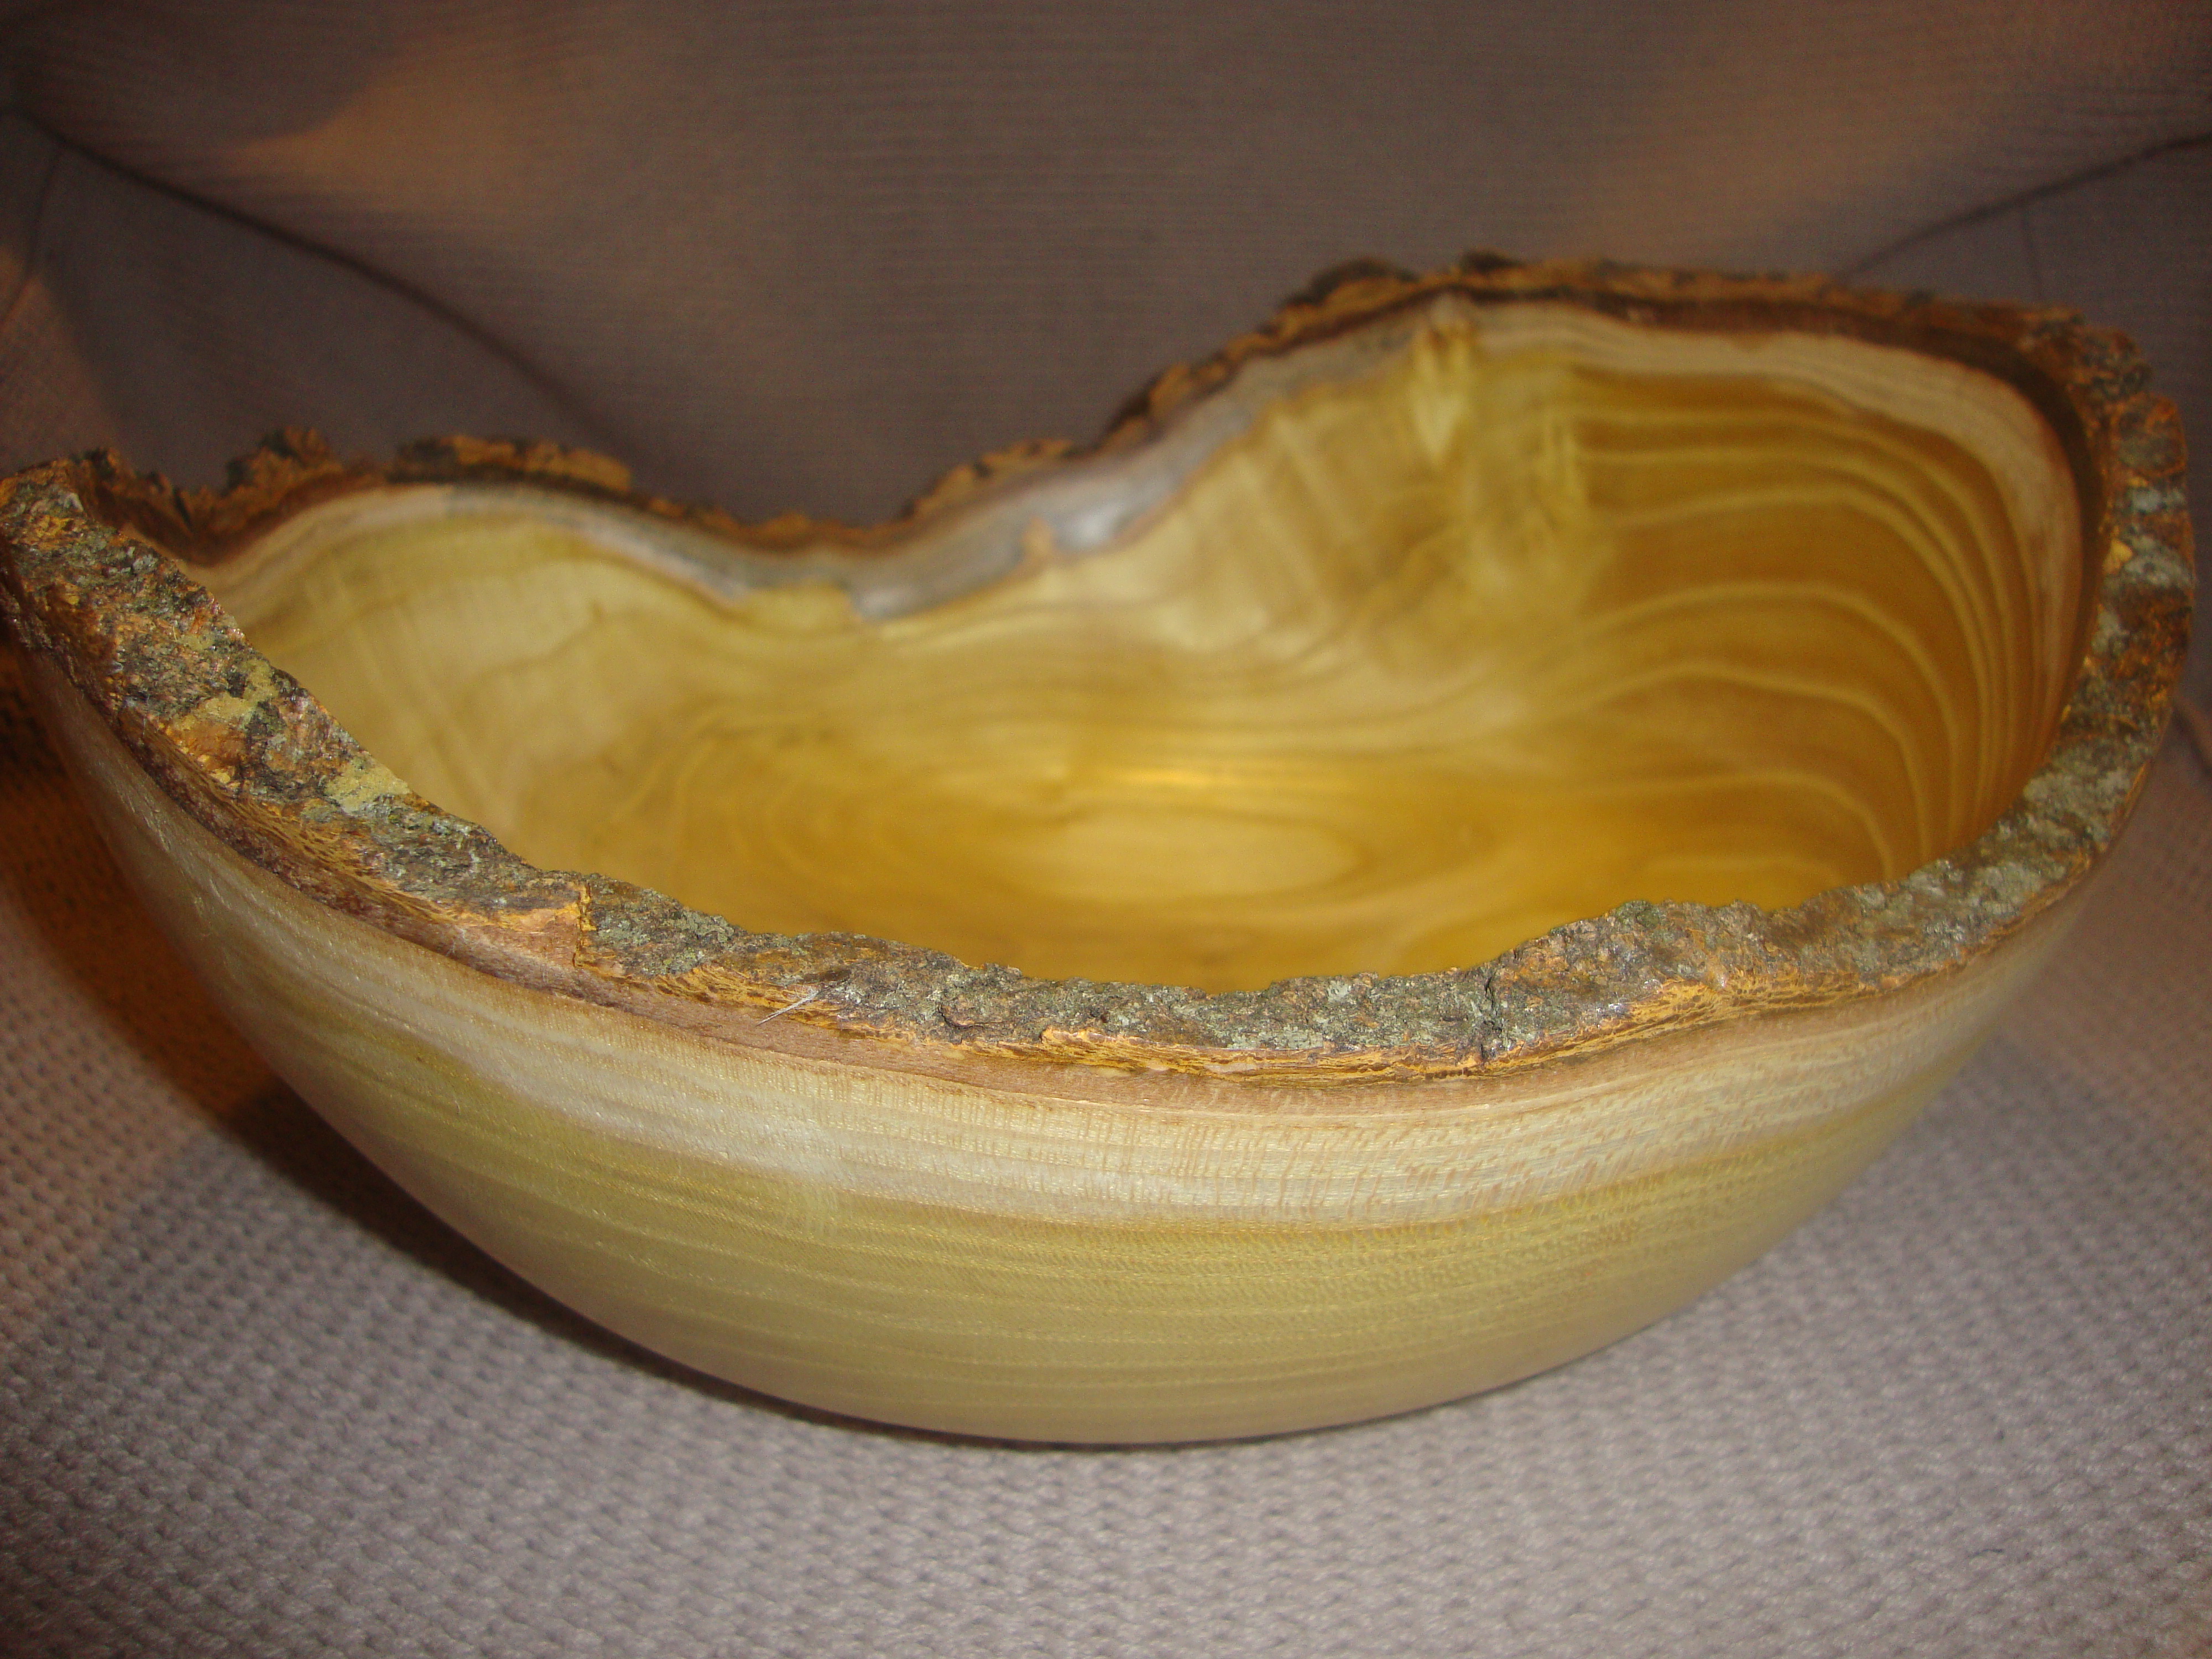
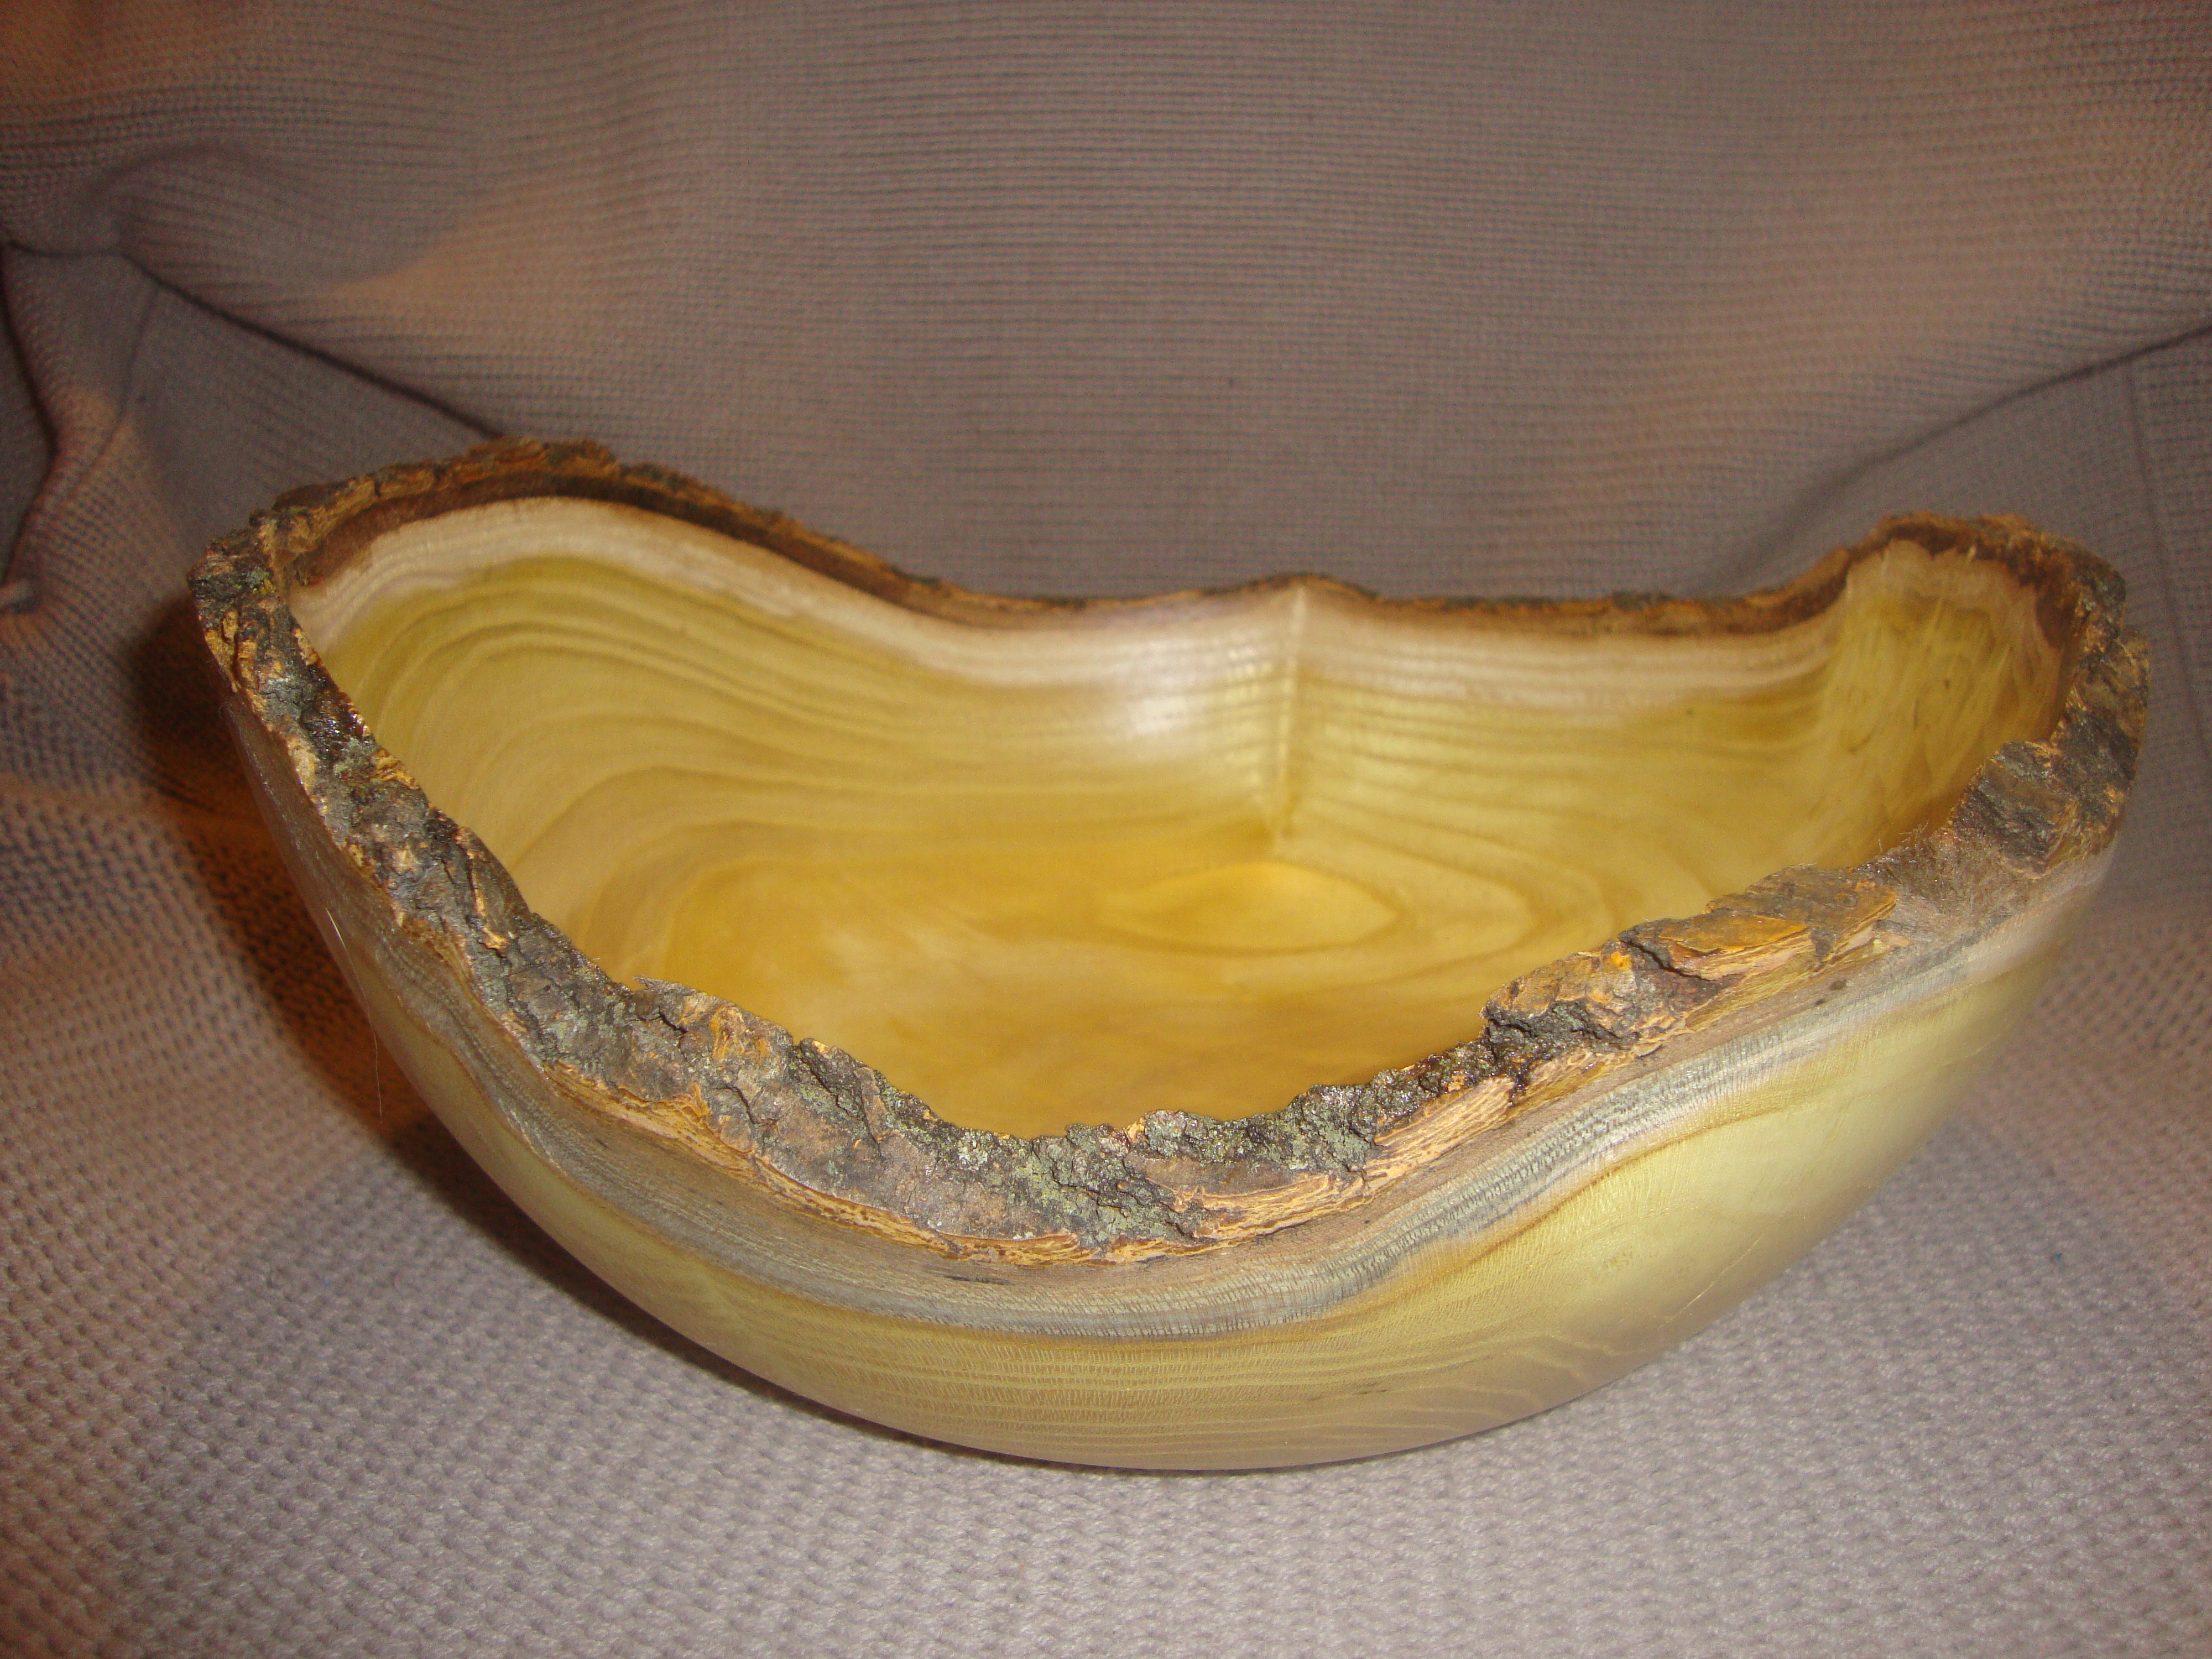
Last week, as I was getting ready to go to a friend and mentor’s shop to turn, I was looking for a project to take. I stumbled on a piece of a tree that wasn’t with all the rest of my green wood and looking at it, I’d forgotten where it came from and couldn’t come up with a reason why it would have been away from the rest of the wood hoard. I decided to take it and see what we could make out of it. When we cut into it, it became clear that it was mulberry. About a year ago, aco-worker told me his in-laws had a big mulberry tree come down in a storm and asked if I’d be interested in any of it to turn. That’s kinda like telling a crack addict that you know a guy who cooked up too much meth and wanted to know if they want a taste. The answer is always going to be a strong yes! The chunk of wood I took was thinner than the other chunks that came from the tree and was from a place in the tree where several branches had kinda joined together. Usually, that part of a tree will give one of two things: Either you’ll find a whole bunch of knots that are prone to cracking and are a pain in the butt to work with, or you’ll find some really cool looking grain patterns because the the tree doesn’t really know which way to grow when it hits those kinds of intersections. I figured we’d spin it up and see which I got.
We finished the outside at Bob’s shop. This morning, I finished the inside, about an hour and a half of sanding, and then started applying the finish. Mulberry is really good to turn, but it can get a little stringy and if there’s end grain, it can leave a really “chippy” surface. The final product will look good, it’s just that you’ll have to factor in some time for extra sanding. Here’s the final product.
I don’t make many natural edge bowls, because it’s hard to keep the bark on them and without the bark, they usually don’t look as good. This one turned out GREAT!Another view…
This one is going to the wood pusher who hooked me up with the fix. That’s the standard deal. You give me a tree, I’ll give you something made from it.
I was looking through the shop last weekend and found a piece of wood that I must have forgotten about. I thought it was oak, but it was too light, didn’t have the right color and the grain pattern was off. It’s not maple, not sycamore, not willow, not cherry, not mahogany, or any other tree that I’ve cut down. It was also really, really dry, which made me think it had been there for more than two years, which was when I got the oak I have been turning. It was cut for spindle turning (which I don’t do much of) and while the bottom of the piece was flat, the top had this weird angle that had been cut into it. For the life of me, I have no idea what kind of wood it is or where it came from, so I’ve decided that wood fairies are real and this was a gift. Would have been a better gift if it was a chunk of buckeye burl, some African blackwood, or a madrone burl, but apparently, my wood fairies have limited resources.
When I started turning it, this wood turned great on the outside, but when I was trying to hollow out the end grain middle, it acted like the wood was half rotten. It didn’t really cut as much as it just torn out. I sharpened the tools, tried different angles on the bowl gouges, tried two different scrapers, and finally settled on a carbide tool that didn’t leave a better surface, but at least it got through the hollowing process quicker. When I got done, I decided it kinda has a shape like a calla lilly, which makes sense for a vase. To make it a useable vase, I had to either seal the wood with some kind of epoxy, or figure out how to make an insert of some kind to hold the water. A coat of sanding sealer followed by multiple coats of liquid lacquer sealed the wood enough for dried flowers, and a quick trip to the dollar store to find a glass that would fit and the project was completed.
Still don’t know what kind of wood this is, but I think it will look nice with some fresh flowers in in.
Some kind of wood, with a cobalt blue glass used as an insert for fresh flowers.
I can be a real cheapskate! If there’s a tool or some turning supply that I want to buy, it takes me forever, because I have to look through every tool magazine and website I can find before I can make myself make the purchase. The unintended side effect of this approach, is sometimes, while looking through all those vendor sites, you can stumble across really good sales. Do I need another wood-worm screw chuck? No, but at that price… Do I need an alcohol dye pipette? No, but at that price… Do I need a <fill in the blank here>. No, but at that price… I was looking at the main site I buy items from and they have a clearance section where they get rid of things, sometimes at ridiculous prices. I bought a dozen acrylic turning blanks for bottle stoppers, for about 75% off, and some stainless steel bottle stopper parts at an introductory sale price. Had I ever planned on making yellow, acrylic bottle stoppers with stainless steel drops? No, but at that price…
Awhile back, while I was looking for something in the shop, I came across the box of bottle stopper parts and that project came back into my mind. At about the same time, one of my daughters introduced me to the joys of buying cheap, Chinese made knock off craft supplies, bought from an app that offers free shipping. For a cheapskate crafter, this is like crack! I came across some glass cabochons (glass domes pieces) that have images attached to them and thought, “I wonder what these would look like inlaid into a bottle stopper?”
This weekend, I got the chance to put all the pieces together. The result is the “acrylic peacock series” below. Some things I learned is that turning acrylic is not easy! It’s really hard, so it dulls the tools, quickly. Every scratch will show and the only way to make it look good is to sand it down to 20,000 grit paper. It takes about twice as long to make one of these stoppers as it takes to make one made from wood. Even so, I think I really like the way these turned out!
Given how cheap the cabochons were, I have other lots on the way that look like eyes (dragon, snakes, daemon…), galaxies, constellations, and I’m sure there are some I’ve forgotten I ordered. This could easily become my next turning obsession…
First lot of acrylic bottle stoppers with Peacock colored inlays.Side view…