A very nice woman named Mona reached out to the turning club I’m in to see if anyone could help. She came into possession of three “tree cookies” that held sentimental value for a friend of hers and asked if there was anyone in the club who could help turn them into something more. I had to look it up, but a “tree cookie” is basically a round slab of wood taken off the end of a log, with the bark still all around the edge. There were some issues with the cookies, but I guess I’m a sucker for projects that have a sentimental attachment to them, so I said I’d see what I could do with them.
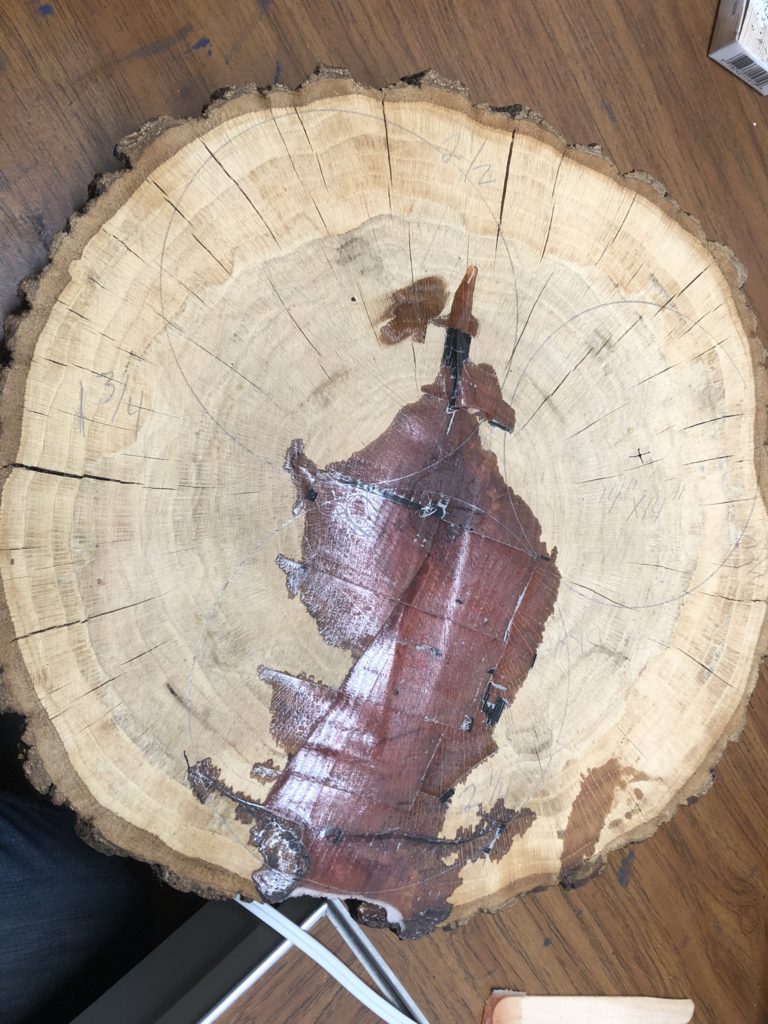
When I met with Mona and she showed me the slabs. All three of them were about 14″ across, were anywhere from 1″- 3″ thick, had cracked fairly severely during the drying process and the wood had warped as well. My first thought was “WOW, there’s nothing here to work with!”. One cookie was absolutely unusable, since it was cracked, twisted from warping, too thin, and had a large rotten/punky section that covered at least a third of the wood. It is now firewood. The second was also cracked and twisted, but had the extra issue of being thin on one side and thick on the other. I decided it might be possible to salvage something, but it would most likely be a much smaller project using only a portion of the cookie. The last blank was the most promising of the three. Yeah, it had a large crack from the pith to the edge, yes, it had at least 50 other cracks of various depths and lengths throughout the wood, yes it had twisted when it warped, BUT… It was a LOT thicker than the others, so I had hopes a more usable blank could be created. I took the two cookies, committed to doing something with the best one and said I’d do what I could – if I could – to the one that was a little iffy.
he first step was to make sure the cookies were completely dry, since no matter what I ended up doing, there would be epoxy involved in the process. If the wood is too wet when the epoxy is used, two potential problems are introduced. First, it could mess up the way the epoxy cures, potentially causing it to be cloudy, brittle or not fully cure. Second, once the epoxy cures, it’s absolutely solid and does not move, but the wood will always move. The more moisture in the wood, the more it will move, so if the wood was too wet it could literally rip the completed project apart as the wood moves as the moisture leaves, but the epoxy doesn’t. To pull the moisture out of the wood, I buried the cookies into a tub of silica desiccant. (Silica desiccant gel are what’s in those little packages you find in the bottom of new shoe boxes with the big “DO NOT EAT” warning printed on the side.) Not only does this draw the moisture out much faster than waiting for the moisture to evaporate naturally, it pulls the moisture very evenly, which reduces the chances of the drying process causing more cracks. Once the two cookies were dried, the condition of the cracks were assessed, and I had a little more time to think about what I felt I could do, the initial request split into 4 sererate projects. The second cookie would be split into three small blanks, then turned into three bowls. The “best” cookie would be kept as a single blank and turned into a large plate or shallow bowl.
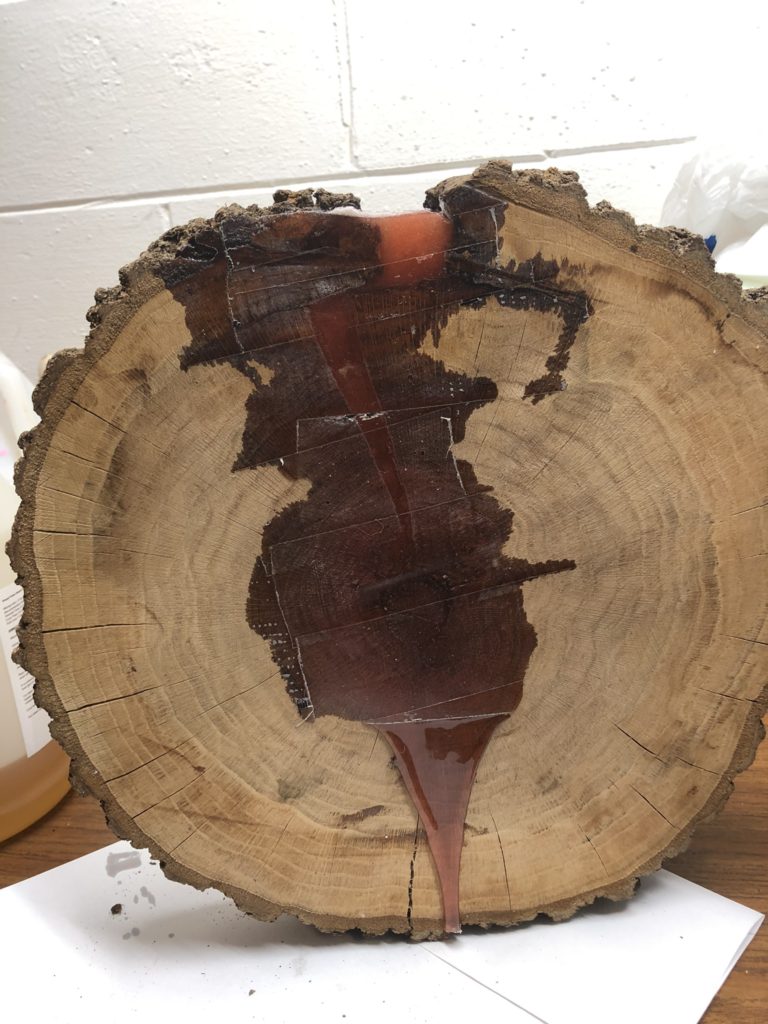
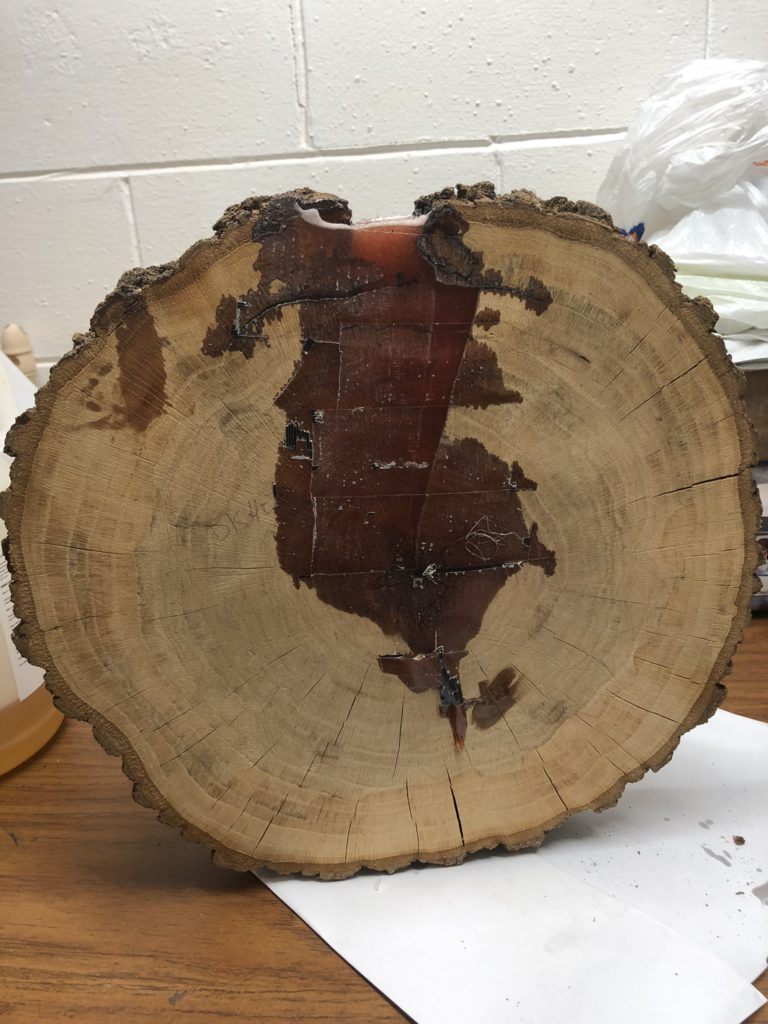
Once the eventual placement of the blanks was decided, the epoxy work was started to fill in all the cracks. For this, I used an iridescent cranberry colored mica powder with the epoxy to provide a contrasting color.
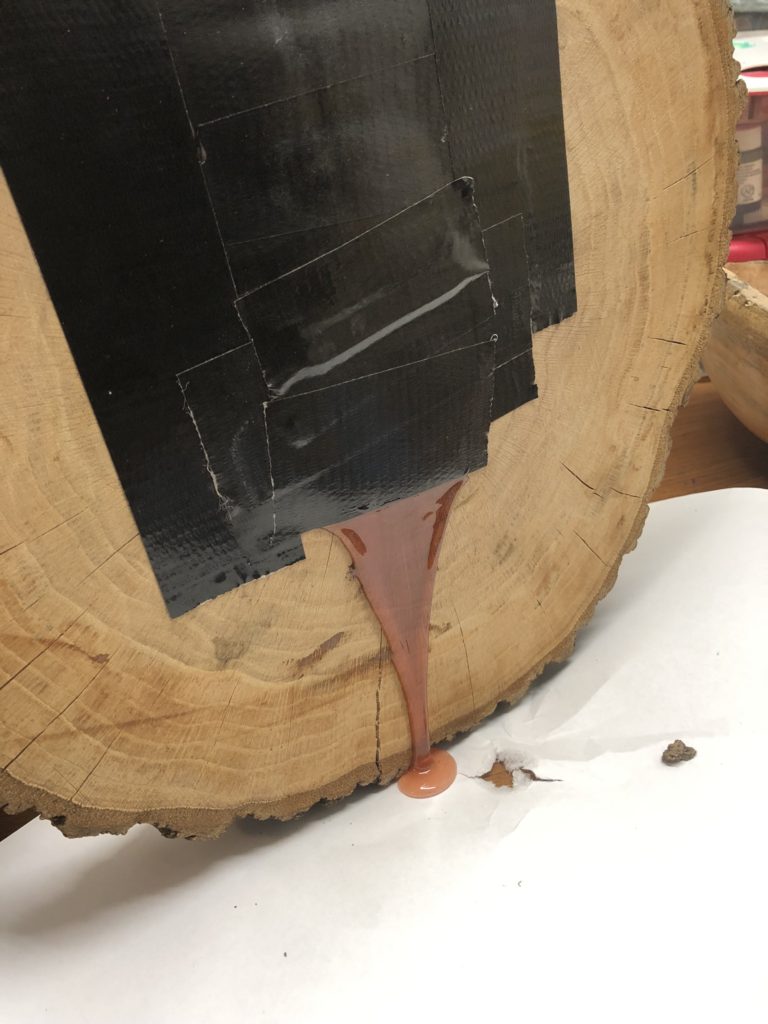
I started working on the biggest crack first. It ended up taking multiple pours to get the crack to fill, mainly since so much epoxy leaked out during the curing process.

The next step was to lay out where the individual blanks would be cut from the cookie.
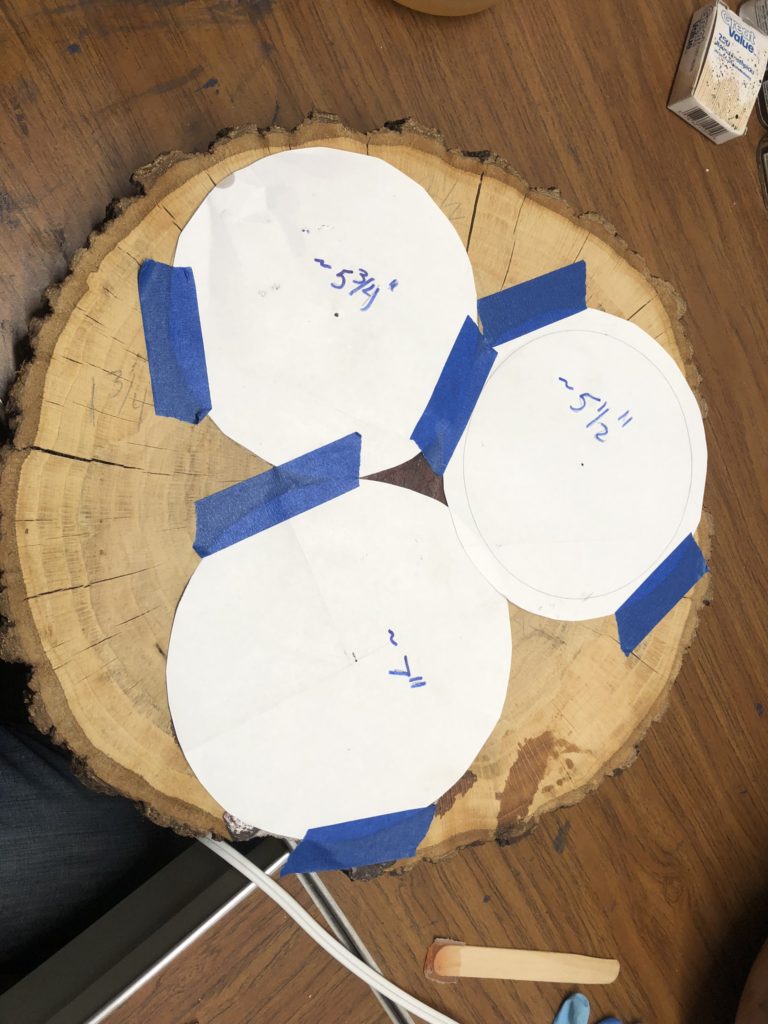
Once the main crack was filled, the three blanks were cut out where the circles were placed. Each of them needed additional epoxy work, so cardboard was affixed to the sides and bottom to prevent epoxy from leaking out, then they were flooded with epoxy.

Project 1: The small epoxy bowl
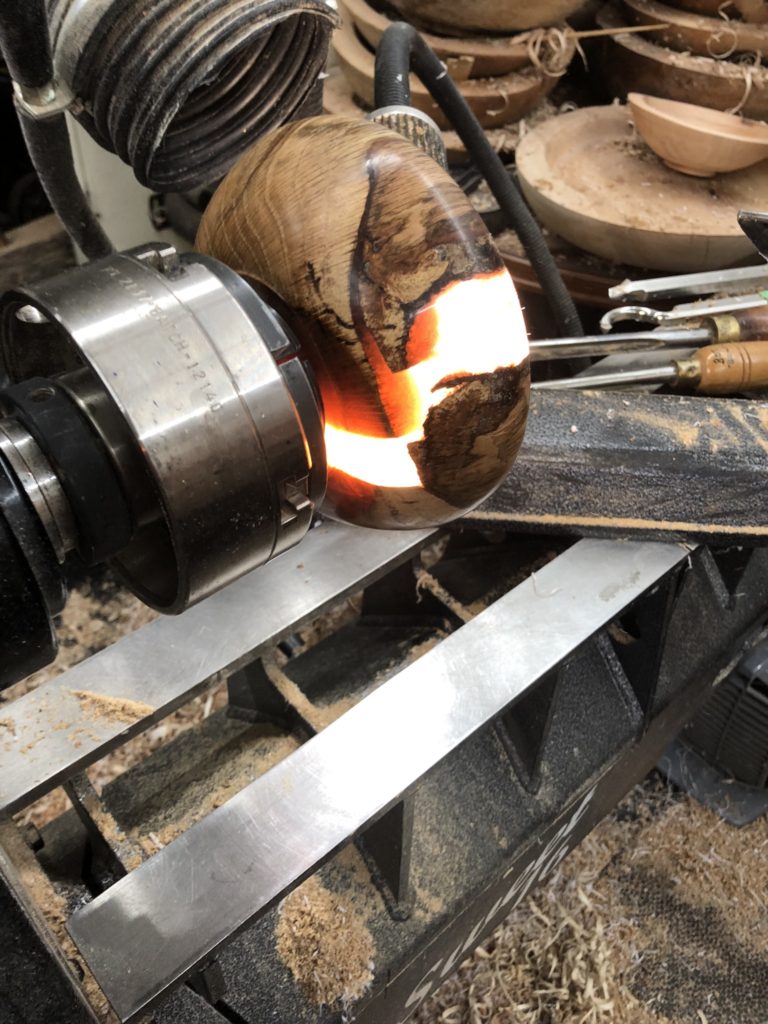
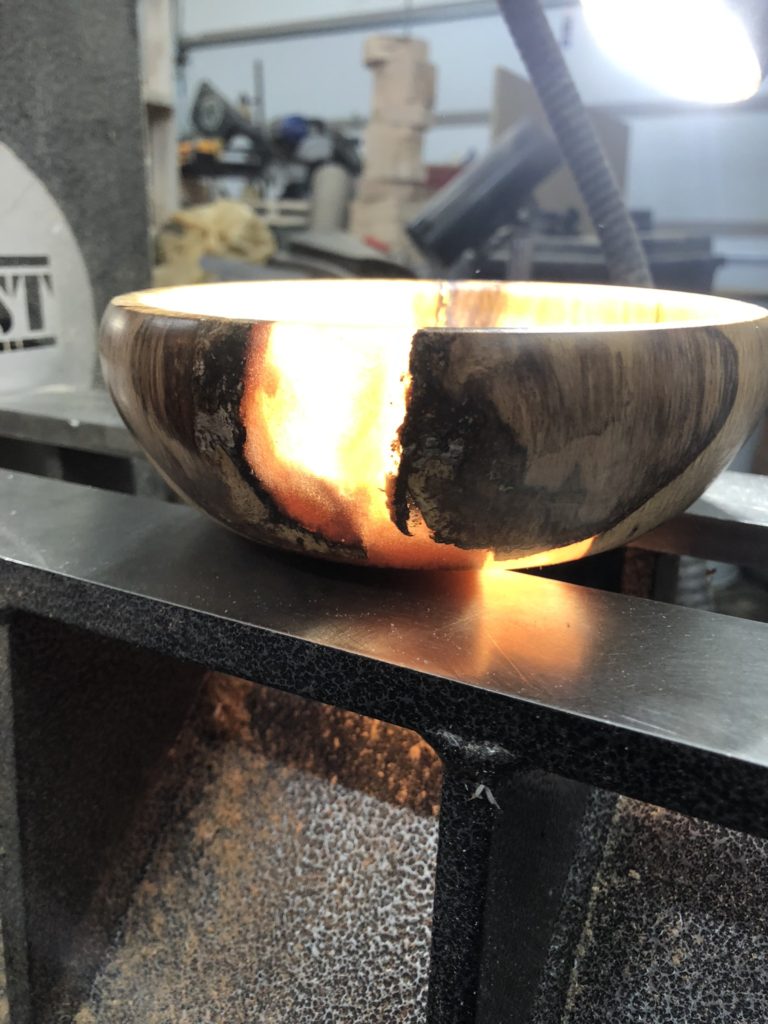
The first blank that I turned was the one who’s main feature was going to be the large crack that had been filled. After turning the outside of the bowl, it was pretty clear that the epoxy would be a prominent part of the overall look of the bowl. When the inside of the bowl was removed, it allowed light to come through, which looked pretty cool.
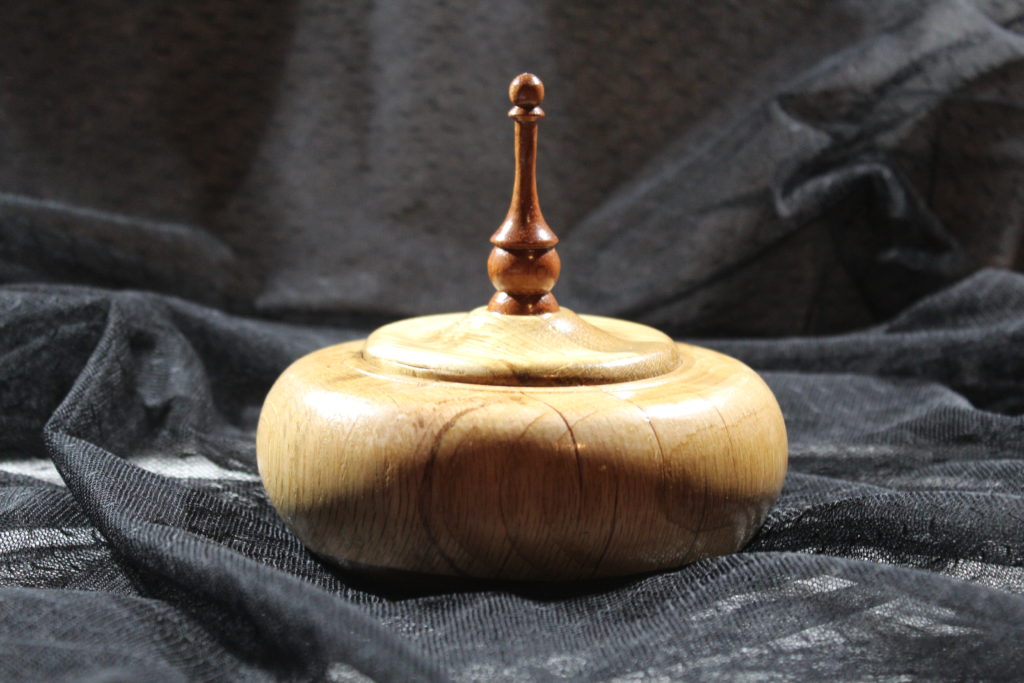
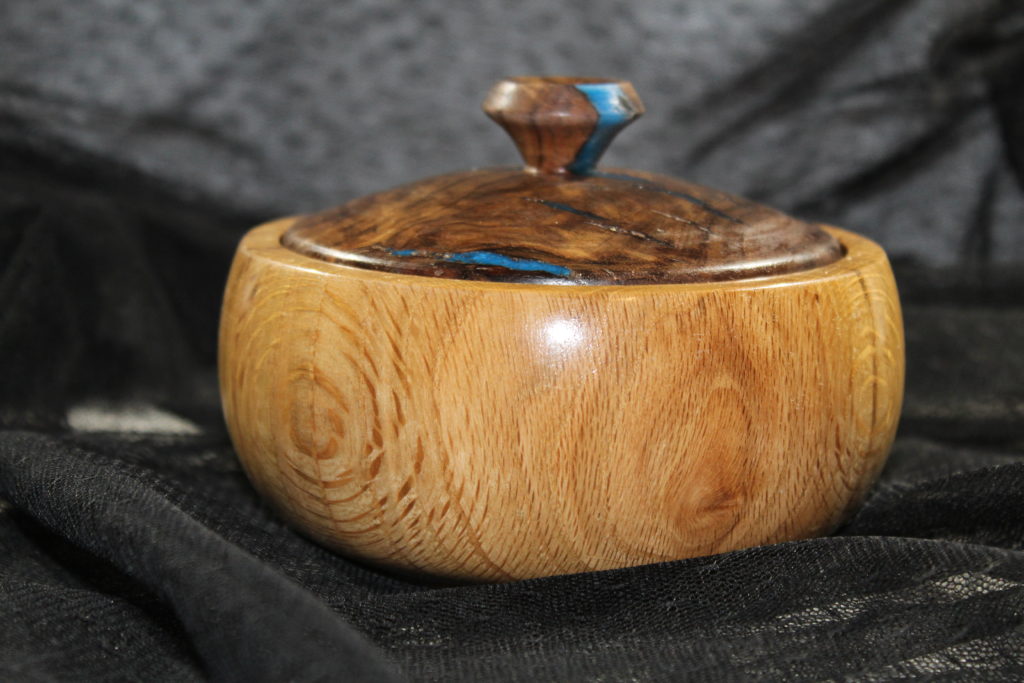
Project #2: The lidded bowl with a tall finial.
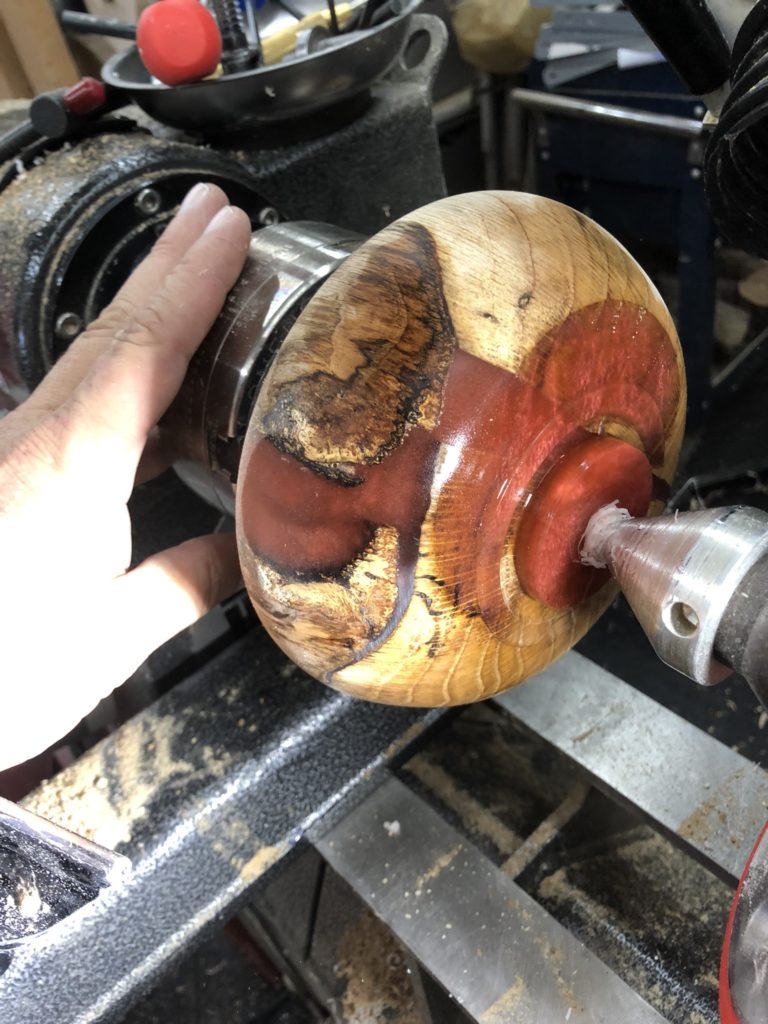
The thought behind this bowl, was to hollow out the middle of the blank to make a bowl that had a lid that fit on top. To get the wood to make the lid, I had to use something other than the cookie, since there wasn’t much of it left. I found a piece of oak flooring in that shop that was big enough to make the lid out of and after turning it, the flooring actually came out with a very similar color to match the wood in the cookie. For the finial, I wanted to use a different color of wood, something darker, just to provide more contrast. I ended up using a pen blank that was darker and had a reddish hue to is. It might be sepele or mahogany.
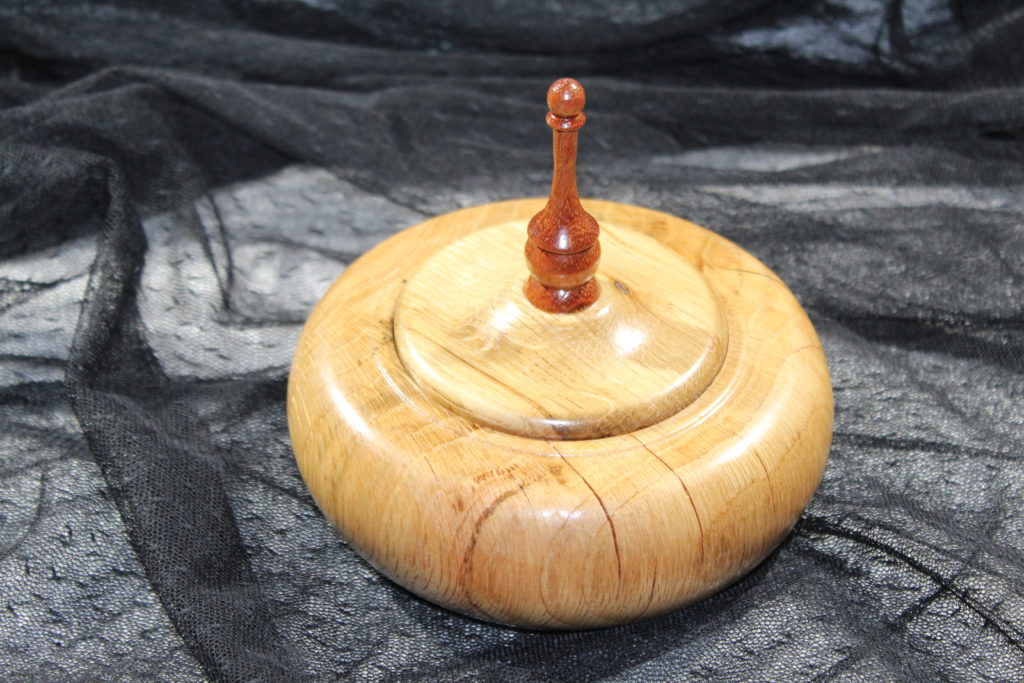
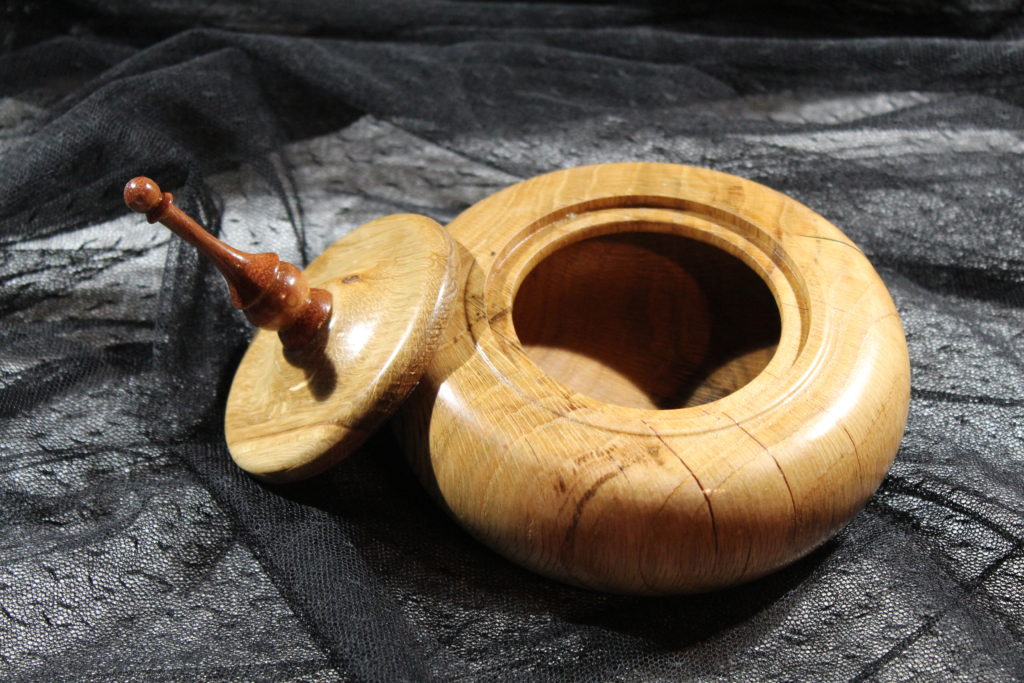
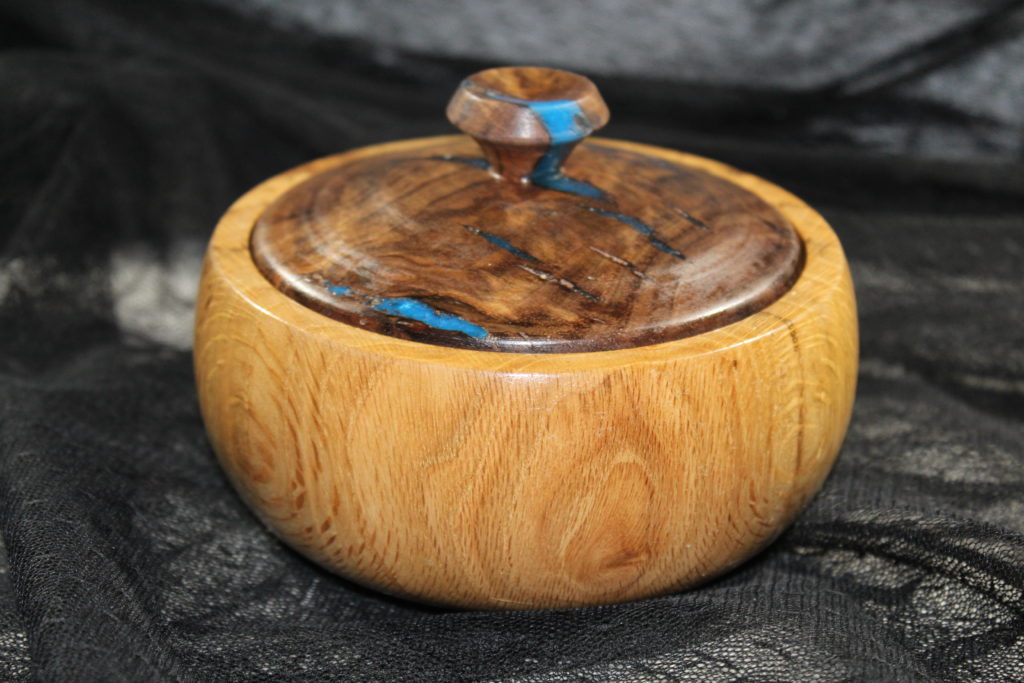
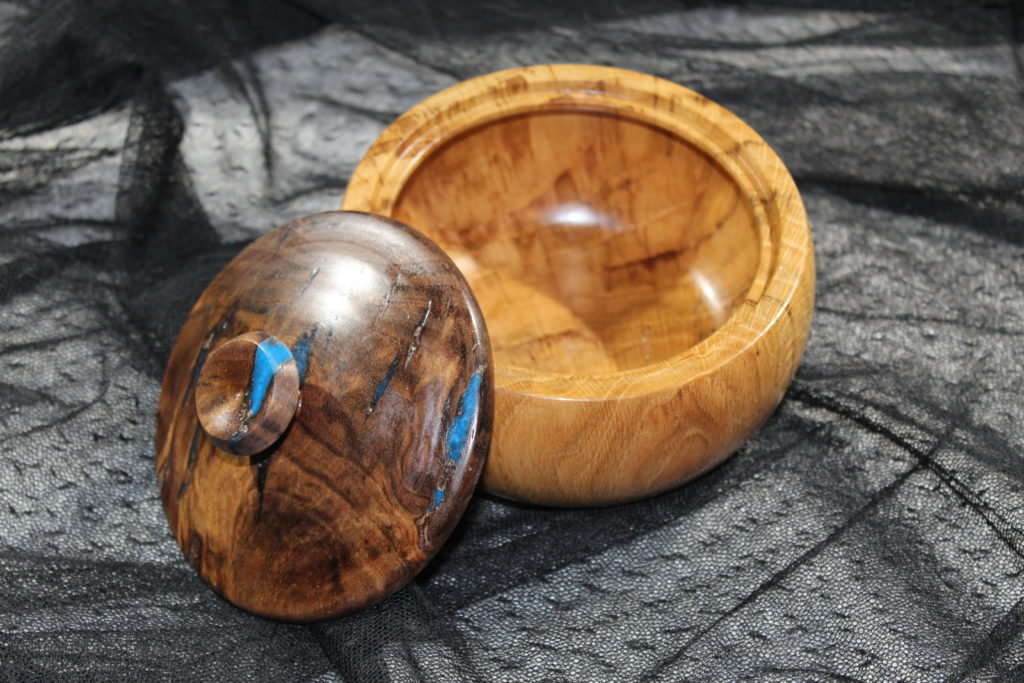
Project #3: The lidded bowl with walnut lid
For the third bowl, there was very little epoxy visible on the final turning. The cracks that were filled with the cranberry epoxy were deep, but they were very thin, so the lines left in the wood blended in easily with the grain. After shaping the outside of the blank, it became clear that the bowl would look very plain. To add some interest, I decided to turn this blank into another lidded bowl, except this lid would be much more of a deliberate contrast to the oak. After finishing the bowl, I found a piece of walnut that was very damaged, full of cracks and voids, which I filled with a blue iridescent epoxy. The blue really stands out against the dark walnut wood, and the dark walnut wood really stands out against the oak.
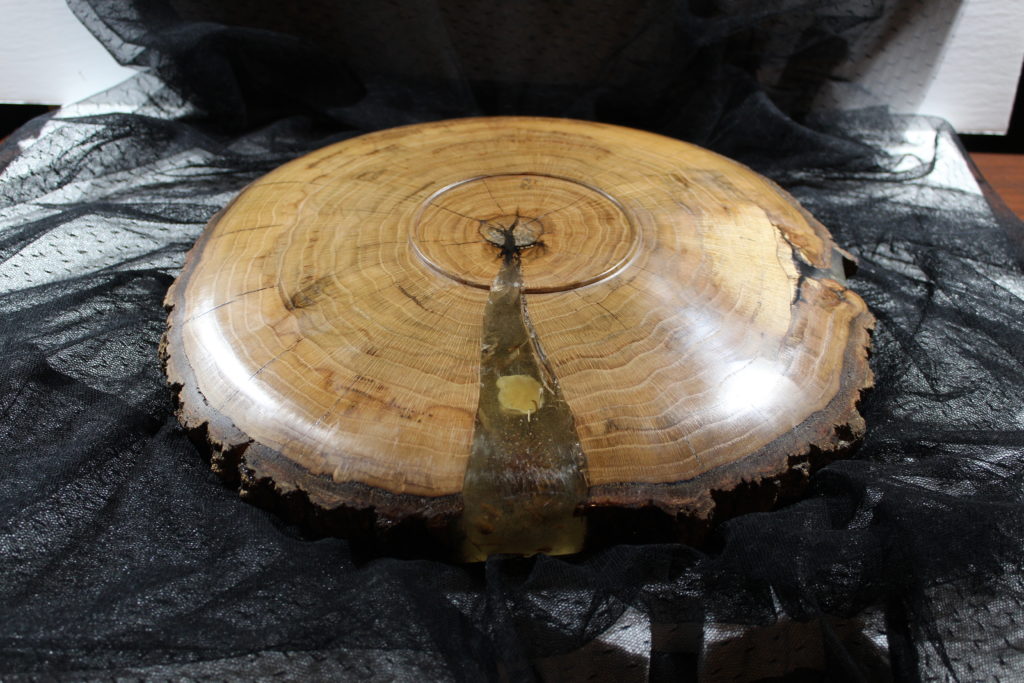
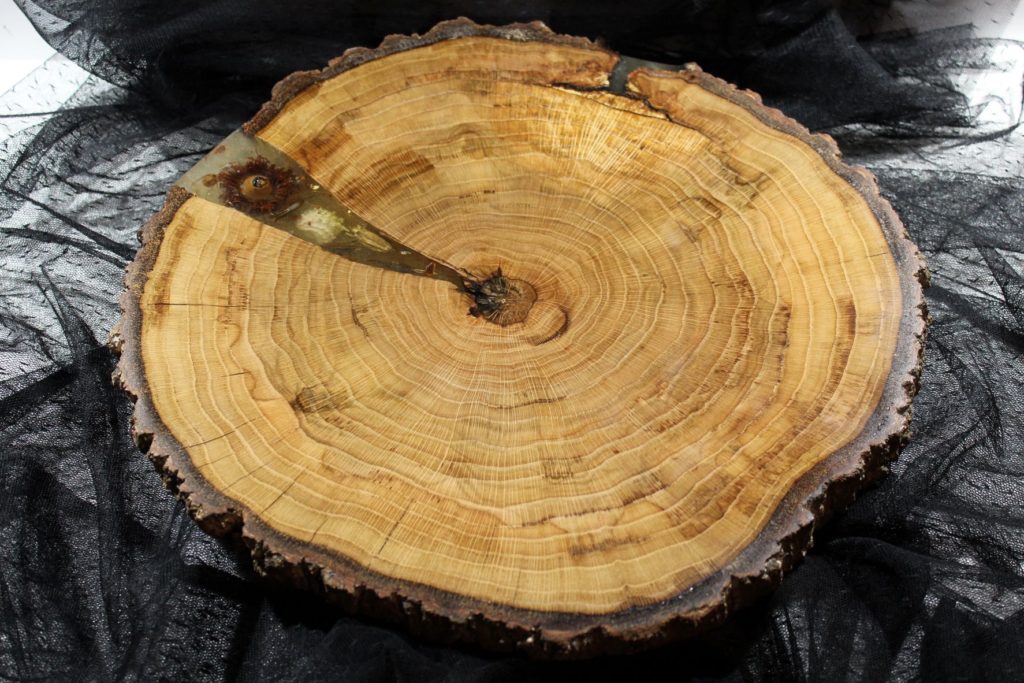
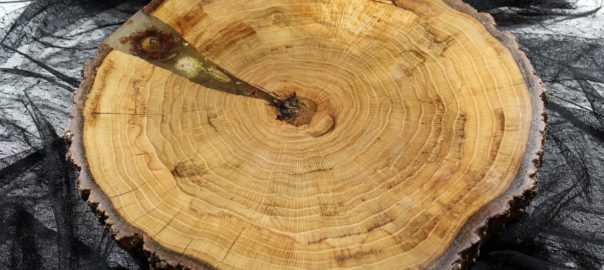
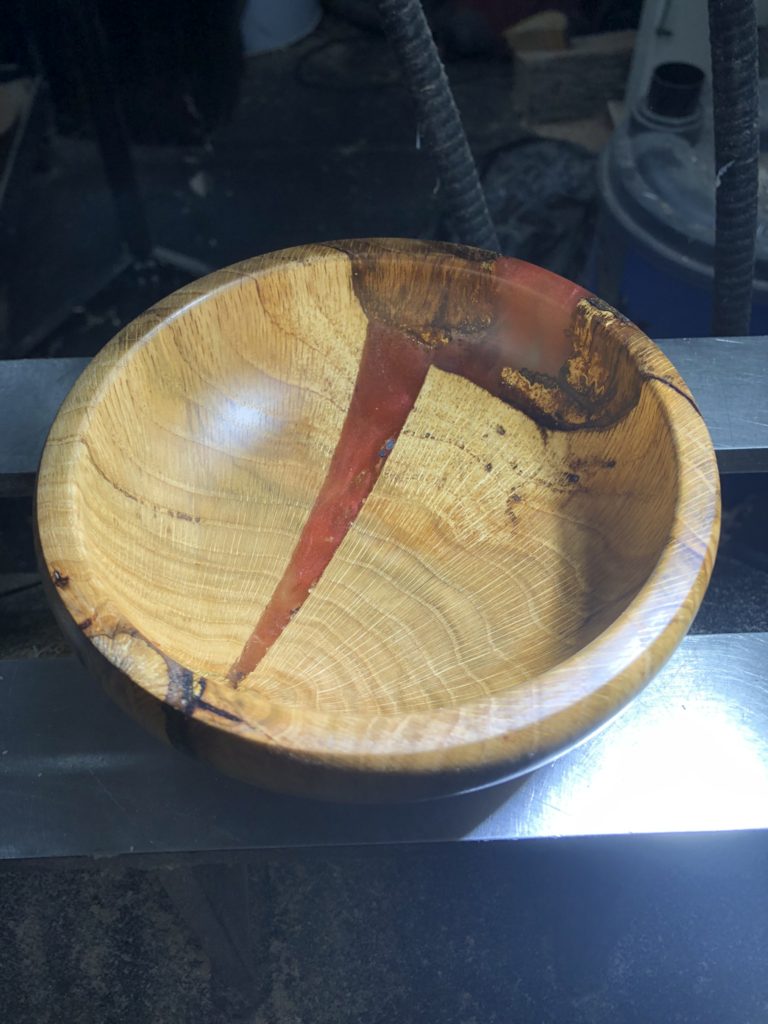
Project #4: The big bowl
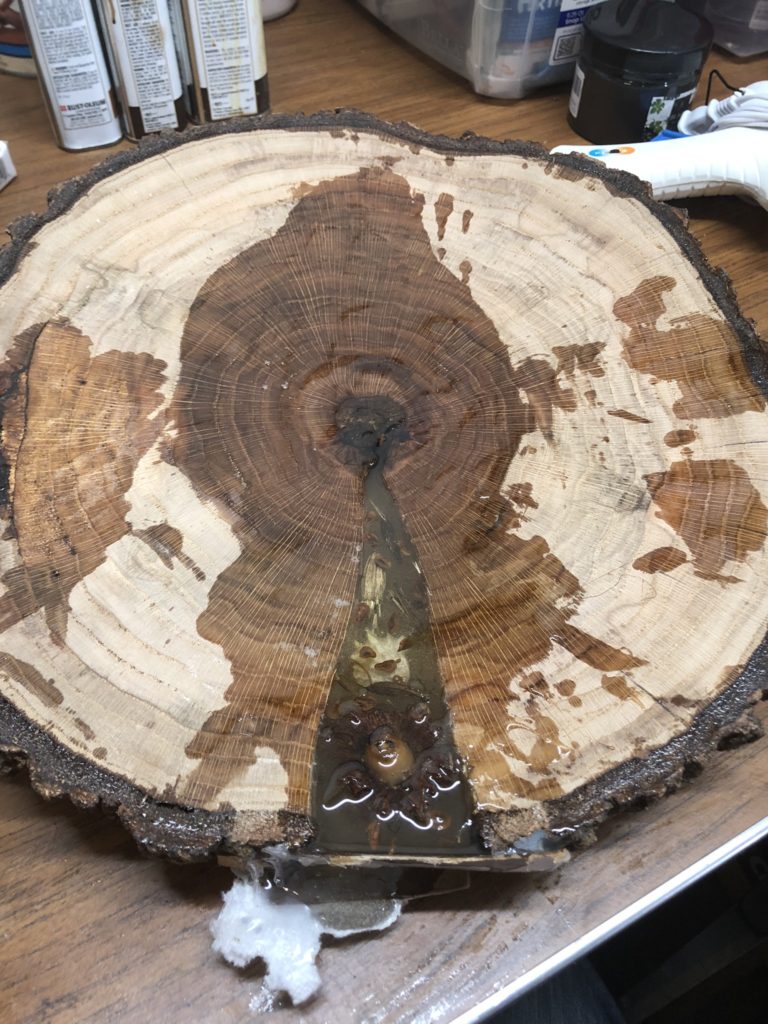
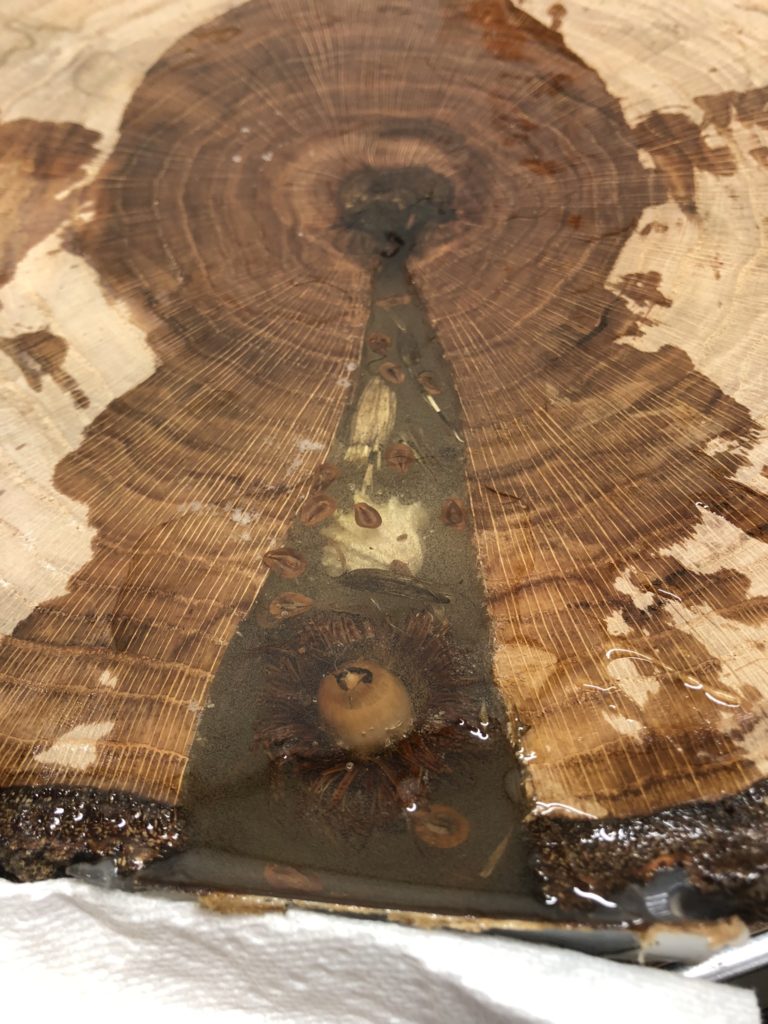
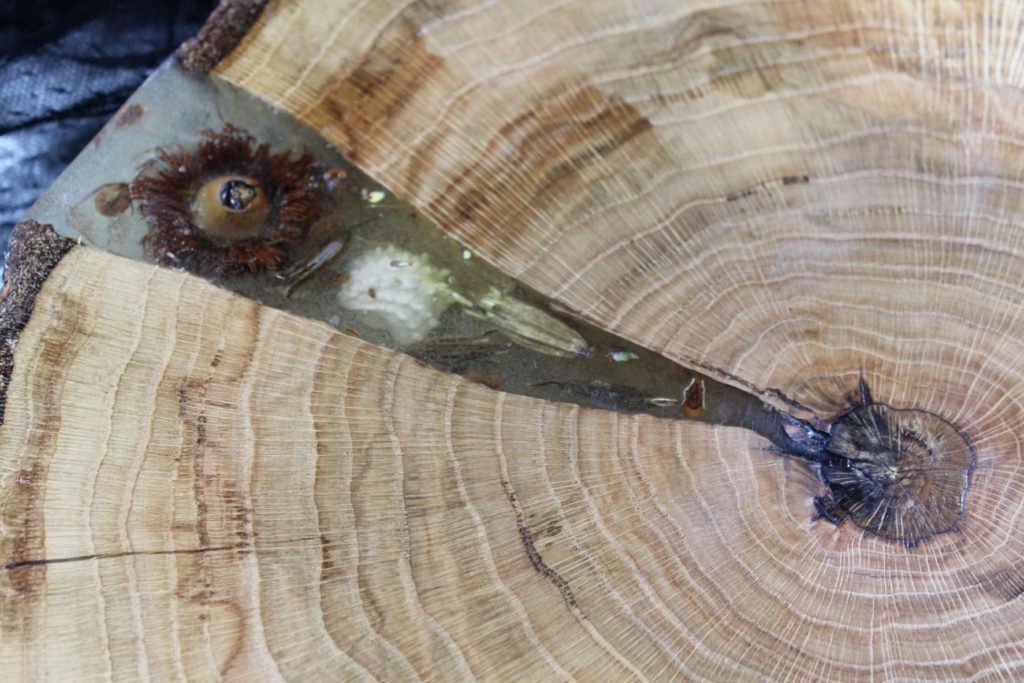
The main reason I agreed to do any of this work was to do something with this big, thick, blank. The plan was to fill the crack with clear resin, but add something to be suspended in the resin that would provide interest. Mona sent me a small box containing the items she’d like to have included. The seeds and seed pods wouldn’t be hard to include, but I wasn’t sure how to include the large acorn husk, the seashell, and the rock that was also in the box.
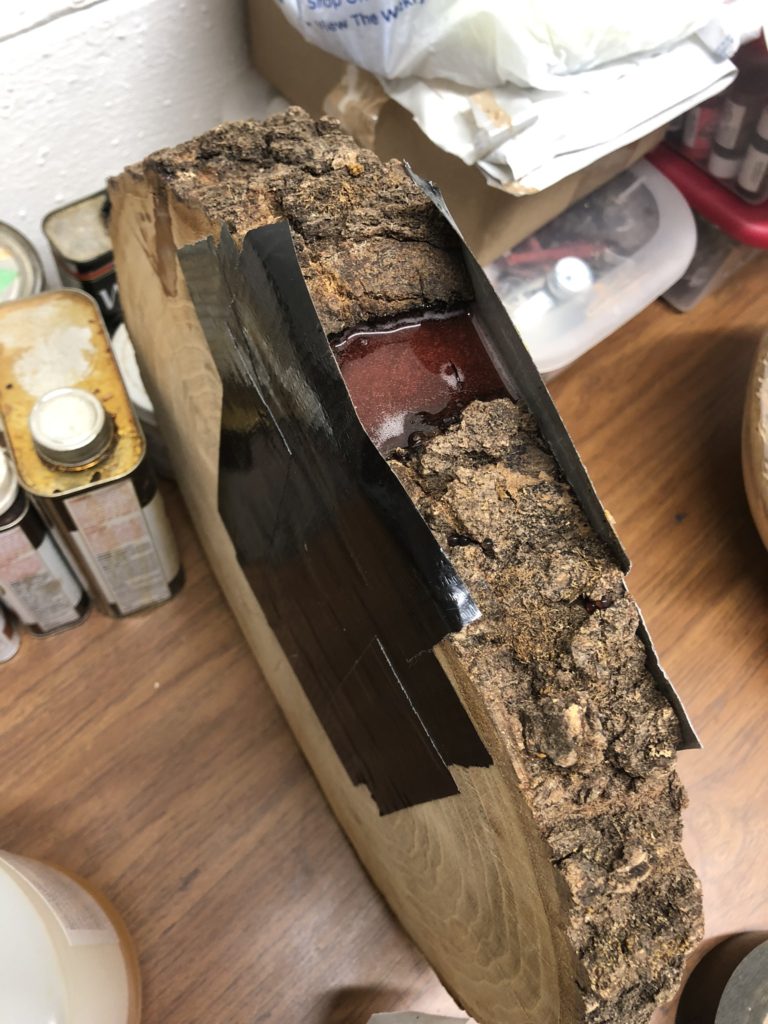
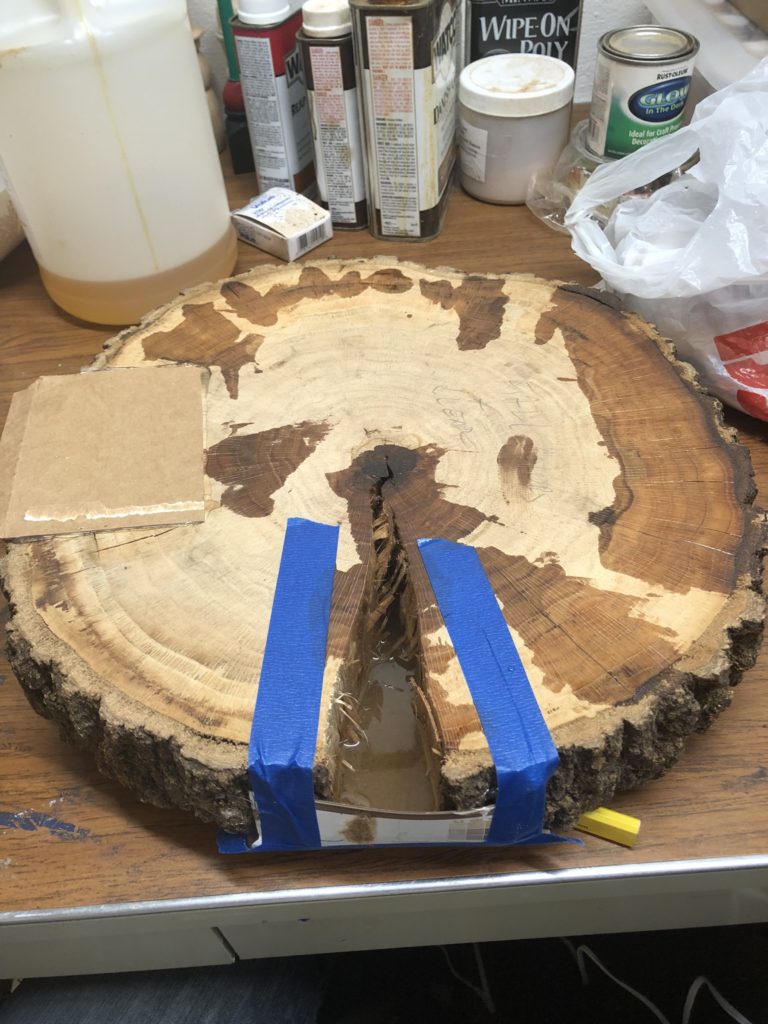
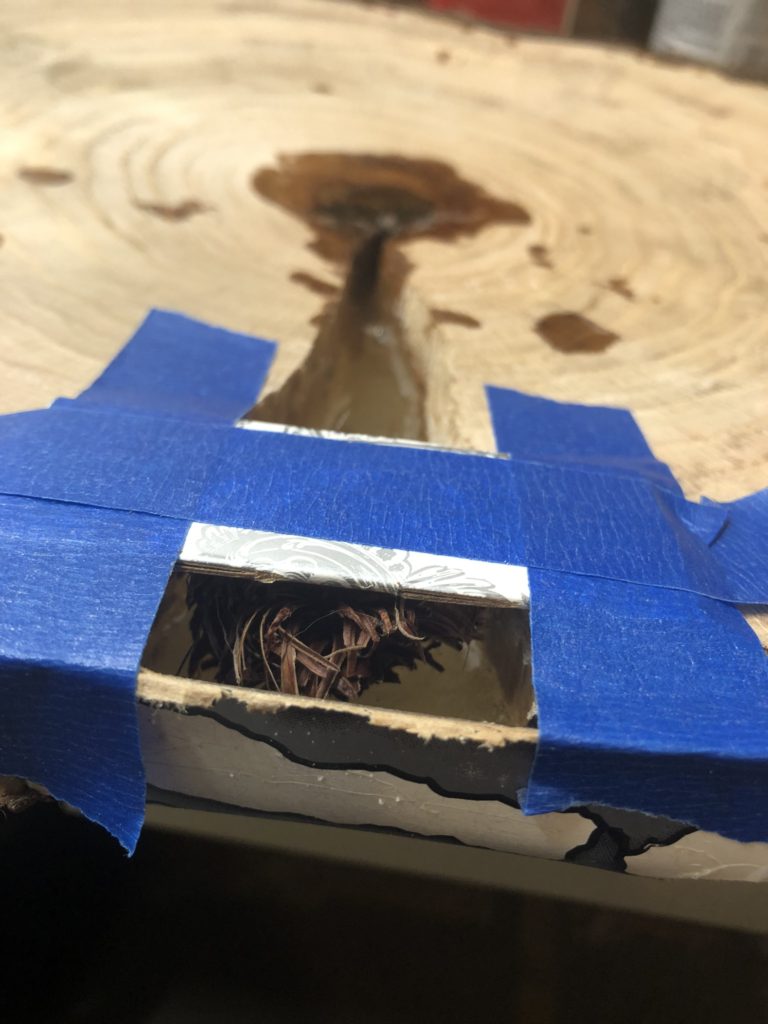
The first issue that had to be worked out was how to keep the piece from exploding while on the lathe. There were so many cracks in the bowl, one wrong move and the whole thing could easily explode. I knew they would need filled with epoxy, but I didn’t want to fill the main split until I was sure what the final shape and thickness would be or I’d run the risk of turning away the items that were encased in the resin. An iterative approach was needed. I put a line of hot glue on the underside of the blank along every single crack I could see to “plug up” the crack and prevent resin leakage. Then, I carefully added tiny amounts of resin into the tops of the cracks, letting it flow down into the cracks to seal them. This was a slow and tedious process. For the big crack, I put a thin (1/8″) layer of resin in the bottom that would eventually be turned away, and epoxy’d a scrap piece of wood across the crack so it wouldn’t move.
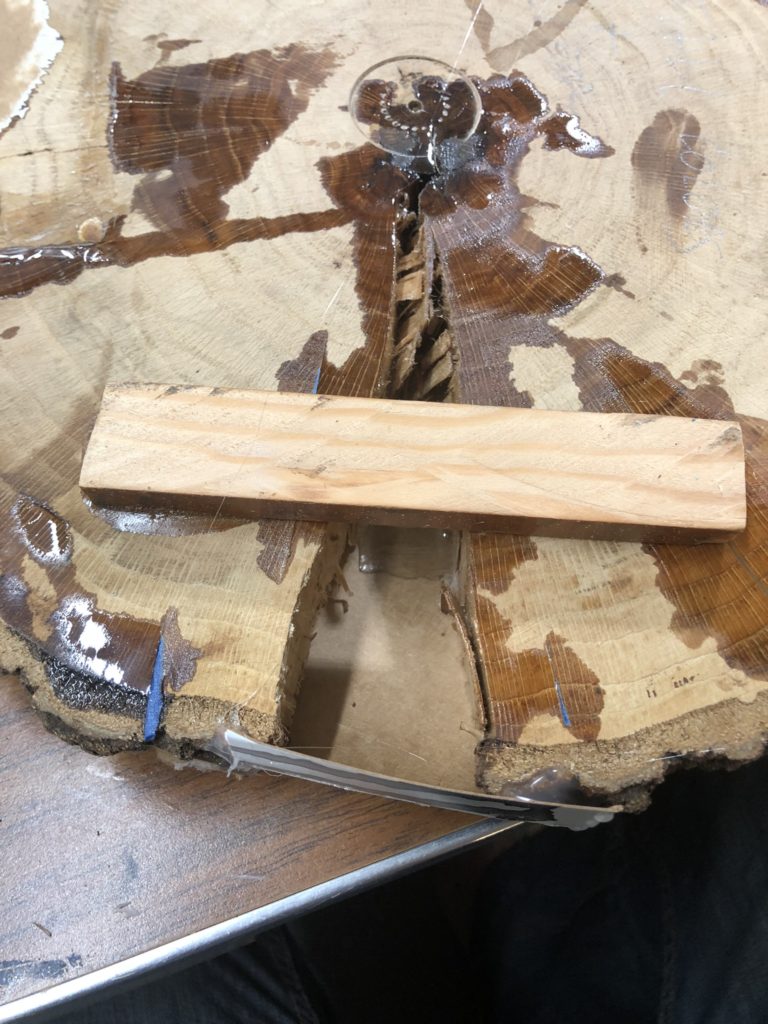
I had hopes of being able to turn the underside of the bowl once, then never return, but that’s just not the way this project went. Some of the cracks were so small that the resin couldn’t fully fill the holes as air got trapped inside the blank. Once I thought I was done, there was another round of sealing the cracks with hot blue (this time on the top of the blank) and adding tiny amount of resin into the cracks on the bottom to fully fill the cracks. Since the surface was now sloped, I had to build little dams around each of the cracks with hot glue to stop the resin from running down out of the cracks and down the slope of the bowl. There were multiple iterations of this process until the bottom of the bowl was in a final, finished form. Then attention turned to the top of the bowl.
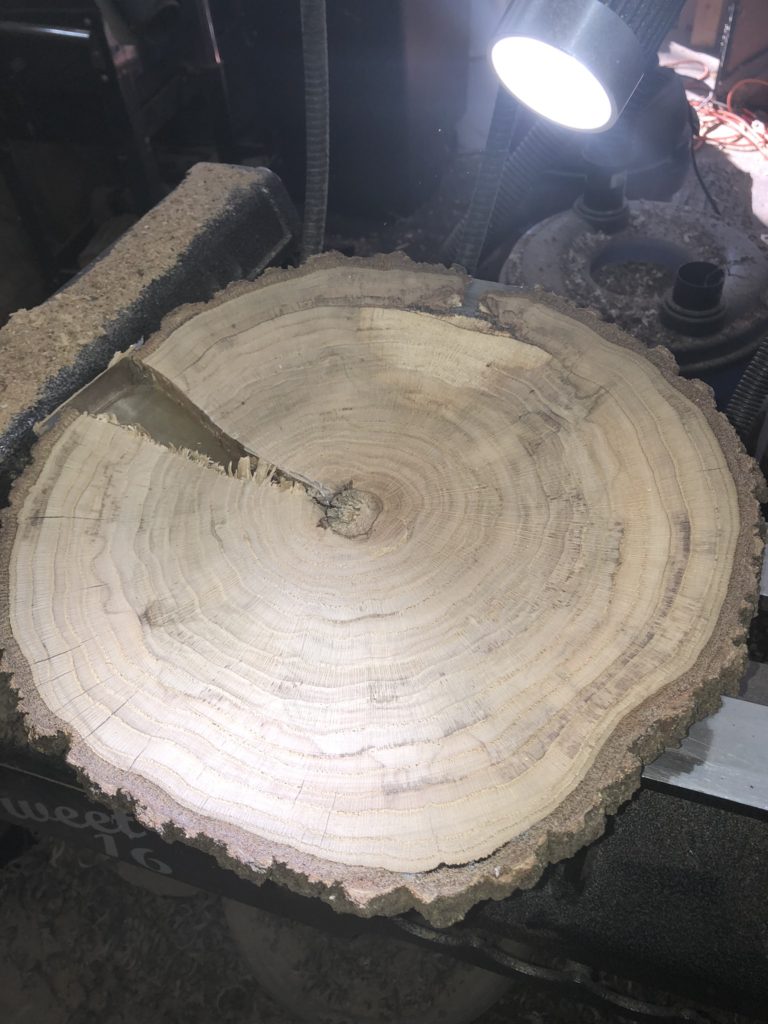
To see what I was working with on the top of the bowl, I sealed any small cracks that were present with resin, then put the blank on the lathe and turned the top of the blank to nearly final thickness. About midway through the process, I realized the same issues that were present when turning the bottom were also present on the top, so I was back to the iterations of mini epoxy ours. Note how cracks had started to appear where the bark attached to the wood. jThose weren’t visible from the underside. As I was repairing that crack, I also brushed multiple coats of epoxy on to the top and bottom of ALL of the bark. My how was the resin would help stabilize any movement within the bark and that some of the resin would soak into the bark well enough that it would also adhere to the wood.
Finally, the top shape was complete, all the small cracks were filled, and I was ready to start adding epoxy and items into the larger crack. When looking at the items and the overall thickness of the platter, it was clear the rock would not be possible. It was bigger than the crack, and I really didn’t want to try to turn stone encased in resin, for fear of what it might do to my tools and that it would cause the epoxy to crack if the forces on the lathe proved to be too powerful. The shell, if it was going to be included, would have to be nearly exactly in the middle of the resin, since I thought it would explode as soon as the tool touched it. The trickiest part was to figure out how to suspend all of the items so they were evenly distributed throughout the crack. This required multiple, small, resin pours, essentially gluing something in place, adding a little opoxy, gluing something else in place, adding a little epoxy… I was back to the iterative process. The acorn husk wanted to float, as did the acorn, so I had to tape them down while the epoxy cured.
Little by little, layer by layer, the items were added.
Then it was time for the final turning. To me, this is always the most anxious part, since one mistake could have easily ruined all this work. Luckily, everything worked out as expected.
The end result turned out very, VERY good! Even though this was a commissioned piece, it was still hard to see it go.