Way back when I’d only been seriously turning for a few years, I put some pieces in a gallery in Normal, just to see if anyone was interested in them. To my surprise, I actually sold pieces. The affirmation was better than the money. One of the pieces that sold, popped up on my Facebook wall a few days later. Turns out Jack, a guy I went to school with, and his wife bought it. Talk about small world!
Time went by, and around a year ago Jack sent me a note asking me if I wanted any elm wood to turn. He didn’t know if it’d be any good, because the tree had bumps all over it. He sent me the pictures below and my jaw hit the floor. This tree was absolutely covered in burls (or burrs, if you’re on the other side of the pond). If done right, this wood would make some of the prettiest pieces you can imagine. I made arrangements to be there when the tree guy was taking it down and carted away as much as I felt comfortable hauling in the suburban. When I got home, I sealed it to lessen the chances of it splitting and waited.


Since I haven’t worked that much with fresh burls, I didn’t know how long it would take for the wood to dry. The project I had in mind would have to be fully dried, or it would likely rip itself up shortly after being finished, so I just kept waiting.
Every time I’d pass the pile of wood, I’d check it out to see if any of it had split, and smile when I didn’t the any damage. One day, though, there was a piece on the top that seemed like it was ready. it was smaller than the rest and was a slightly different color, so I figured it was worth the risk. I put it on the lathe and turned the outside shape, taking care to see if the wood got wetter as the outside of the blank was shaped. Everything seemed to be pretty good, so I brought it inside and let it sit in silicone desiccant for a week or so to make sure it was dry. After a week of nervous waiting, I decided it was time to finish the piece.
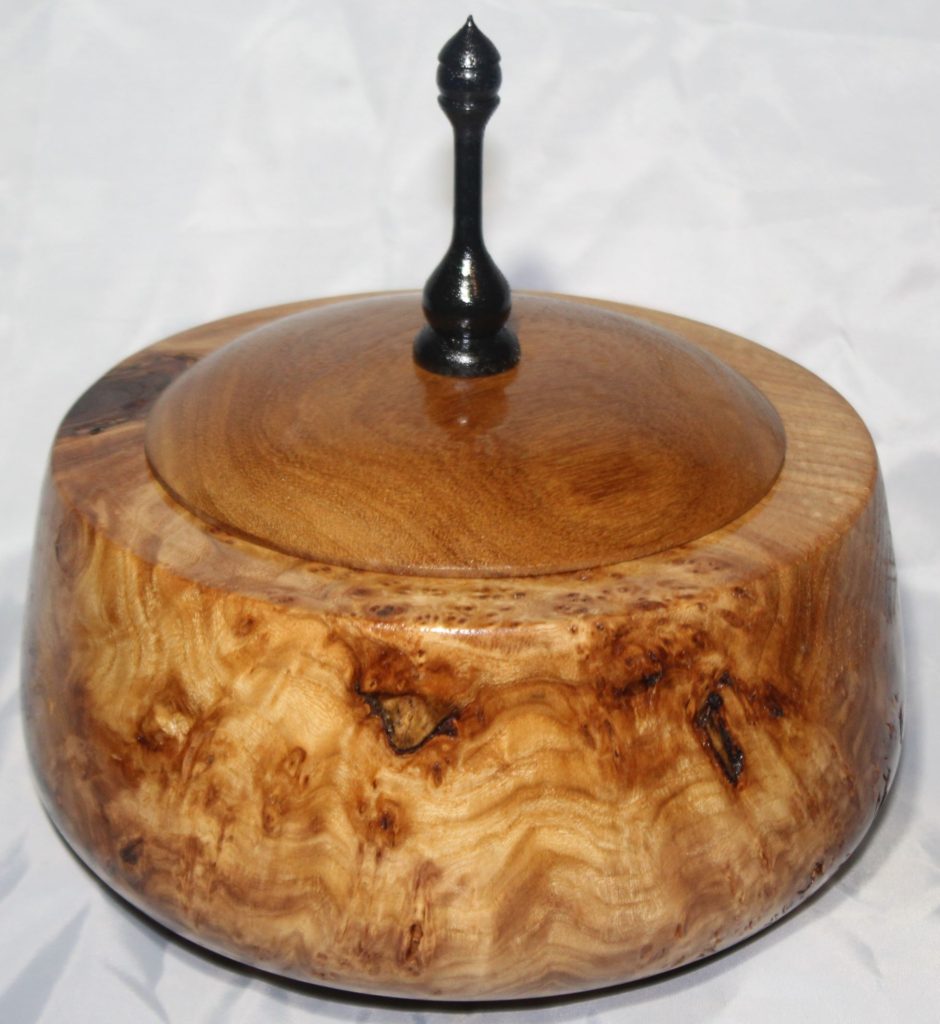
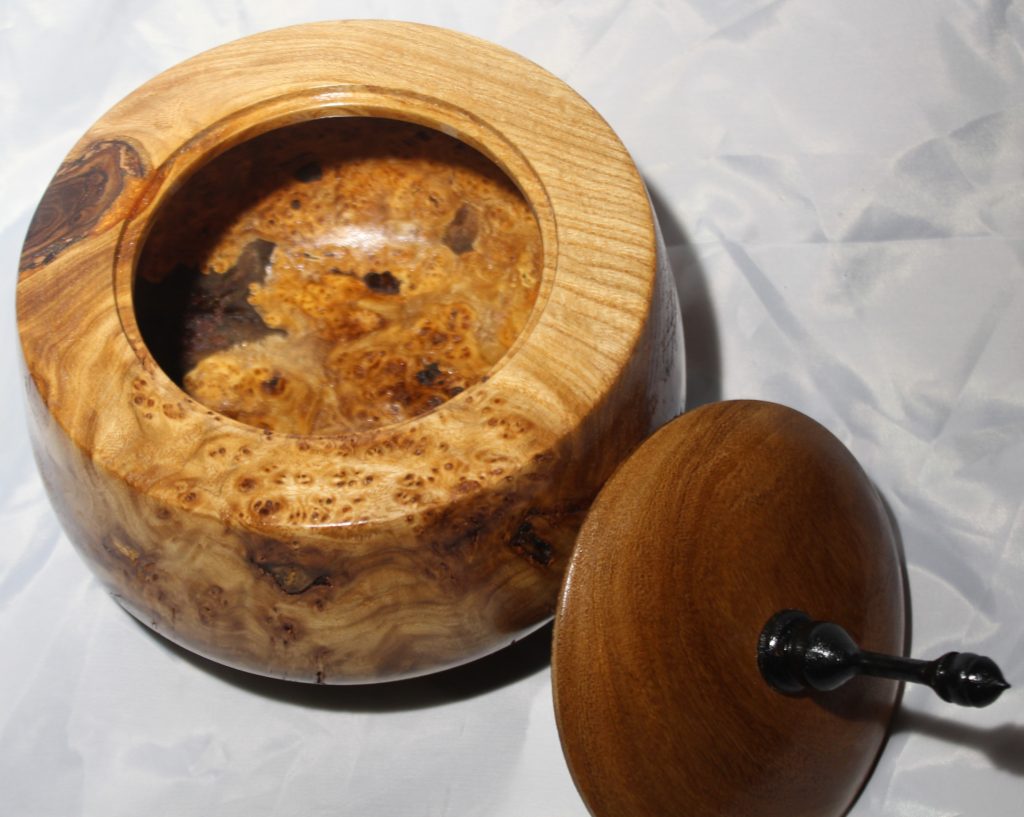
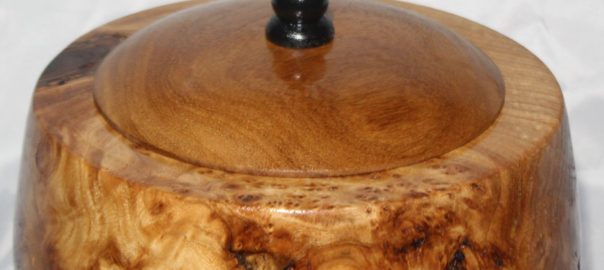
First step was to fill all the spaces in the piece where the “good wood” and the burls had come apart as well as all the normal voids and bark inclusions that are present with any burl. iridescent copper seemed like a good choice of color and contrast, so off I went doing the epoxy work. I learned quickly that there must be more gaps inside the project than I thought, because the first pour of epoxy completely disappeared into the wood. I let it cure for a week or so, then did a second pour, thinking this would be it. No, this one also disappeared, which meant another week of waiting before the next pour. Eventually, I got it on the lathe, reshaped the outside and realized that there were still gaps in the blank where the resin hadn’t reached, yet, so it was back to the basement for more epoxy work. When I started on the inside, the same issues came up with unknown voids, so more epoxy work was needed and more time was spent waiting.
Eventually, the bowl was completed, but I needed a lid. Bob, my friend and mentor, gave me a piece of some kind of exotic wood that he’d had for many, many, years which just happened to be the right color and grain pattern so as not to fight with the chaos of the burl. I added a piece of maple, dyed black, for the finial, but on three coats of poly, and suddenly the piece was done.
I told Jack and his wife when I was there getting the wood that the first piece I made was theirs. That seems only fair and a small gesture for all the fun they had unknowingly provided. It’ll be hard to send this off, but hopefully they’ll enjoy this one and see that the tree did all the work making it spectacular to look at, I was just there for the ride!
Thank you, Jack, I can’t wait to see what else is hiding in the burl pile.