I had a couple of cherry blanks that I’d put in the dessicant to dry, then forgot about them. As I was shuffling stuff around, I came across them and decided that there’s no time like the present to do the final turning. When I was finished, I was left with a basic cherry bowl, about 7″ across. It was pretty, but it was just your basic bowl. I decided that it would be a good canvas to practice some wood burning techniques to make texture. I wasn’t looking at making any “finished project, just looking at logging some practice hours. When I got done with the practice, this is what I was left with:
The texturing work was ok, but there was no overall design, so it just looked like a bunch of random stuff, thrown on the side of the bowl. I accepted it, since it was a practice piece bound for the fire, but the next morning, I decided to see if I could salvage it.
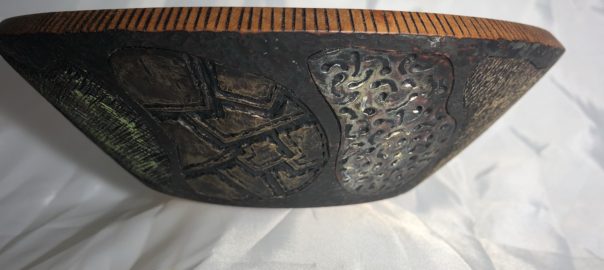
The first order of business was to get rid of the plain wood that was surrounding all the texture bubbles. That was done easily enough by using a shading bit on the wood burner, turned up about as high as it would go. About two hours later, it was done. That helped, since now the entire outside of the bowl was at least a consistent dark color.
Next, I remembered a demonstration I’d watched from a guy in France who was using gilder’s paste on top of wood burnt surfaces to accentuate the textures. I’d bought some to try to use as colored liming wax and figured at this point I had nothing to lose. This technique is basically dry brushing a TINY bit of this past over the very tops of the textured surface using your finger. When I got done, this was the final result. It ended up looking a LOT better than I’d ever expected it to! All things considered, it was a pretty productive time span spent in the shop! I learned a ton AND I got something that was good enough to escape the flames.