I’ve been making quite a few wig stands lately and to be honest, it’s getting pretty boring. Yeah, the idea of making a cancer patient smile is a great things, but come on! How many ways are there to make two circles and a stick? Like anything, after awhile they stop being fun to make and start being drudgery.
As I was turning one out of cherry wood, Bob Seger’s greatest hits was playing and my mind started to wander. I was remembering ping pong before school, lunch table conversations, school dances, musical rehearsals, band rehearsals, concerts, contests, old friends, lost friends, homecoming floats, teachers… That’s when my old shop teacher paid the rent for my head and stayed around for awhile. I remembered watching as he showed Ted how to make stacking salad bowls out of a single board of teak. I remembered him telling me what each of the three lathe tools we had in the shop were for and then saying, “you’re ready to begin”, and walking away. That I made anything other than a blood trail is a miracle. I also remembered him making a shelf out of cherry. As he ran the router around the edge, the bit was dull and it blackened the whole side. he was pissed, but I thought the color difference looked pretty cool, or would have it was more consistent. “Against the Wind” was done, so I snapped back to the present, finished up sanding the wig stand, and decided to try my hand a pyrography, aka wood burning.
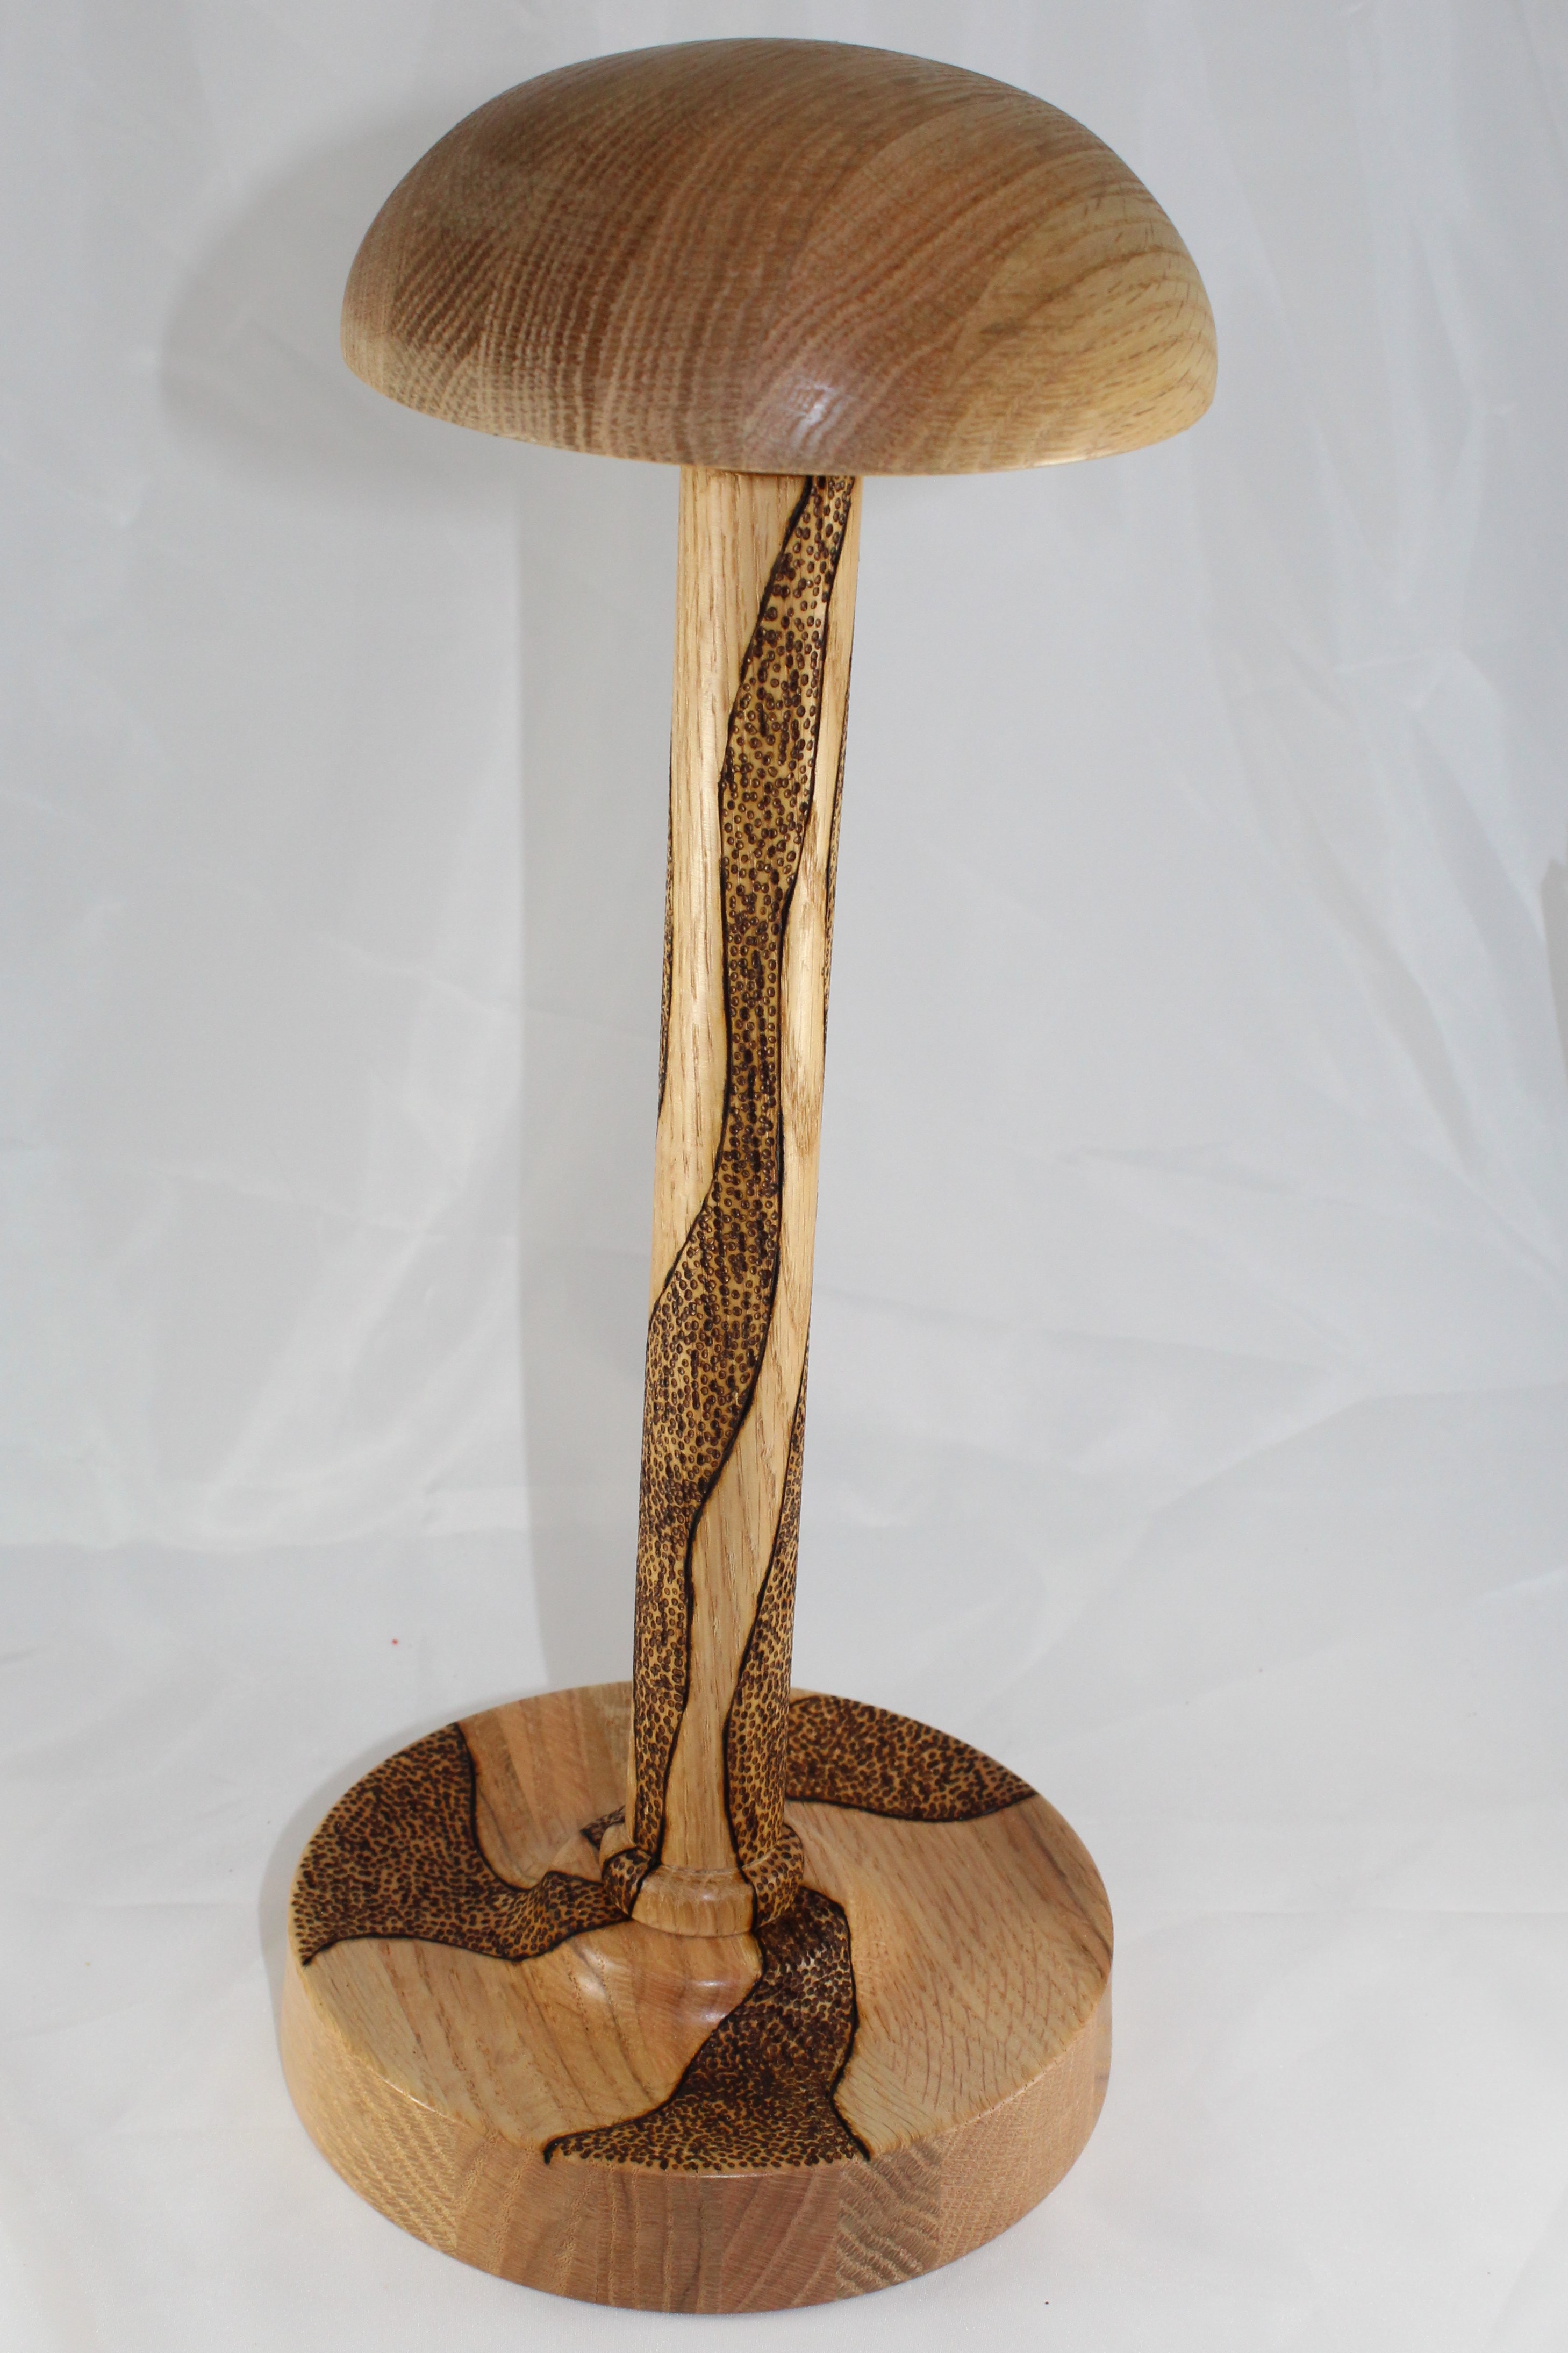
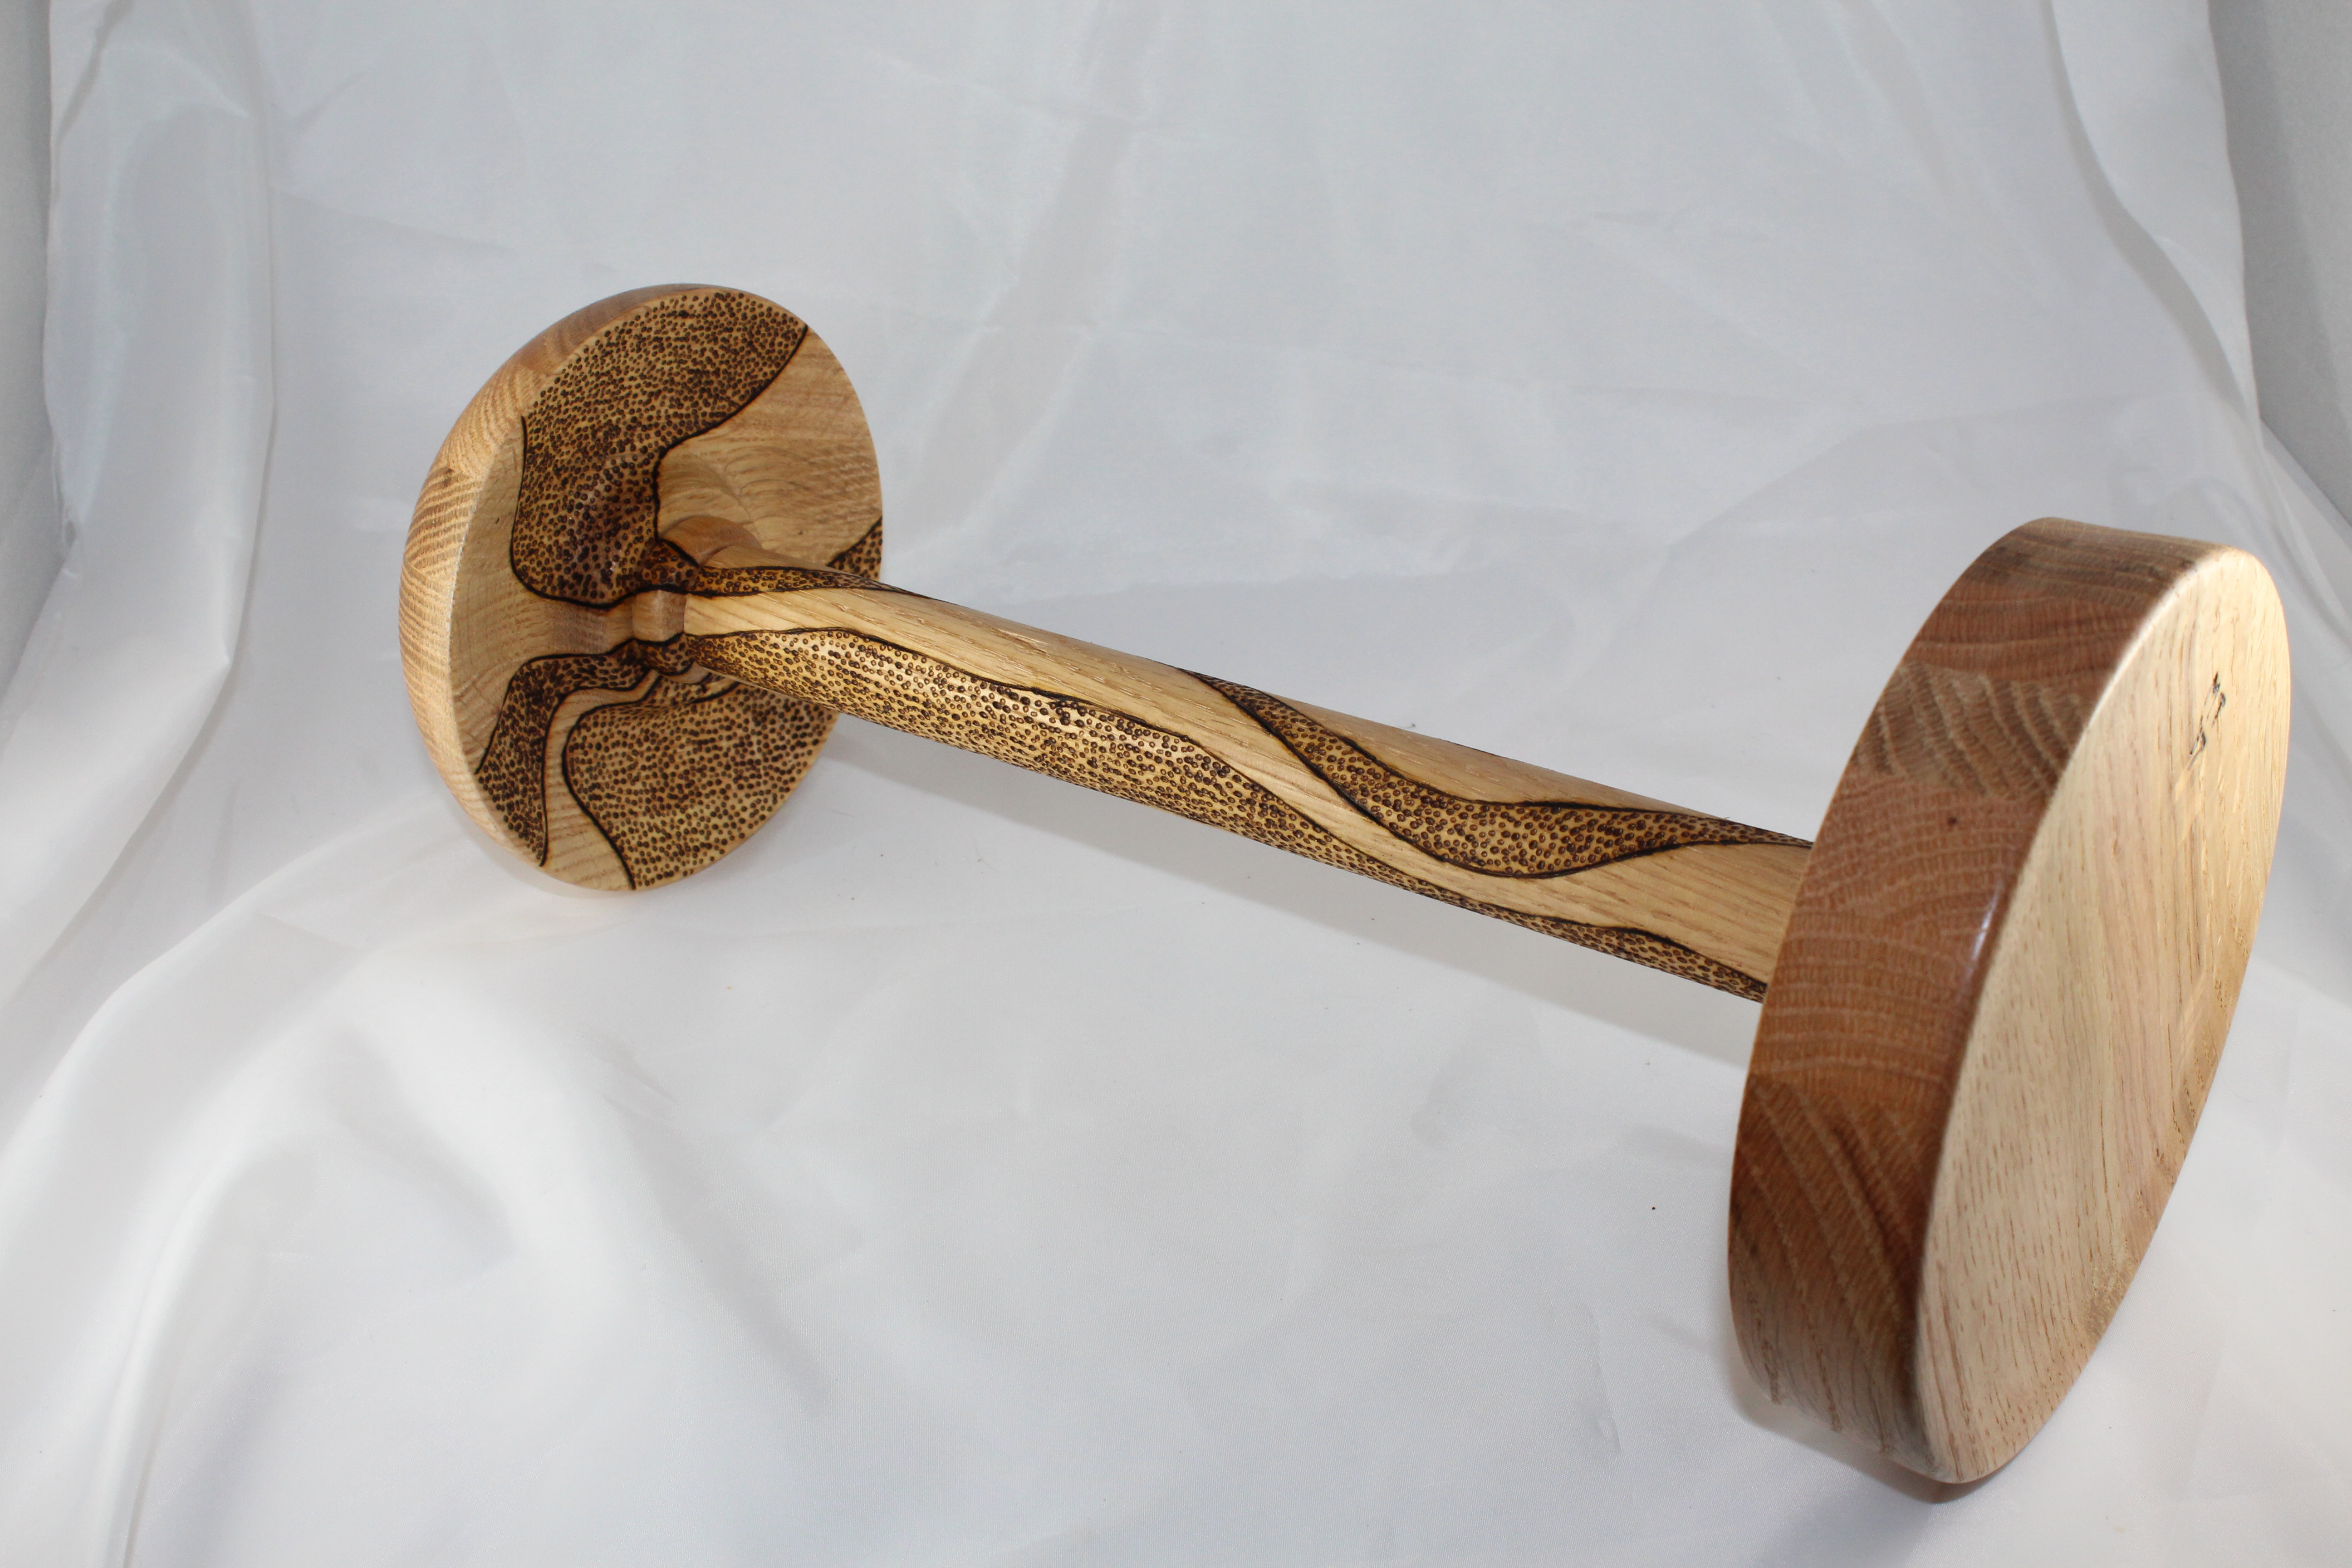
Here’s the final projects, one from cherry and one from oak. Still have a long way to go to achieve the result I have in my head, but for now, it’s at least a way to incent myself to turn out more wig stands…
Pretty simple pattern, but I think I like the look.Kinda like the texture on this one, although it’ll be about a week before I can fully move my hand again. Repetitive motion injury is a real thing!The only cool part about this one is the texture goes up under the dome.
Earlier this summer, my daughter was driving home and went past a house that was having a huge maple tree being taken down. Most kids would wait until they got home to say anything, tell their dad what they saw, then leave it up to him to decide if he wanted to do anything. Not Megan… She called and asked me if I wanted any free wood. That’s kinda like asking a pyromaniac if they’d like a new lighter. She laughed and said she’d be home in about 15 minutes. When she got here, her little car was just about to scrape the pavement, because the whole trunk and the back seat were all filled with great big chunks of freshly cut maple. After telling her how bad this was on her car, I asked her how she got so much loaded up. She laughed and said she went up to “the guys” who were working and asked if they minded if she took a piece of wood or two. Apparently, but the time the conversation ended, all the saws had been shut off and they were all loading up whatever chuck of wood she pointed to.
Here’s the first of the finished products from Megan’s Maple tree. There was a big knot on one side, and when it finished drying, the knot had split like a star and the whole middle had fallen out. The fix was to add colored epoxy. It was supposed to be a cobalt blue, but this was the first time I’ve used the dye and apparently a little goes past a long ways, so it looks black. There was also this weird deformity under the bark on one side, so I left some of that in the final product. All things considered, I’m pretty pleased with this one!
Thank you, Megan, for feeding my addiction. Love you lots!
Here, you can see the knot that was repaired. Looks pretty good! This part of the tree much have been close to where the tree was damaged, because the dark coloration is usually the first step to the wood starting to break down.Another view of the back side of the knot, along with the “weird” place on the right.
Last fall, a neighbor cut down a tree. It was a dead ornamental pear tree that I’d guess was about 15 years old or so. Some kind of bug swarmed onto it in the spring and literally ate anything green. Without any way to harvest sunlight, it was dead very quickly. It might have come back in the spring, but they decided it was an eyesore and took it down. My kids saw it, and put out the “hey dad, there’s free wood on the curb” alert. Most of the trunk of the tree wasn’t really big enough to use, but they had pulled the majority of the stump out of the ground and left it there.
Looking at the stump, I thought it would turn into something cool, but didn’t know what. I left it in the garage to dry while I thought about what I could make out of it. Time passed and it got shuffled into a corner, covered by other chunks of “curb wood” and forgotten. This summer, as I was cleaning things up, I found it again. It hadn’t cracked, but it was upside down from how I had initially left it. That’s when it hit me that I could turn a bowl out of the part where the roots were coming out, fill the gaps with colored resin, and make something different, translucent, and big enough to test out the limits of my new lathe. So in August, I started roughing it out.
After it was fairly round, I could see the parts that would need to filled with resin. Here’s the part where once again I was reminded that I really should have paid better attention in school. I vaguely remember Mr. Oyer droning on about this mystical thing called “gravity”. Something about how everything falls down, water seeks it’s own level, and an apple will smack you in the head if you fall asleep outside. Turns out, he was right. Pouring a liquid resin on a circular surface gets real messy, reall quick. I started making little check dams, using duct tape and painter’s tape to build a floor for the resin to sit on and walls for the resin to stay between. Great idea, right? Not exactly… Turns out resin will leak through any small crack in the wall and puddle wherever it lands. Also, because of the circular form, the only place you can pour resin is on the top surface of the bowl, or the inside bottom of the bowl.
The next month was spent building a little dam, pouring some resin, then waiting for it to cure. Repeat, repeat, repeat… When I thought I had it “done”, I put it back on the lathe and started to refine the shape. Three things became immediately obvious. First, the amount of cleanup that would be required for all the times the resin escaped my makeshift dam would be significant. It takes hours to scrape cured epoxy off the floor, the workbench, tools that were setting on the workbench, the lathe, and a towel that ended up just being thrown away. Second, My check dam method worked (kinda) but all too often pieces of the dam got trapped in the epoxy, so as I started to turn, there were little bits of blue and black tape stuck in the resin like that mosquito in Jurassic Park. The bowl got thinner and thinner as I worked to get those pieces turned away. Lastly, when you use tape to build a dam, it makes straight lines. When the bowl was put on the lathe, it left flat spots on the sides of the bowl, so I had to repeat the dam building/epoxy pouring steps all over again until the resin was built up past the arc.
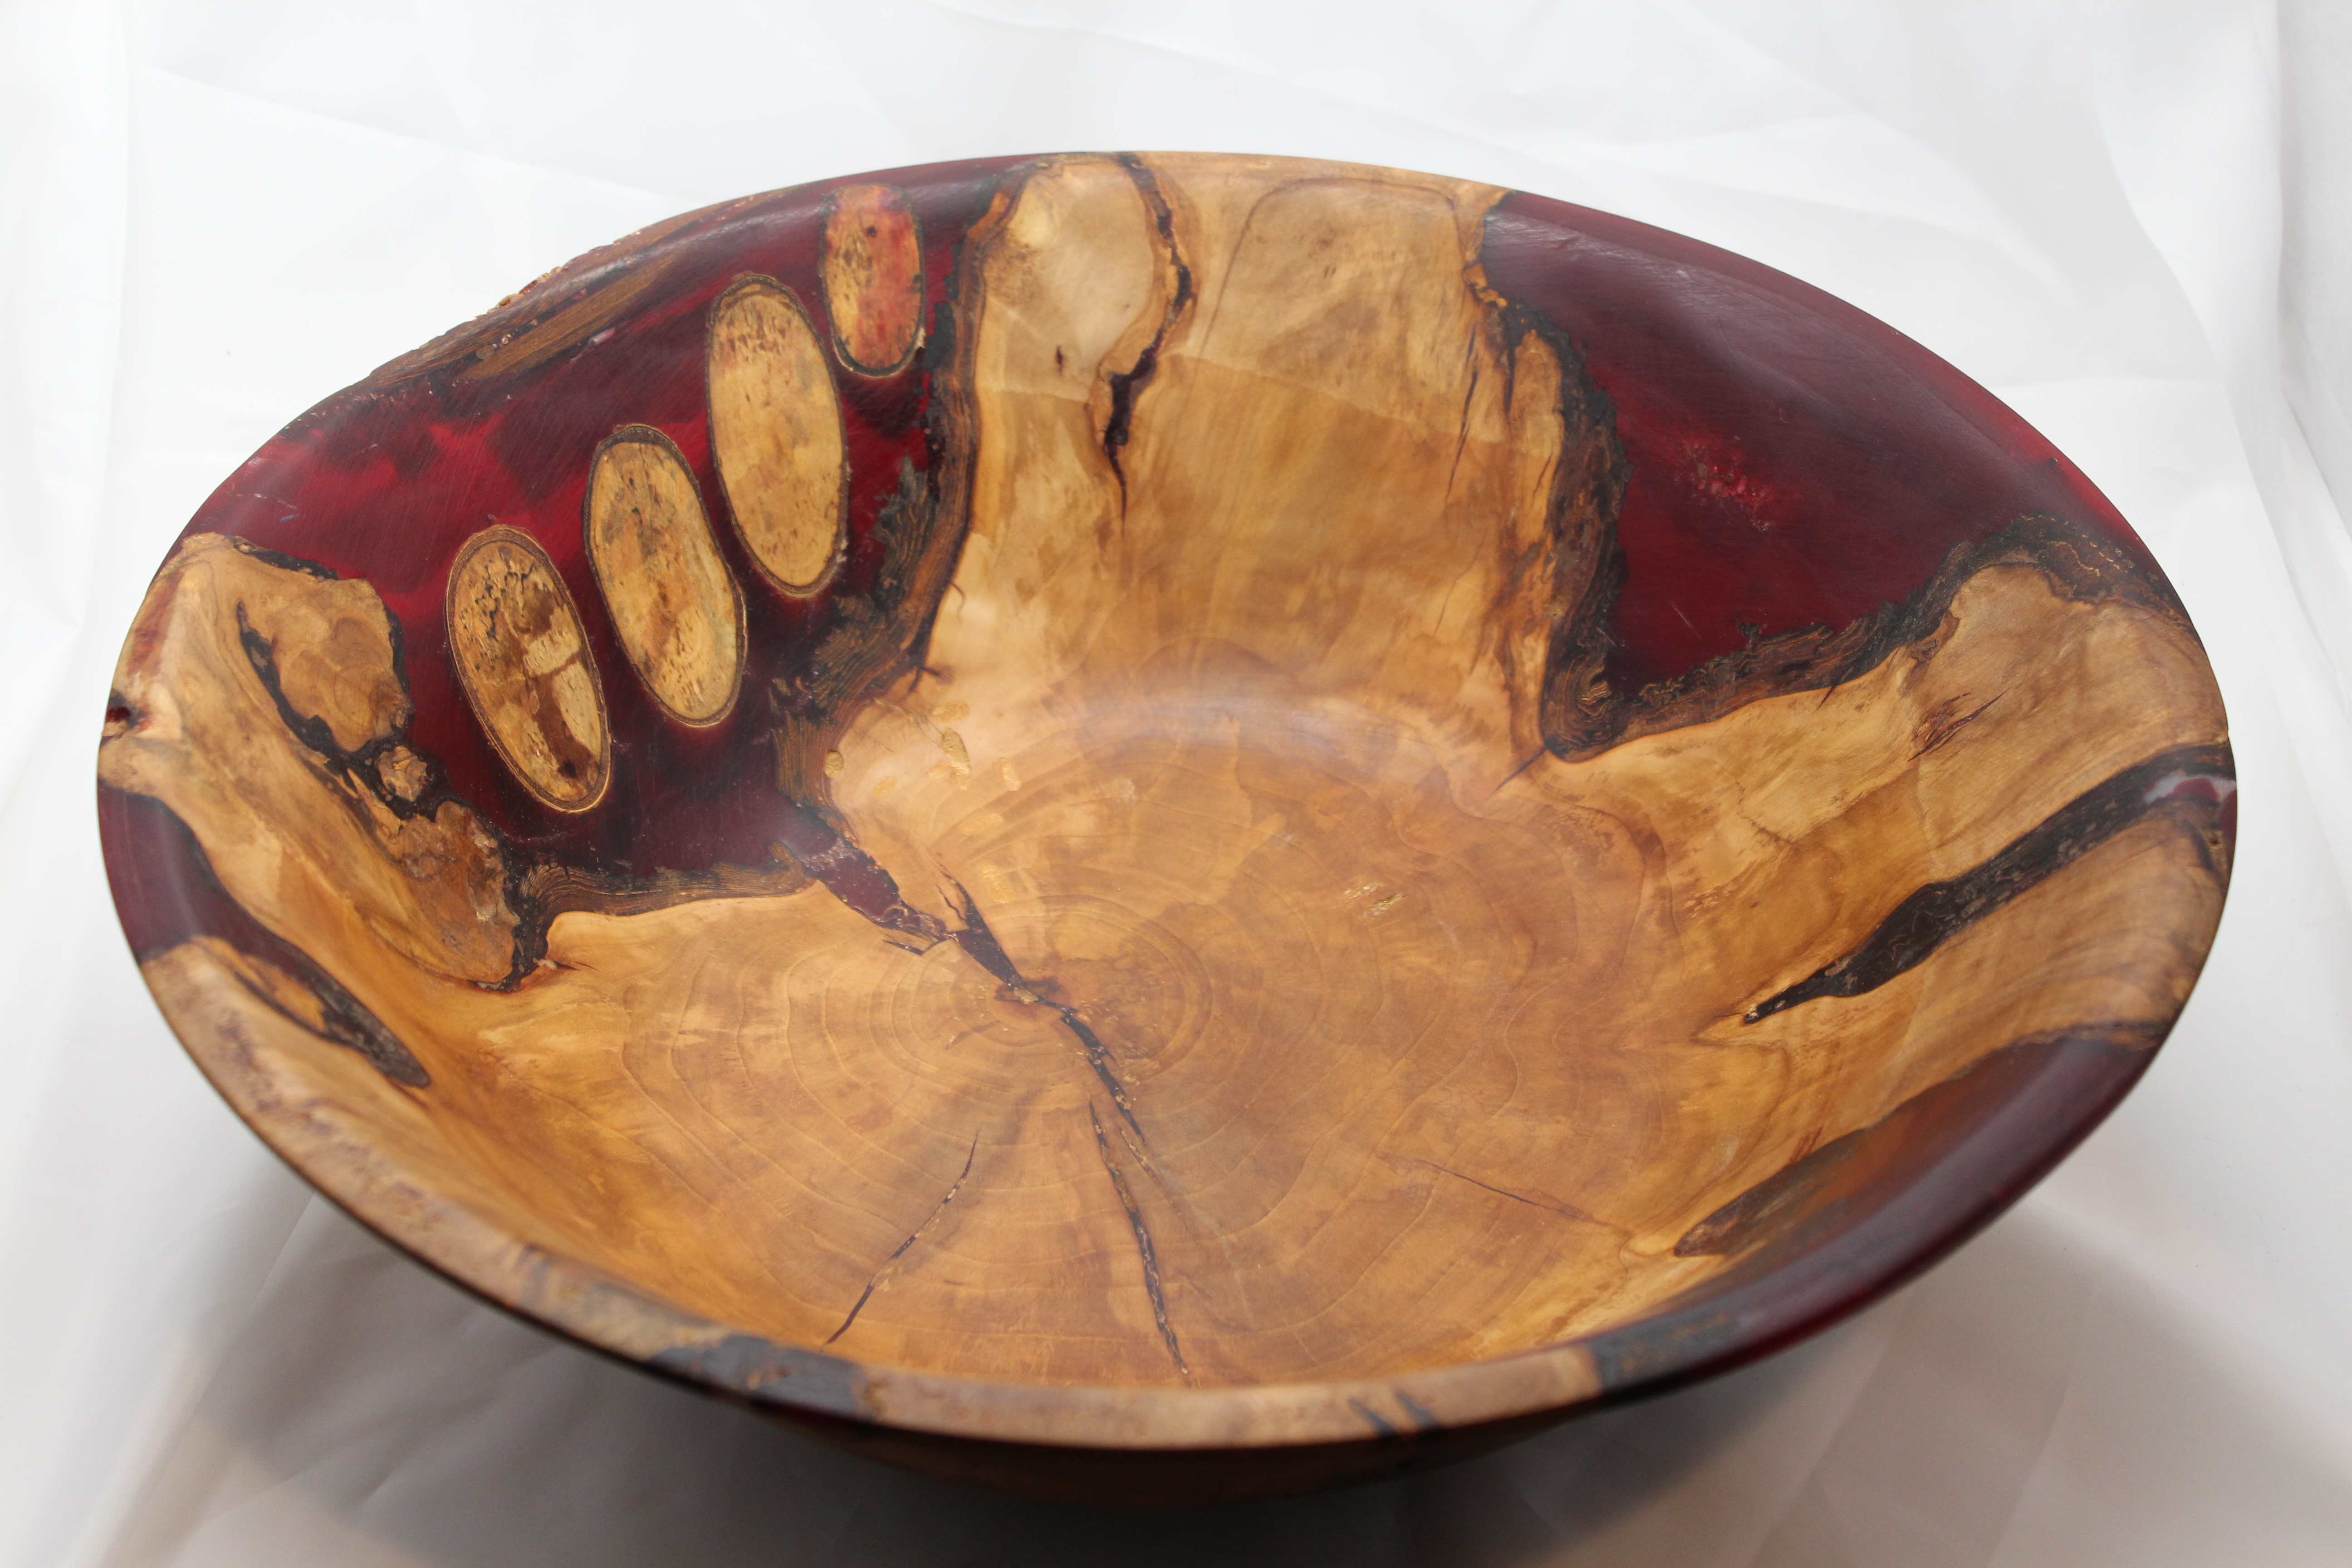
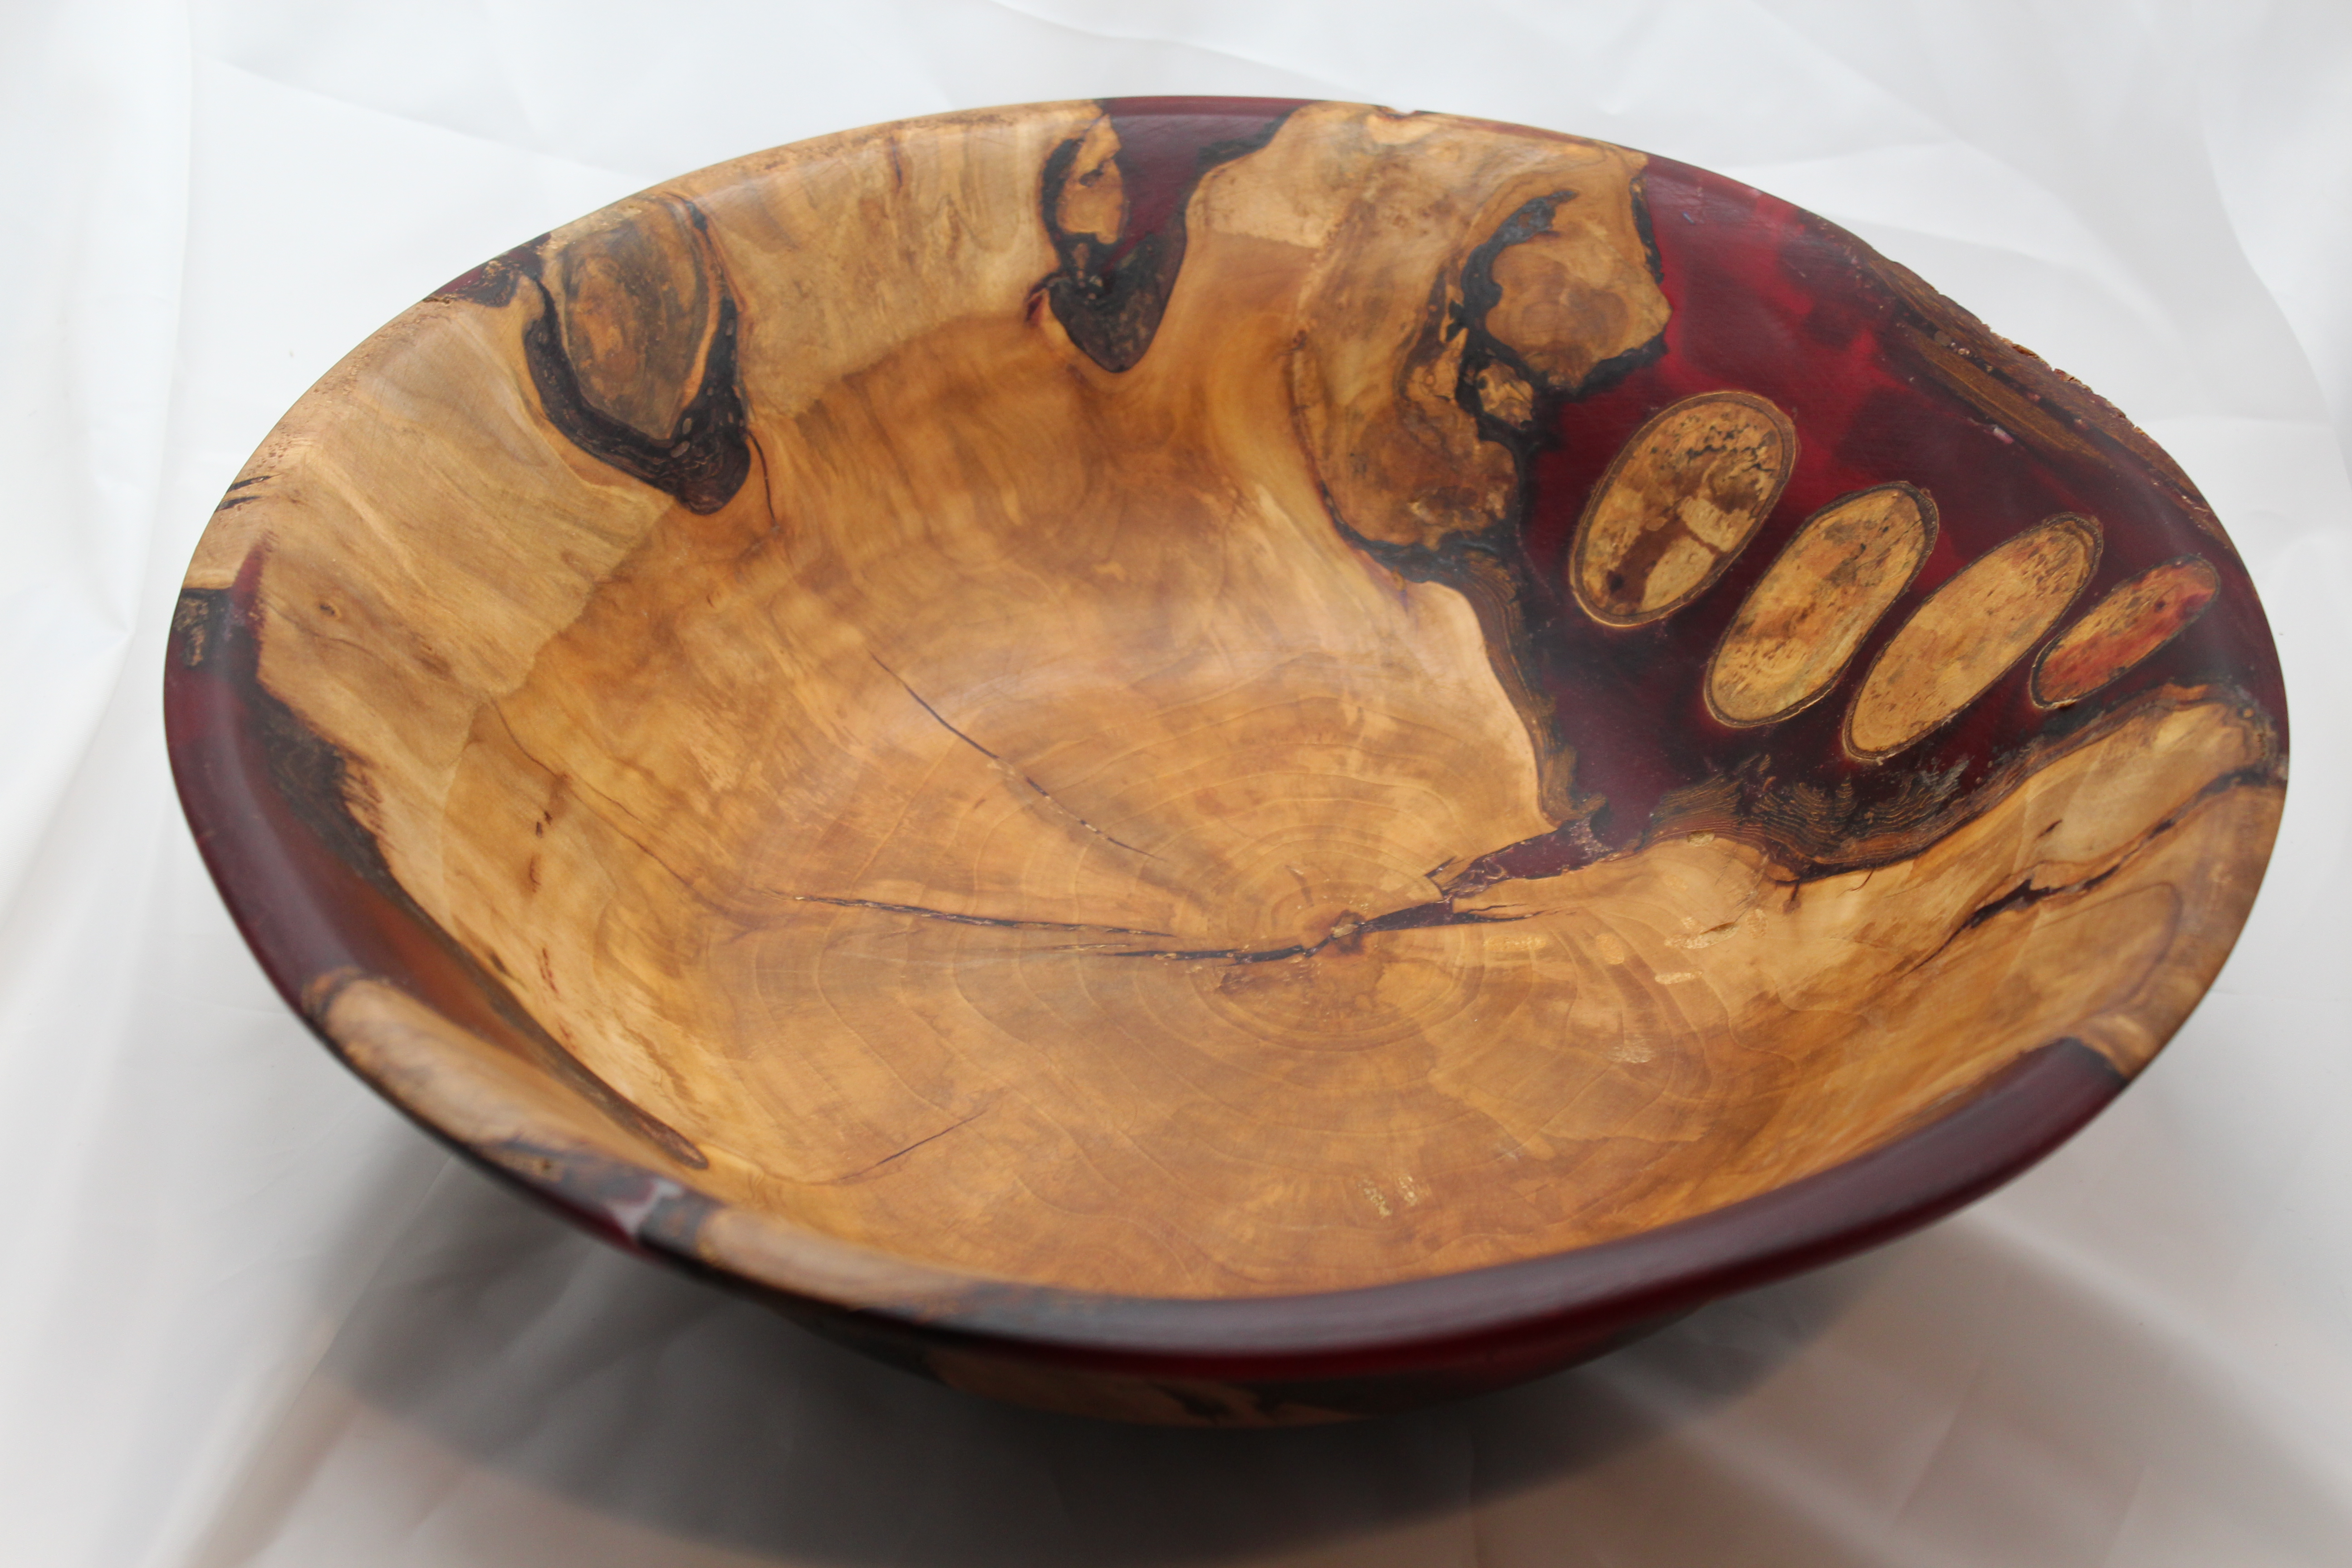
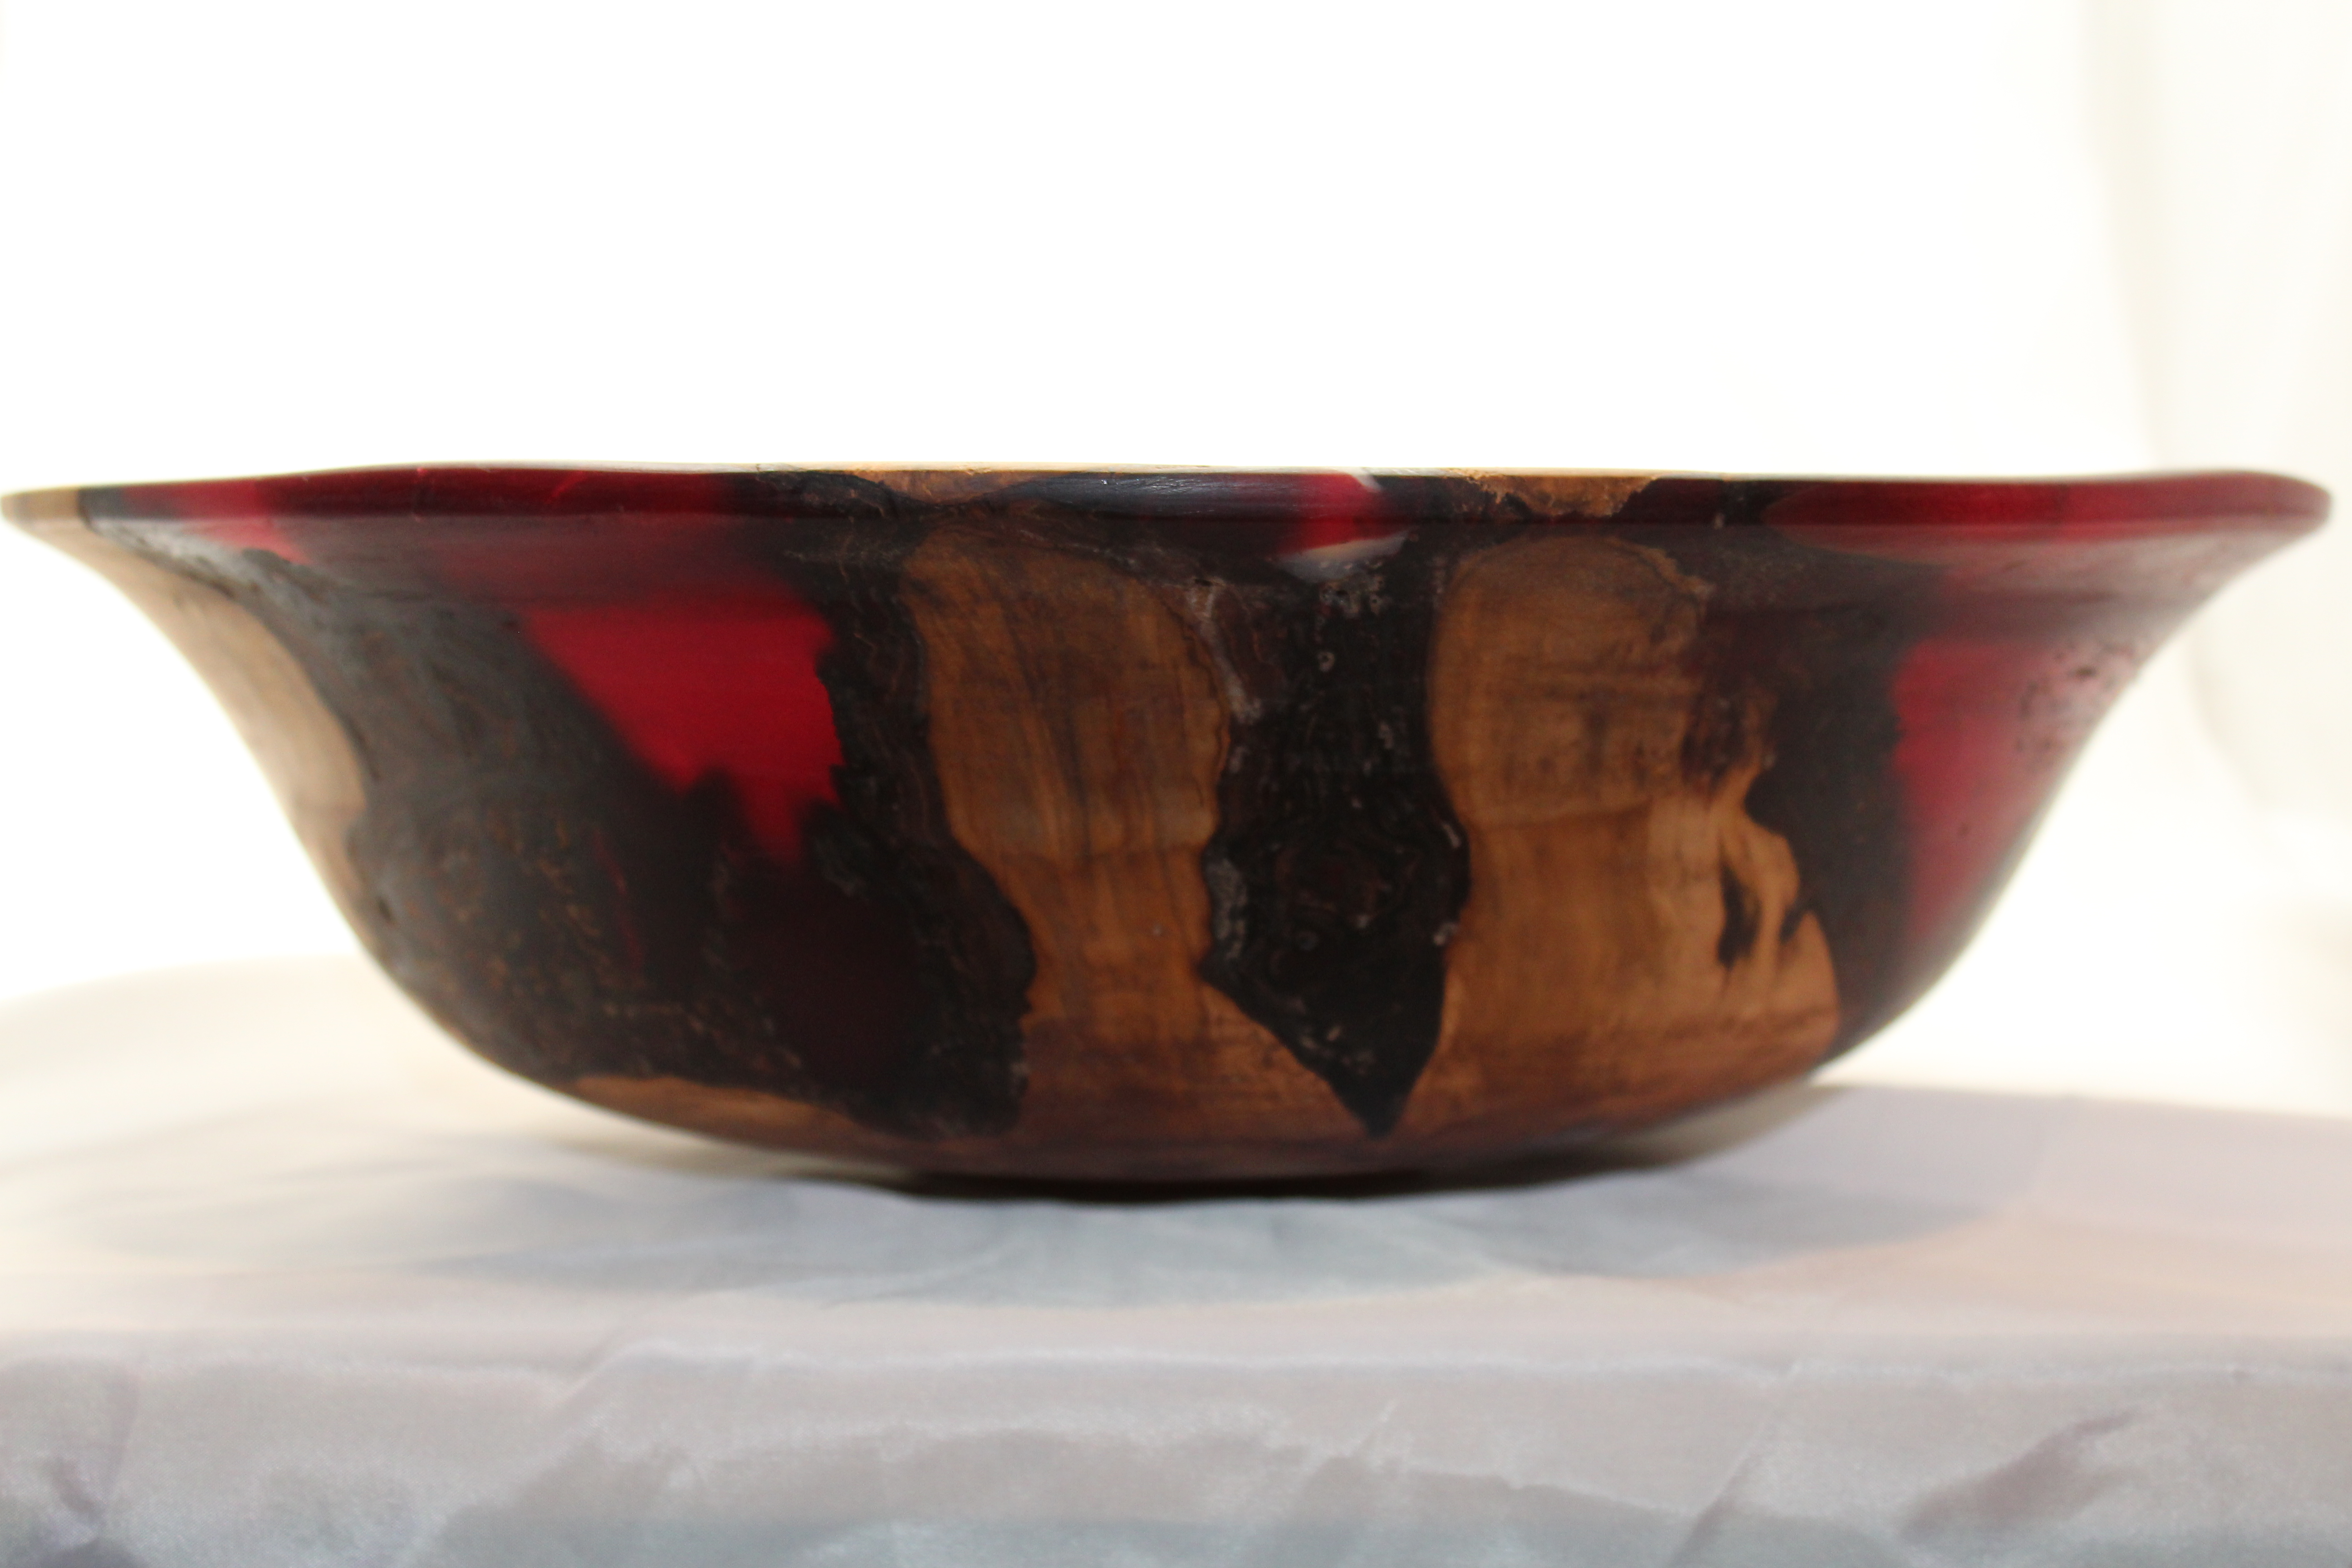
As I was finishing the bowl, I noticed something very odd. The epoxy was supposed to be like a hard, clear, plastic, but what I ended up with was a softer, almost gummy resin that would expand under the centrifugal force of the lathe. Think of finding a gummy bear the kids dropped down the back of the couch a couple of Easters ago and you’ll get the picture. The flexibility of the resin made it impossible to sand, since any grit of sand paper would dig into the resin as it flopped around. It also made it impossible to turn into a circle, since the resin would bow out as it spun. As soon as I realized what was happening, I declared this failure as good as it was likely to get and admitted defeat. $60 worth of resin and a month or so later and I ended with a bowl that looks fantastic from a distance (especially when there is light that comes through it) but is a floppy mess. This is why it is called the red resin failure.
The circle parts on the side was where a large quantity of resin would be needed to build up the side of the bowl. To save money on resin, I added some tree branches, thinking it might look kinda cool. Like the effect, but the branches were very dry and starting to spalt, so the wood started tear out, instead of cutting cleanly.another view. I really like the way the resin filled in the filled in the smaller parts where the roots were branching.From the side view, you can see the light coming through the resin. That’s the exact effect I was going for! If you look on the left side of the bowl, you can see a bump in the rim, which is where the gummy epoxy wouldn’t turn true on the lathe.
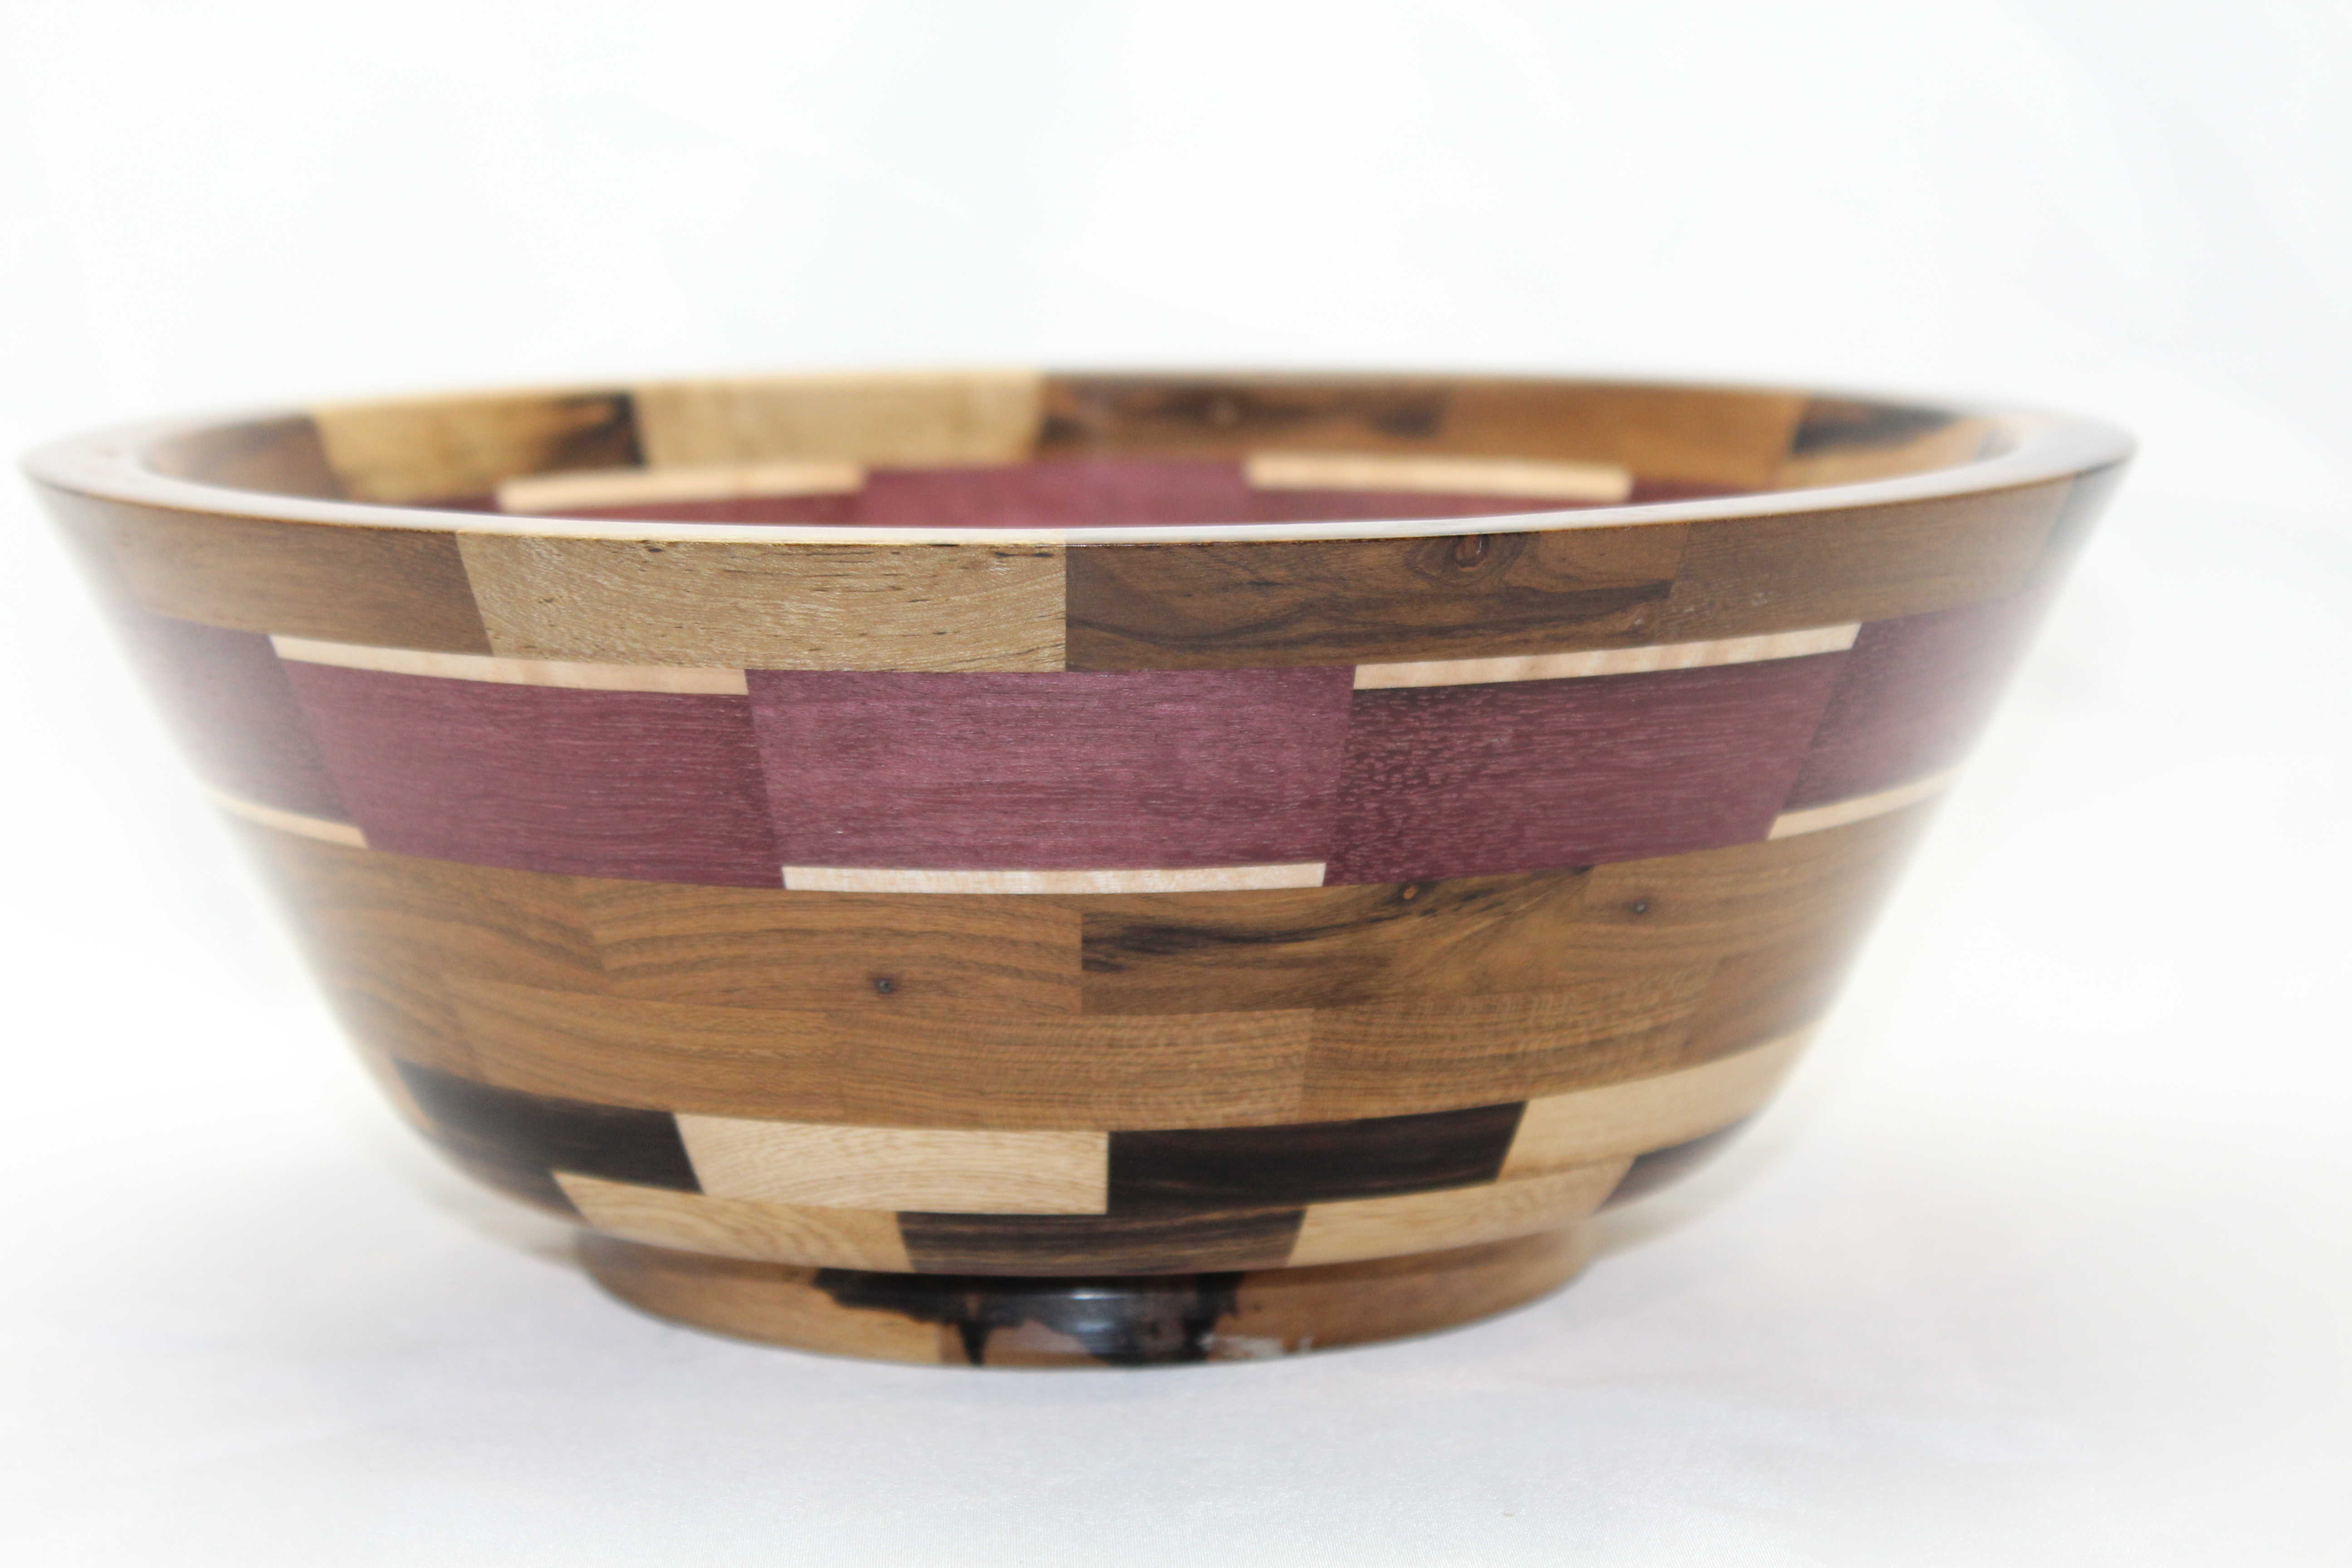
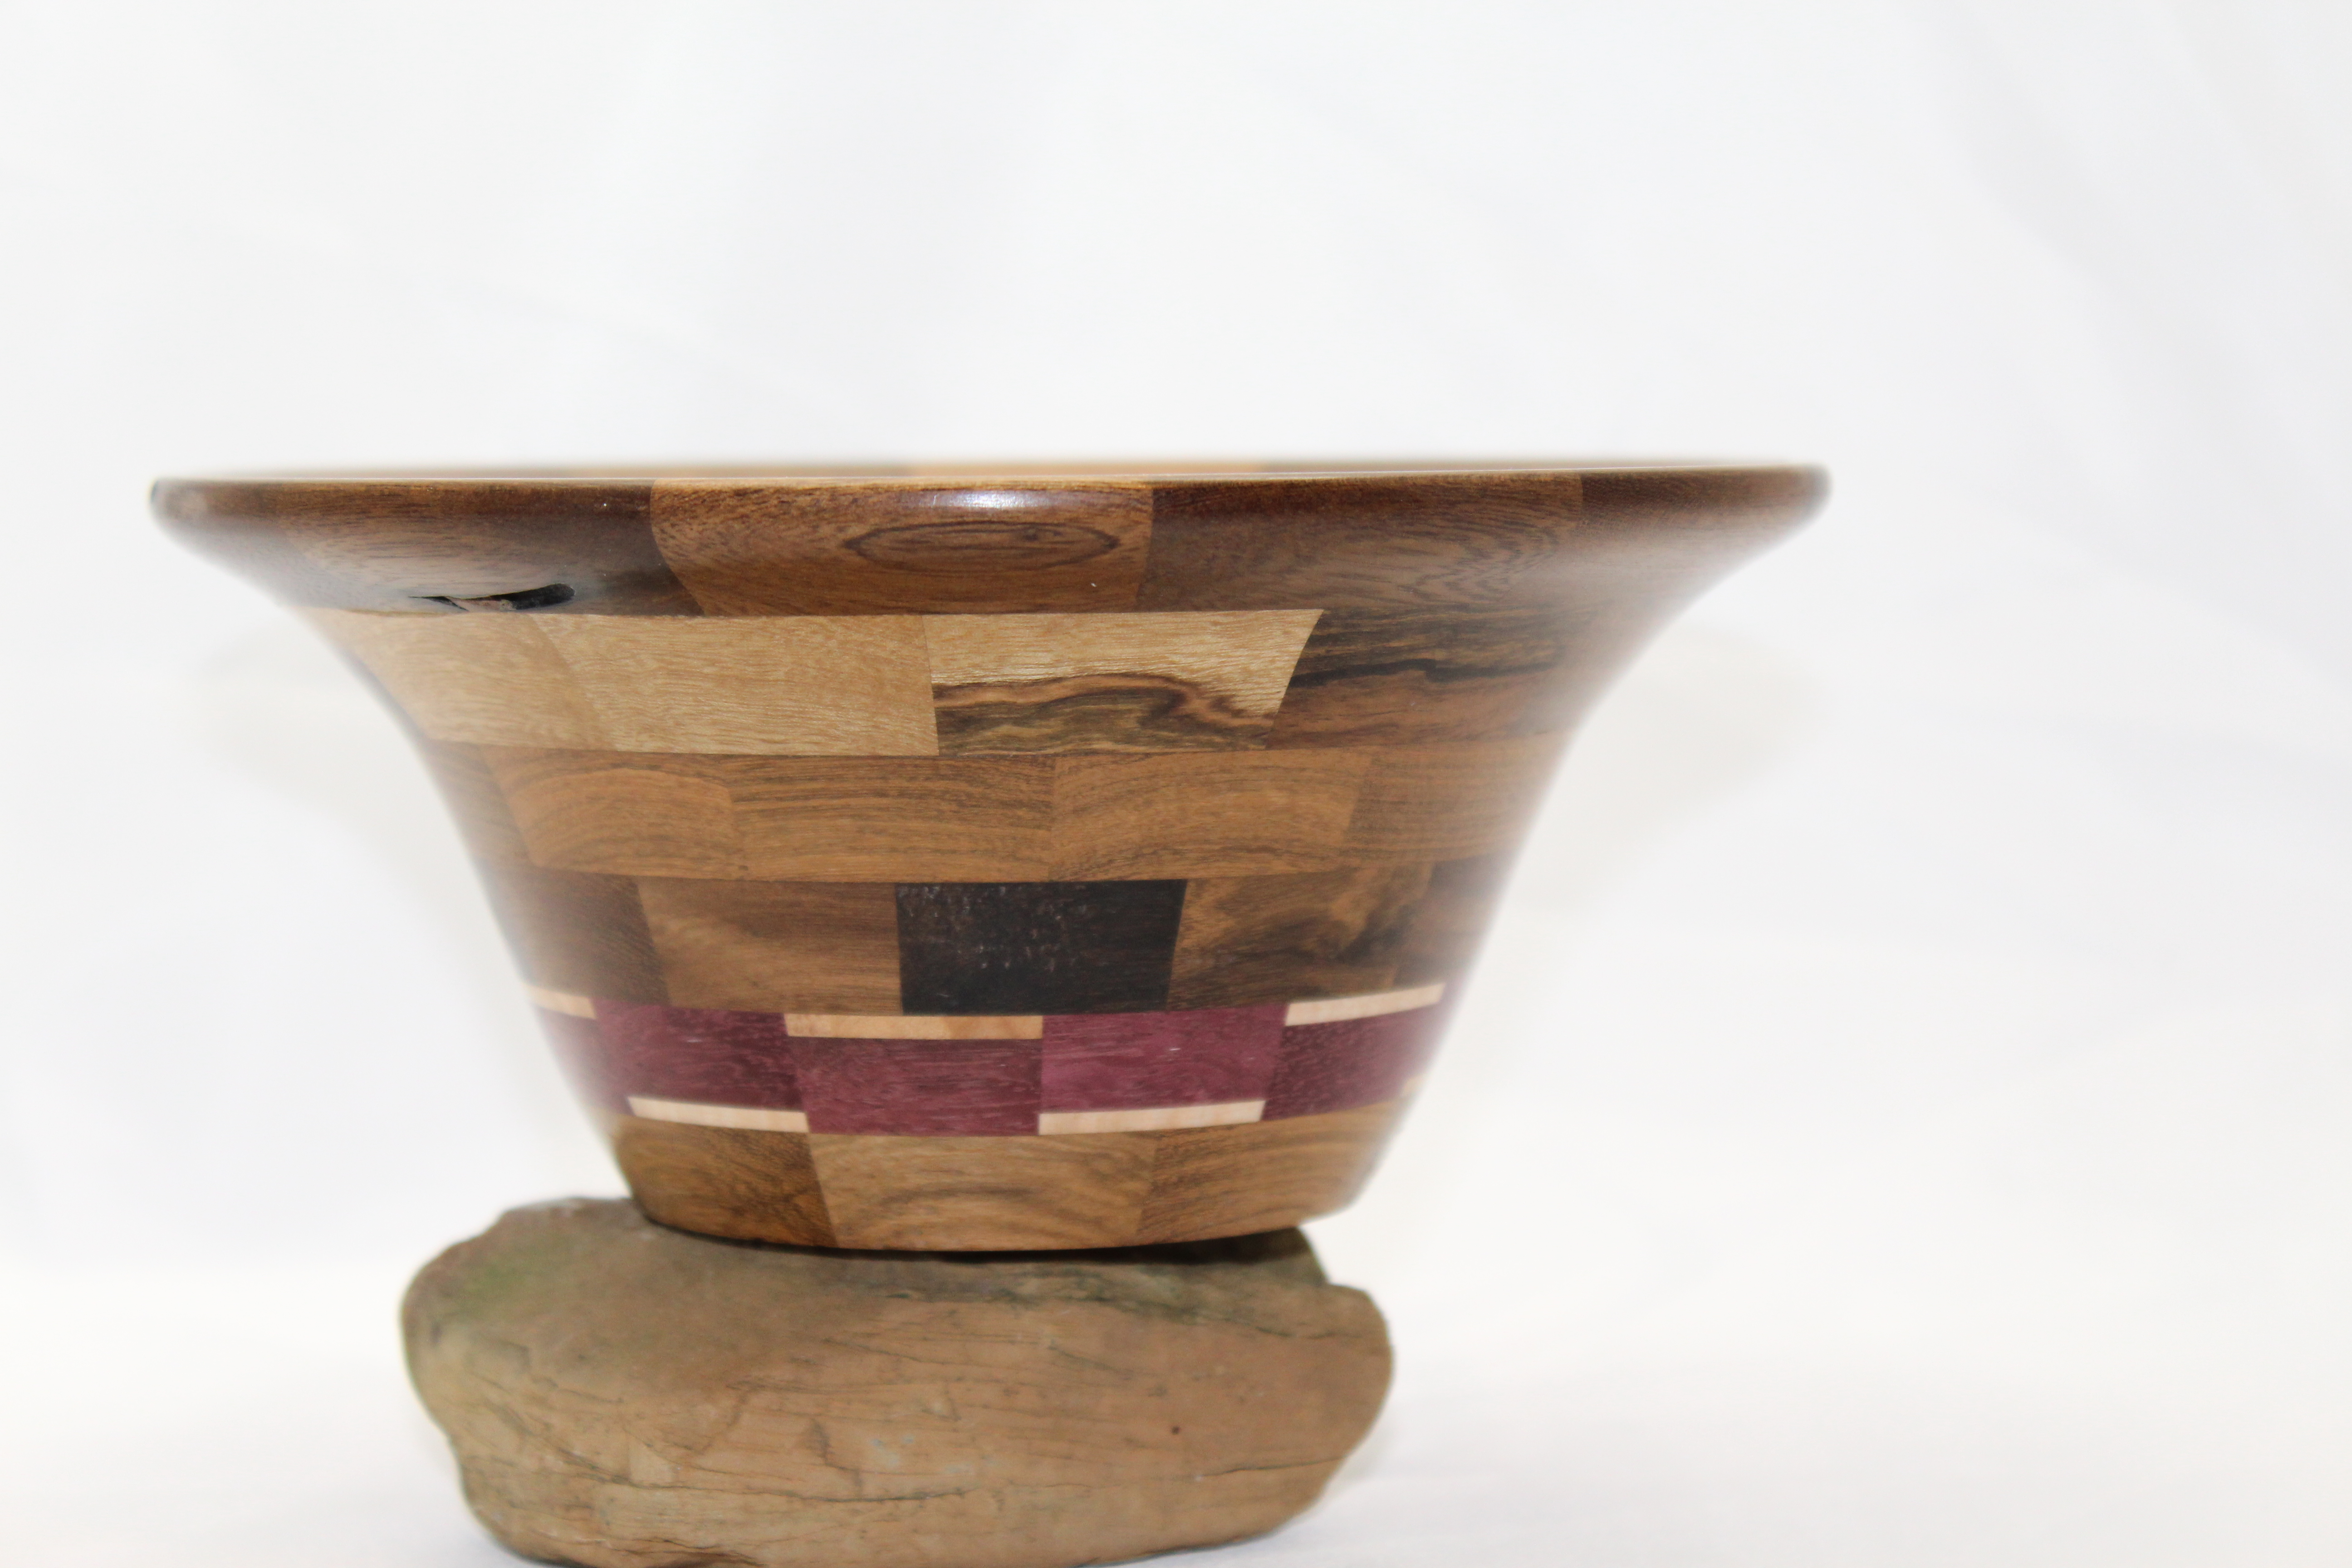
This is the bowl I had in my mind when I started on the project to make my newest grand daughter a bowl. A combination of South American hardwoods, with some purpleheart added in for a feature ring, and a little maple to break up the pattern. The turning was easy, since the Brazilian mesquite and the weird variety of pecan turn really easy. Purpleheart is one of the hardest woods on the planet, so it took a little time.
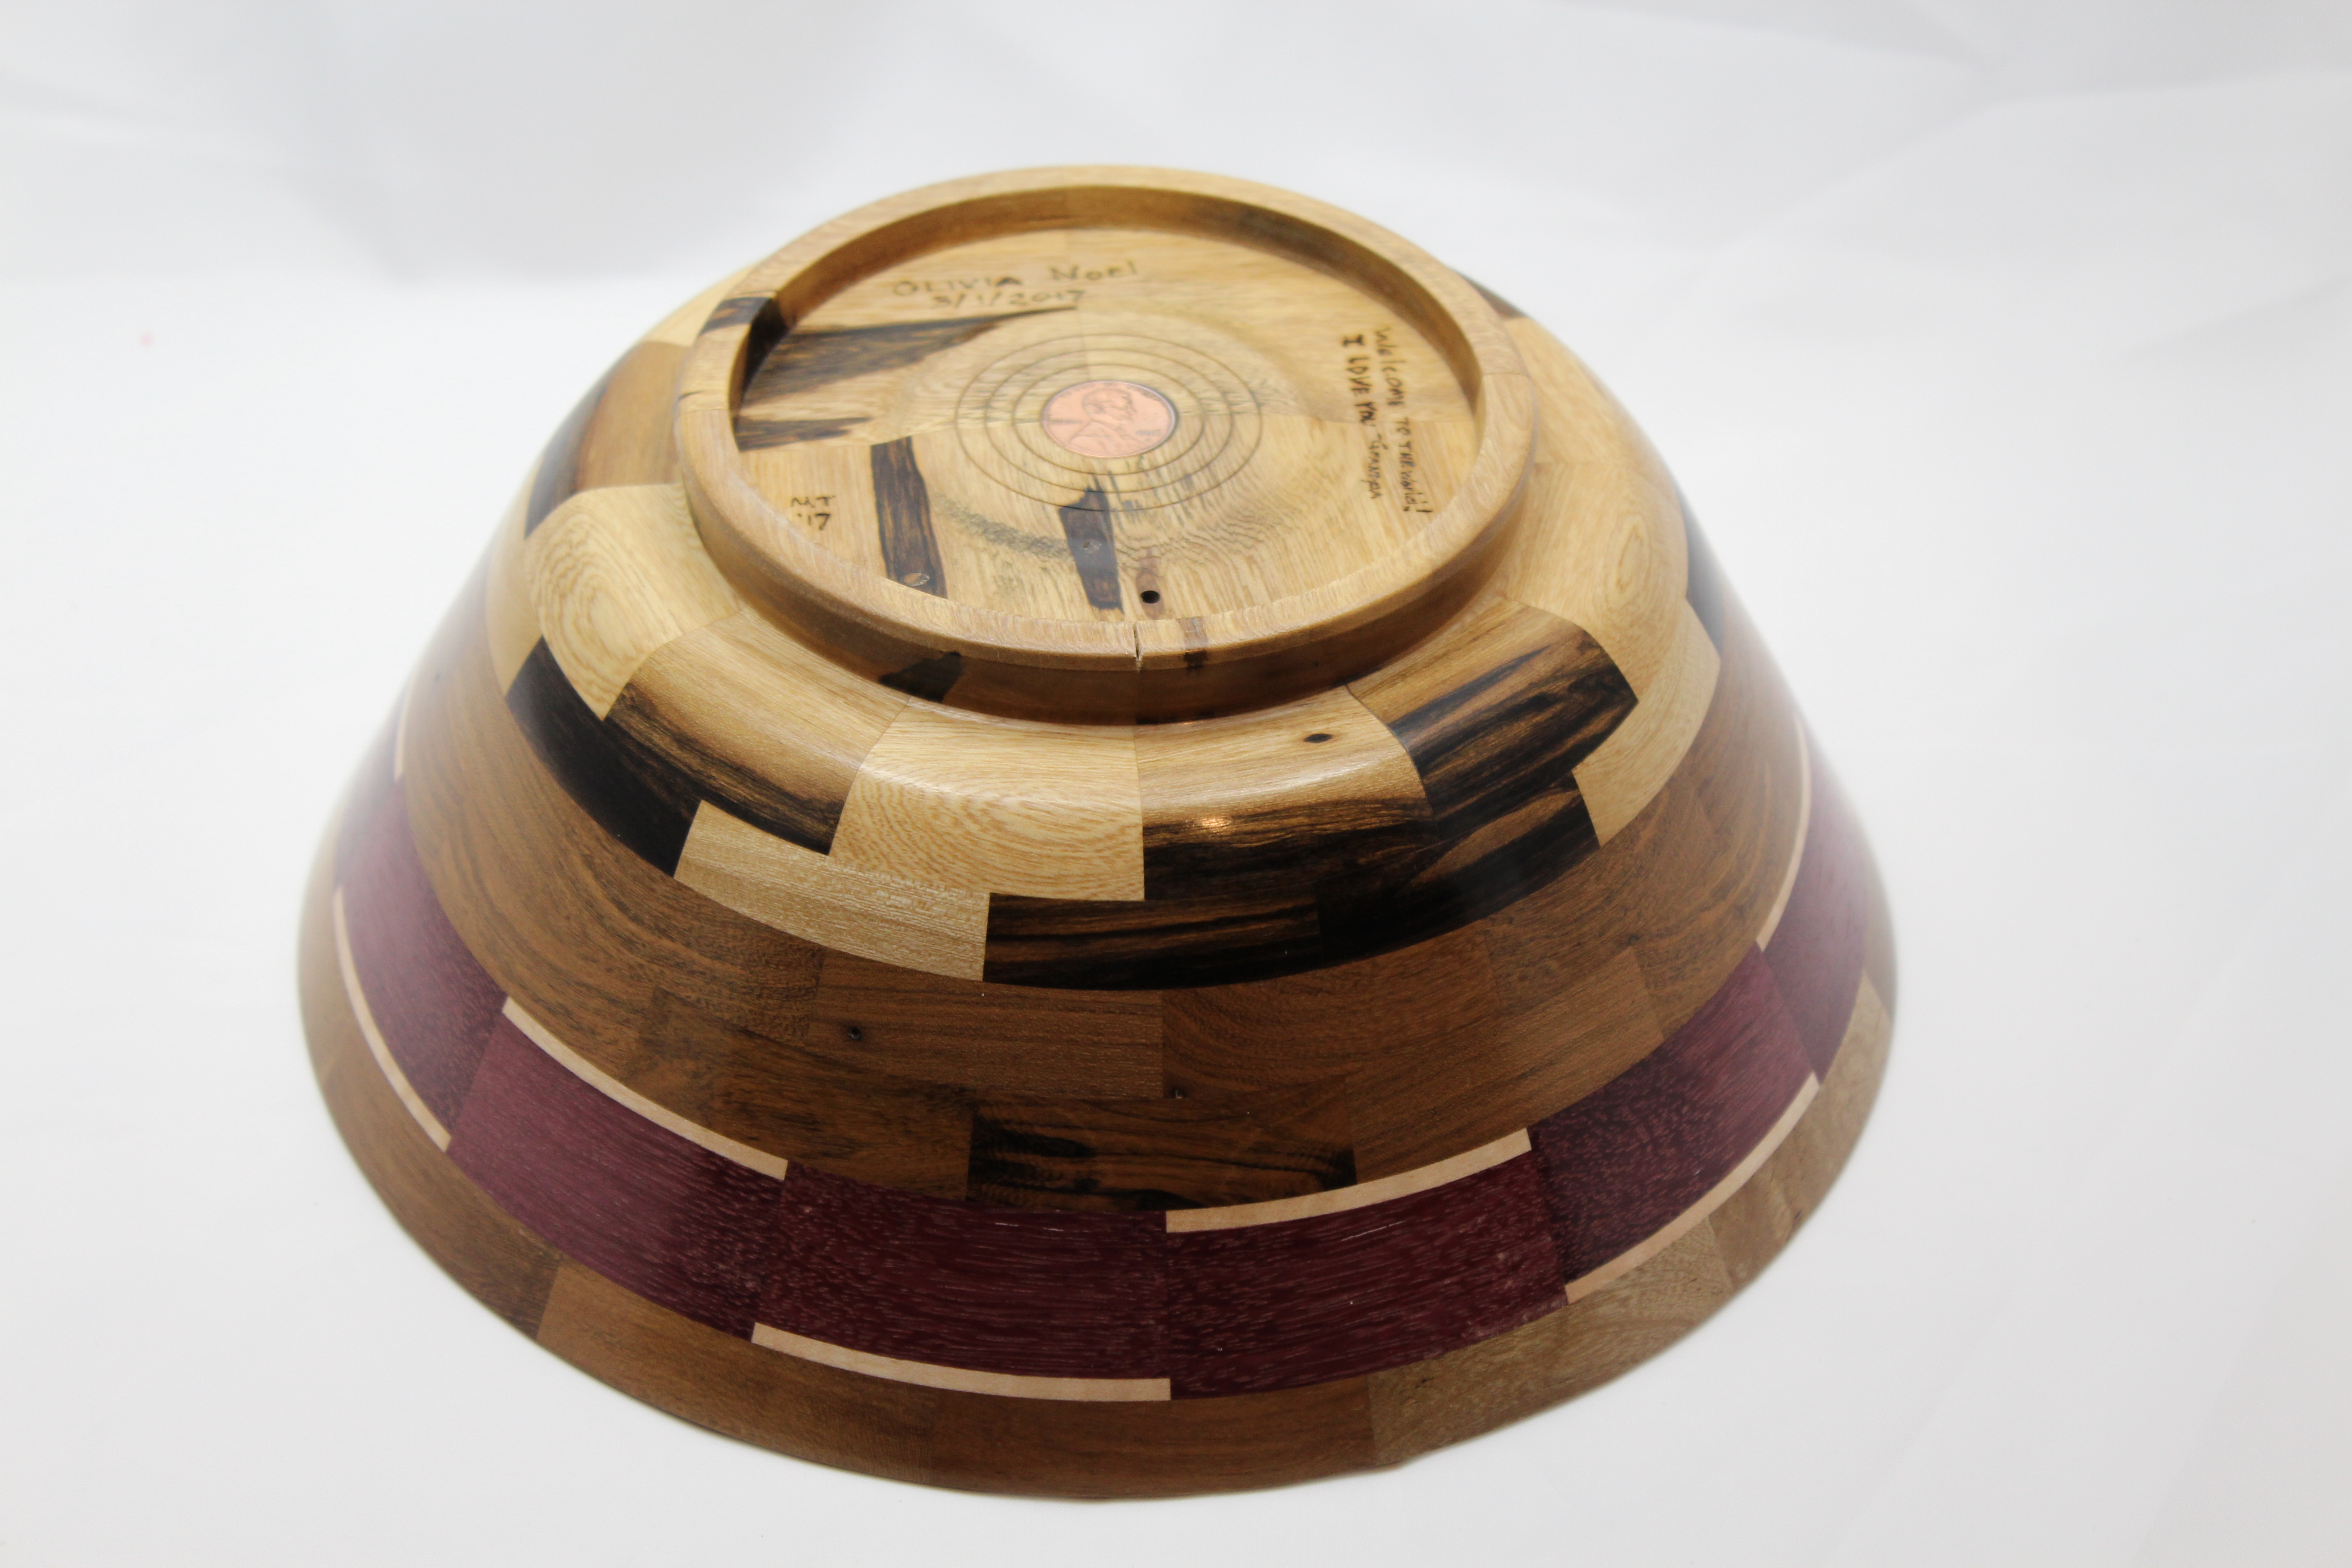
It would have been finished a long time ago, except I got the brilliant idea to inset a 2017 golden dollar coin into the bottom. I figured if she ever grew tired of the bowl, she could burn it and still have at least a buck or a coin that I don’t think will be around much longer. That sounded like an easy proposition, except it’s almost impossible to find a golden dollar, let alone one from a specific year. I tried three banks and the post office, but all I got was raised eyebrows from those behind the counter who were suspicious that anyone would actually WANT a golden dollar coin.
Finally, after 6 months of looking, I called a different bank and they had one coin in the drawer of a teller. 15 minutes later I had the coin in my hand and a smile on my face! When I got home, the smile was replaced with a series of cuss words as I realized the date on a golden dollar is not on the front of the coin. It’s not even on the back of the coin. The brain trust that designed this useless pocket fodder decided to put the date around the edge of the coin. The edge. That little bitty strip that no one pays attention to. If it were inlaid into the bowl, the date would be hidden and there would be no logical reason why it was ever done. Looking at my nightstand, I had a brand new, shiny 2017 penny and decided that I suddenly liked Abraham Lincoln a lot more than sack-a-whats-her-name, and finished the bowl.
This one is going to Olivia, for sure. Still not sure what to do with the others…
Side view. The purple heart will fade over time as exposure to UV rays turn it into a very dark reddish brown color, but for now, I love the look.top view. The segmented points of this one also left a hole, but they were plugged with a combination of maple and walnut.bottom view. I like the nice, shiny penny in the bottom. The wide base will make it much, much more stable, so later when she starts to put “stuff” in it, it won’t be tippy.
When my third grandchild was born, I was reminded of the tradition I had started of making a bowl for them. Earlier this spring, I detailed the issues I was having making one bowl, when a mental lapse and bad math skills left me with three segmented bowls, any one of which could have been good enough to give to my newest grand daughter. (http://www.toonturning.com/?p=990)
I finally got around to finishing the second bowl. This one took awhile, because the bottom segmented ring didn’t come together in the middle, leaving a little jagged, round hole right in the center. I could either make another layer for the bottom of the bowl, or do something to patch the hole. Either work work, but neither felt like the right thing to do, so the half finished project set in the corner.
Today, while looking at the stack of unfinished projects, I got a combination of shame over my laziness in having so many and embarrassment over some of them that really are too ugly to finish. When I saw the second segmented bowl for Olivia, it suddenly hit me that if I added another layer on the bottom, the bowl would be way too tall for the width of the bowl, so the only option I had was to plug the hold. Then I realized I had an oak dowel rod that I bought for another project and the end grain pattern on the oak would actually look pretty good. Twenty minutes later, the second bowl was finished. I still have the delemma of keeping it, or giving it away…
side view. it looks like a crack in the rim, but that’s just coloration within the wood.top view. The plug for the hole in the bottom turned out really nicely on this one.
I fully confess that this idea is not mine, it’s all over the woodturning sites on the internet. Each time I’ve seen a finished piece, I think, “well that’s pretty cool! I wonder if I could pull that off?”
Well, yes!
Yes I can…
I love the way the half turned pencils show their colors…
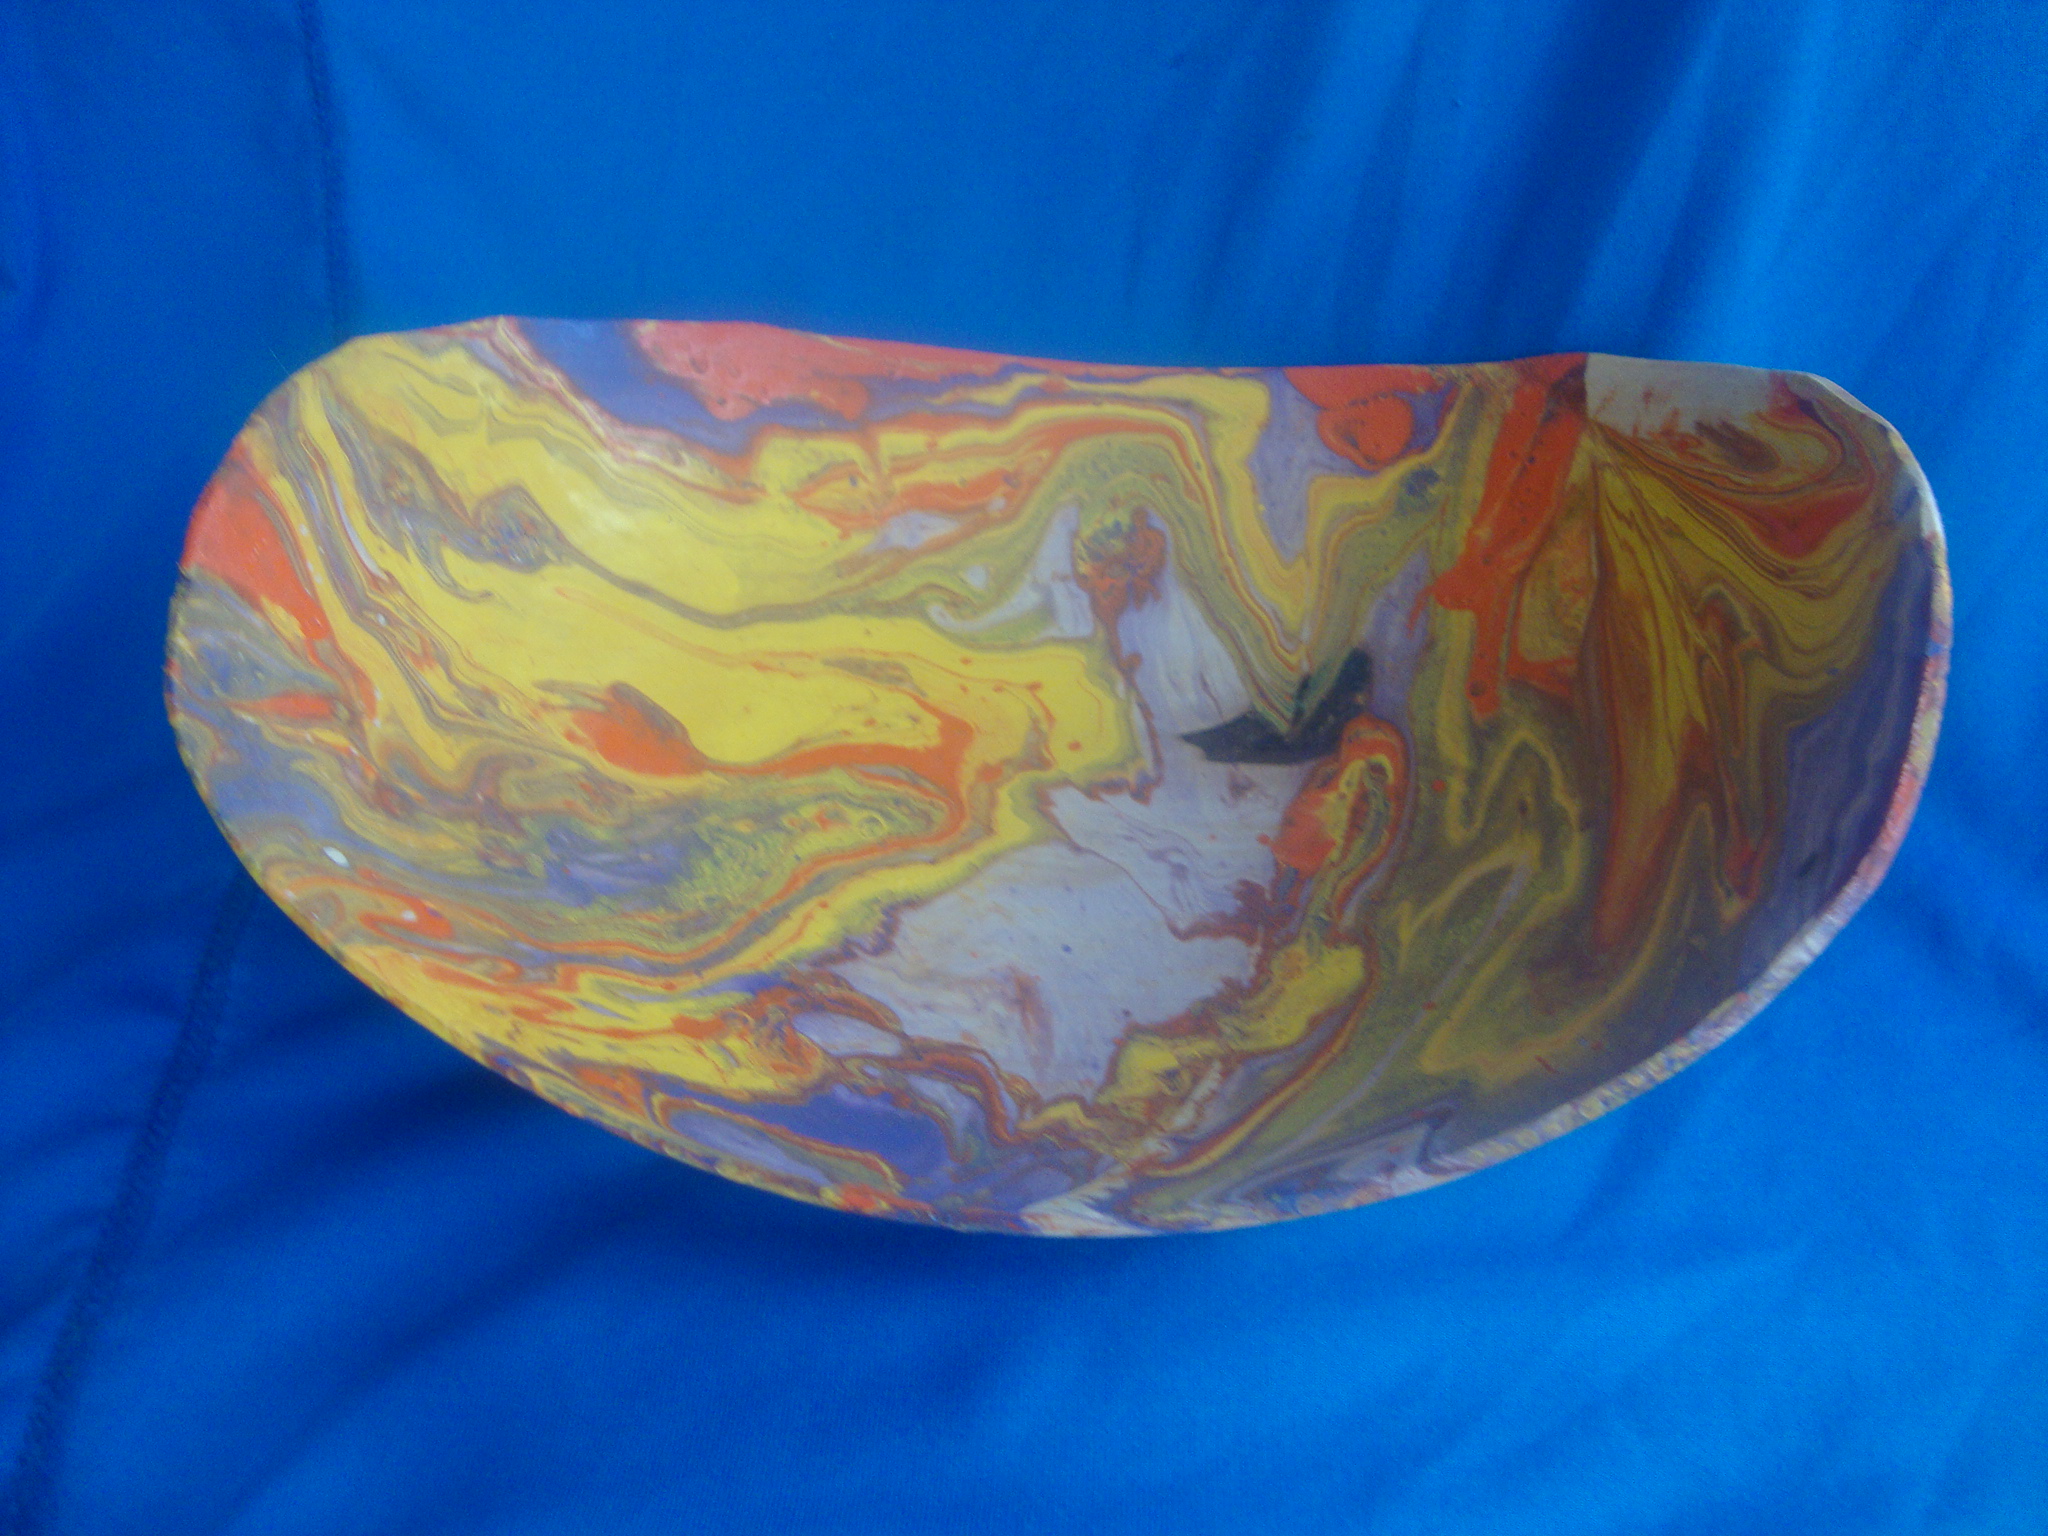
Earlier this month, I made a shallow dish, but thought it looked plain. To fix that little issue, I decided to try a paint dipping technique, courtesy of a couple thousand You Tube videos. If done right, it will make some really cool swirls on the item being dipped. If done wrong, it will make a gloppy, sticky mess! For a first attempt, there was much in the way of learning lessons to be taken away:
DON’T put any finish on the piece before you dip it, because the paint may not stick.
DON’T put too much of any one color in/on the water, or you’ll get a piece fully dominated by that color.
DON’T use a container for dipping that you ever want to use for anything else, because it will be completely ruined – OR – make sure you put some kind of liner in before you fill it with water.
DON’T use a container with a small surface area to save paint. You’ll end up with a splotchy spot because there won’t be enough paint on the water surface to cover the whole project.
DON’T save time by using cold tap water, the paint won’t disperse enough if you do.
DO wear gloves of some kind, or you’ll get spray paint all over your hands.
DO keep a supply of mineral spirits readily available to clean up your hands because you stupidly think your hands won’t get dirty. They will. Almost instantly!
DO figure out a way to attach some kind of handle to your piece. It’ll keep your fingers out of the way of the paint and avoid a blank spot on the final product where your fingers were clamped on.
DO wear some kind of breathing protection, because when spray paint hit water, it will quickly become breathable. No coroner wants to see Technicolor lungs when you get to their table…
Here’s the final product. I’m thinking the next wig stand that I make for the cancer patients will have a much different visual appearance.
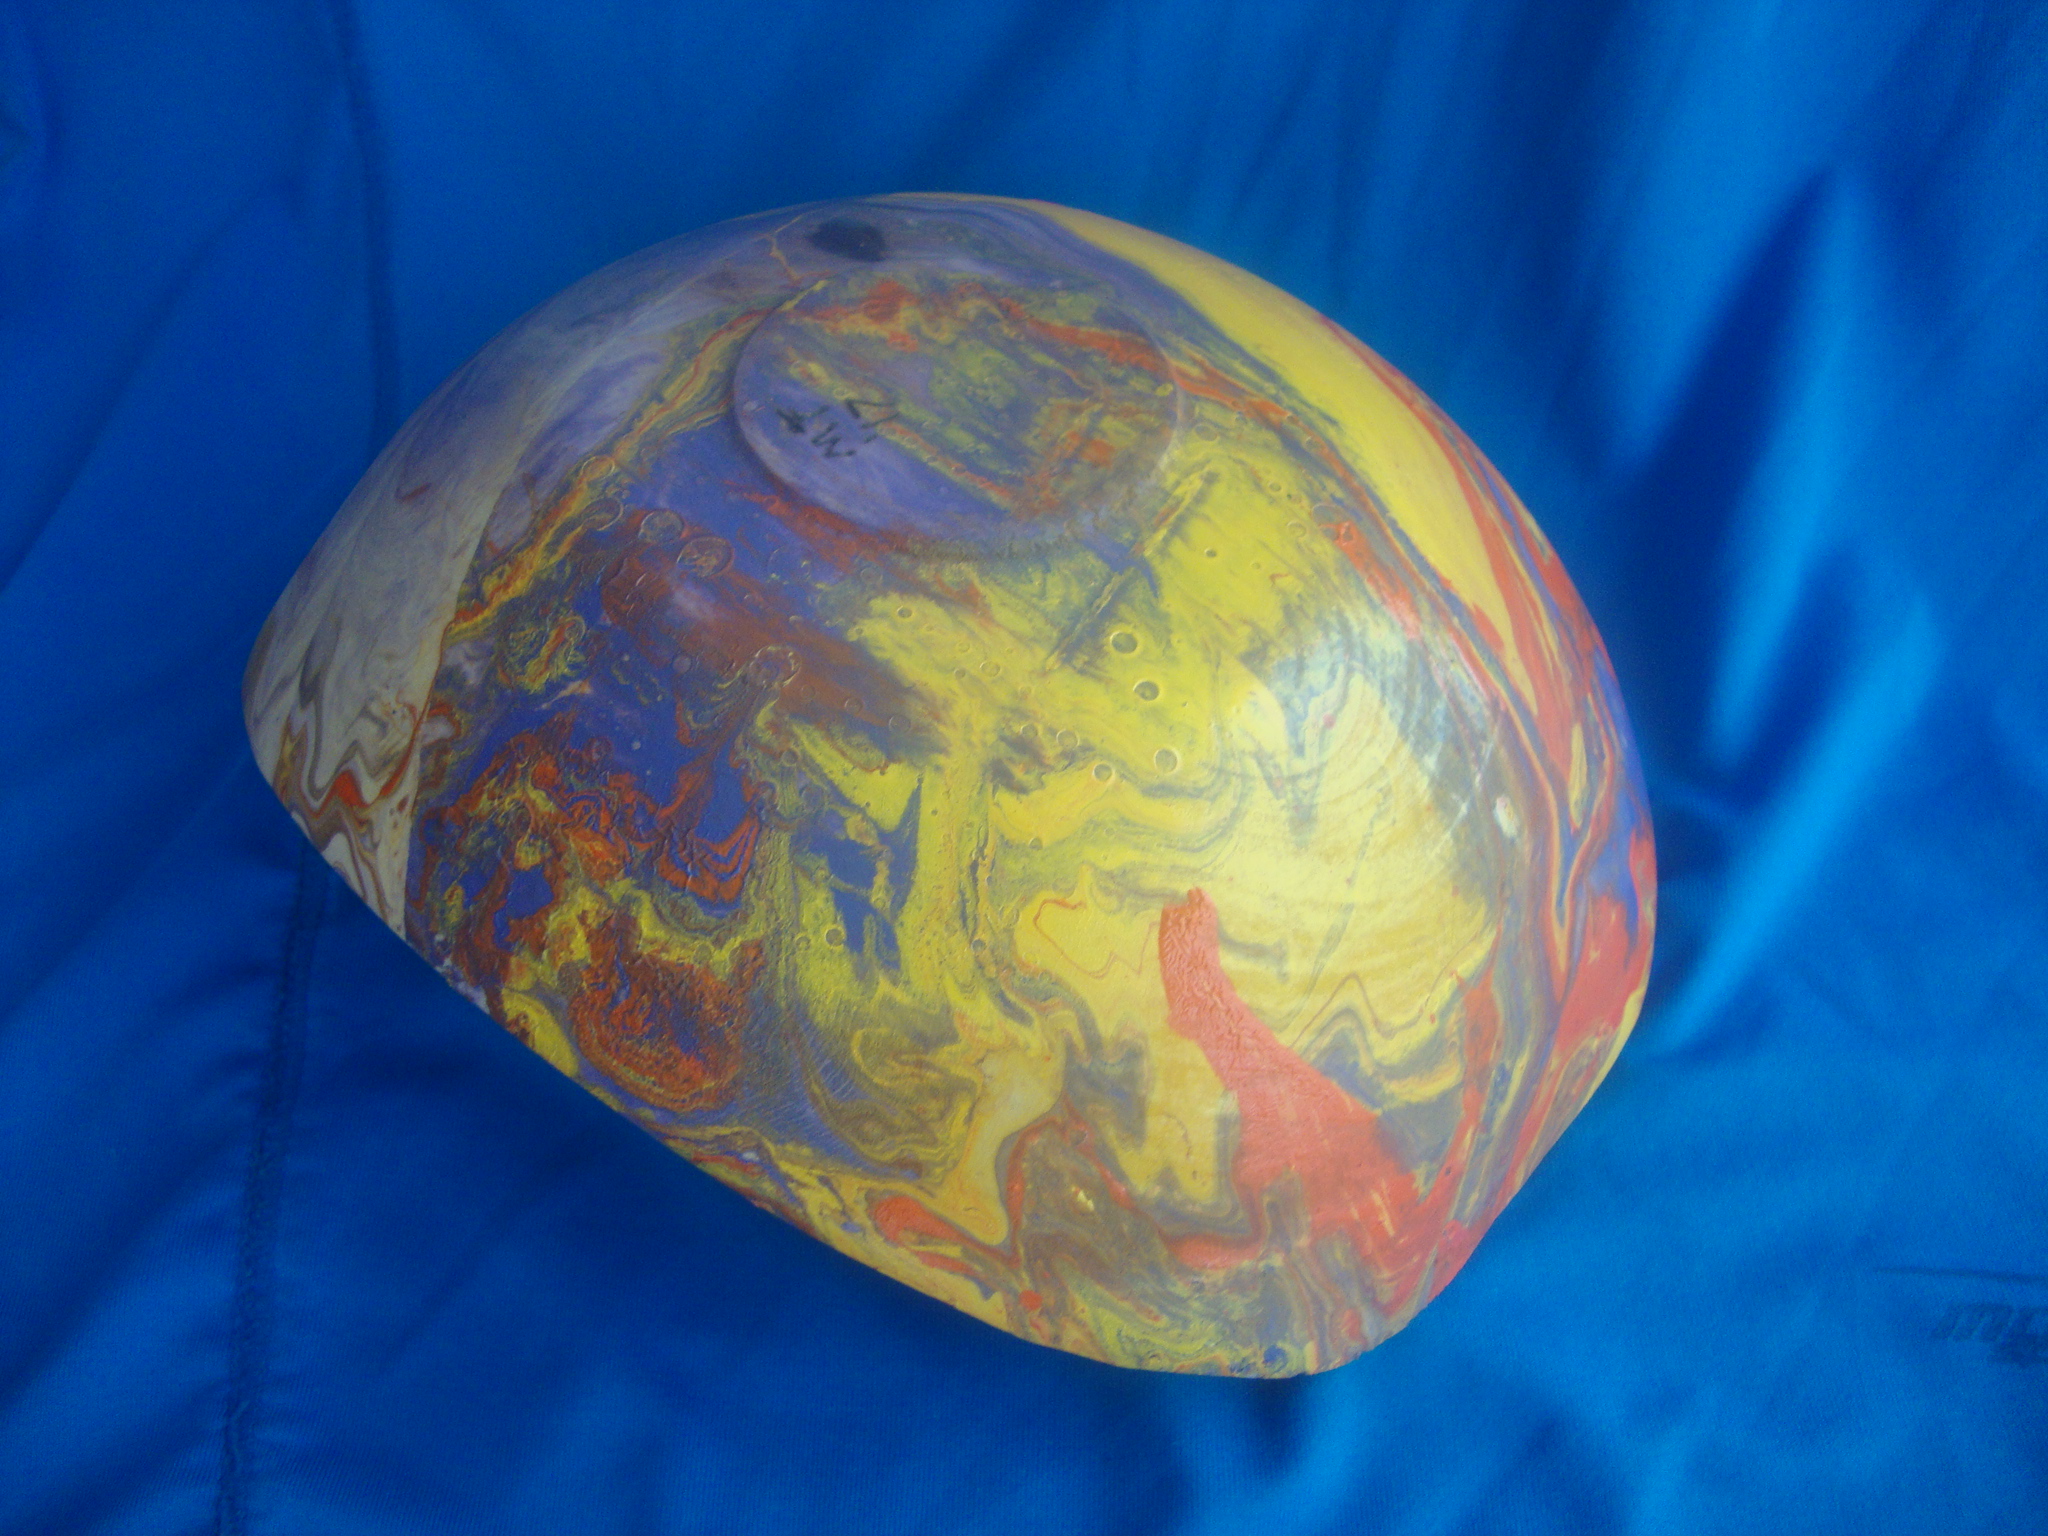
Top view. Kinda like the randomness of the colors.bottom view. Not the lack of paint on the left hand side. It’s actually a dull purple.
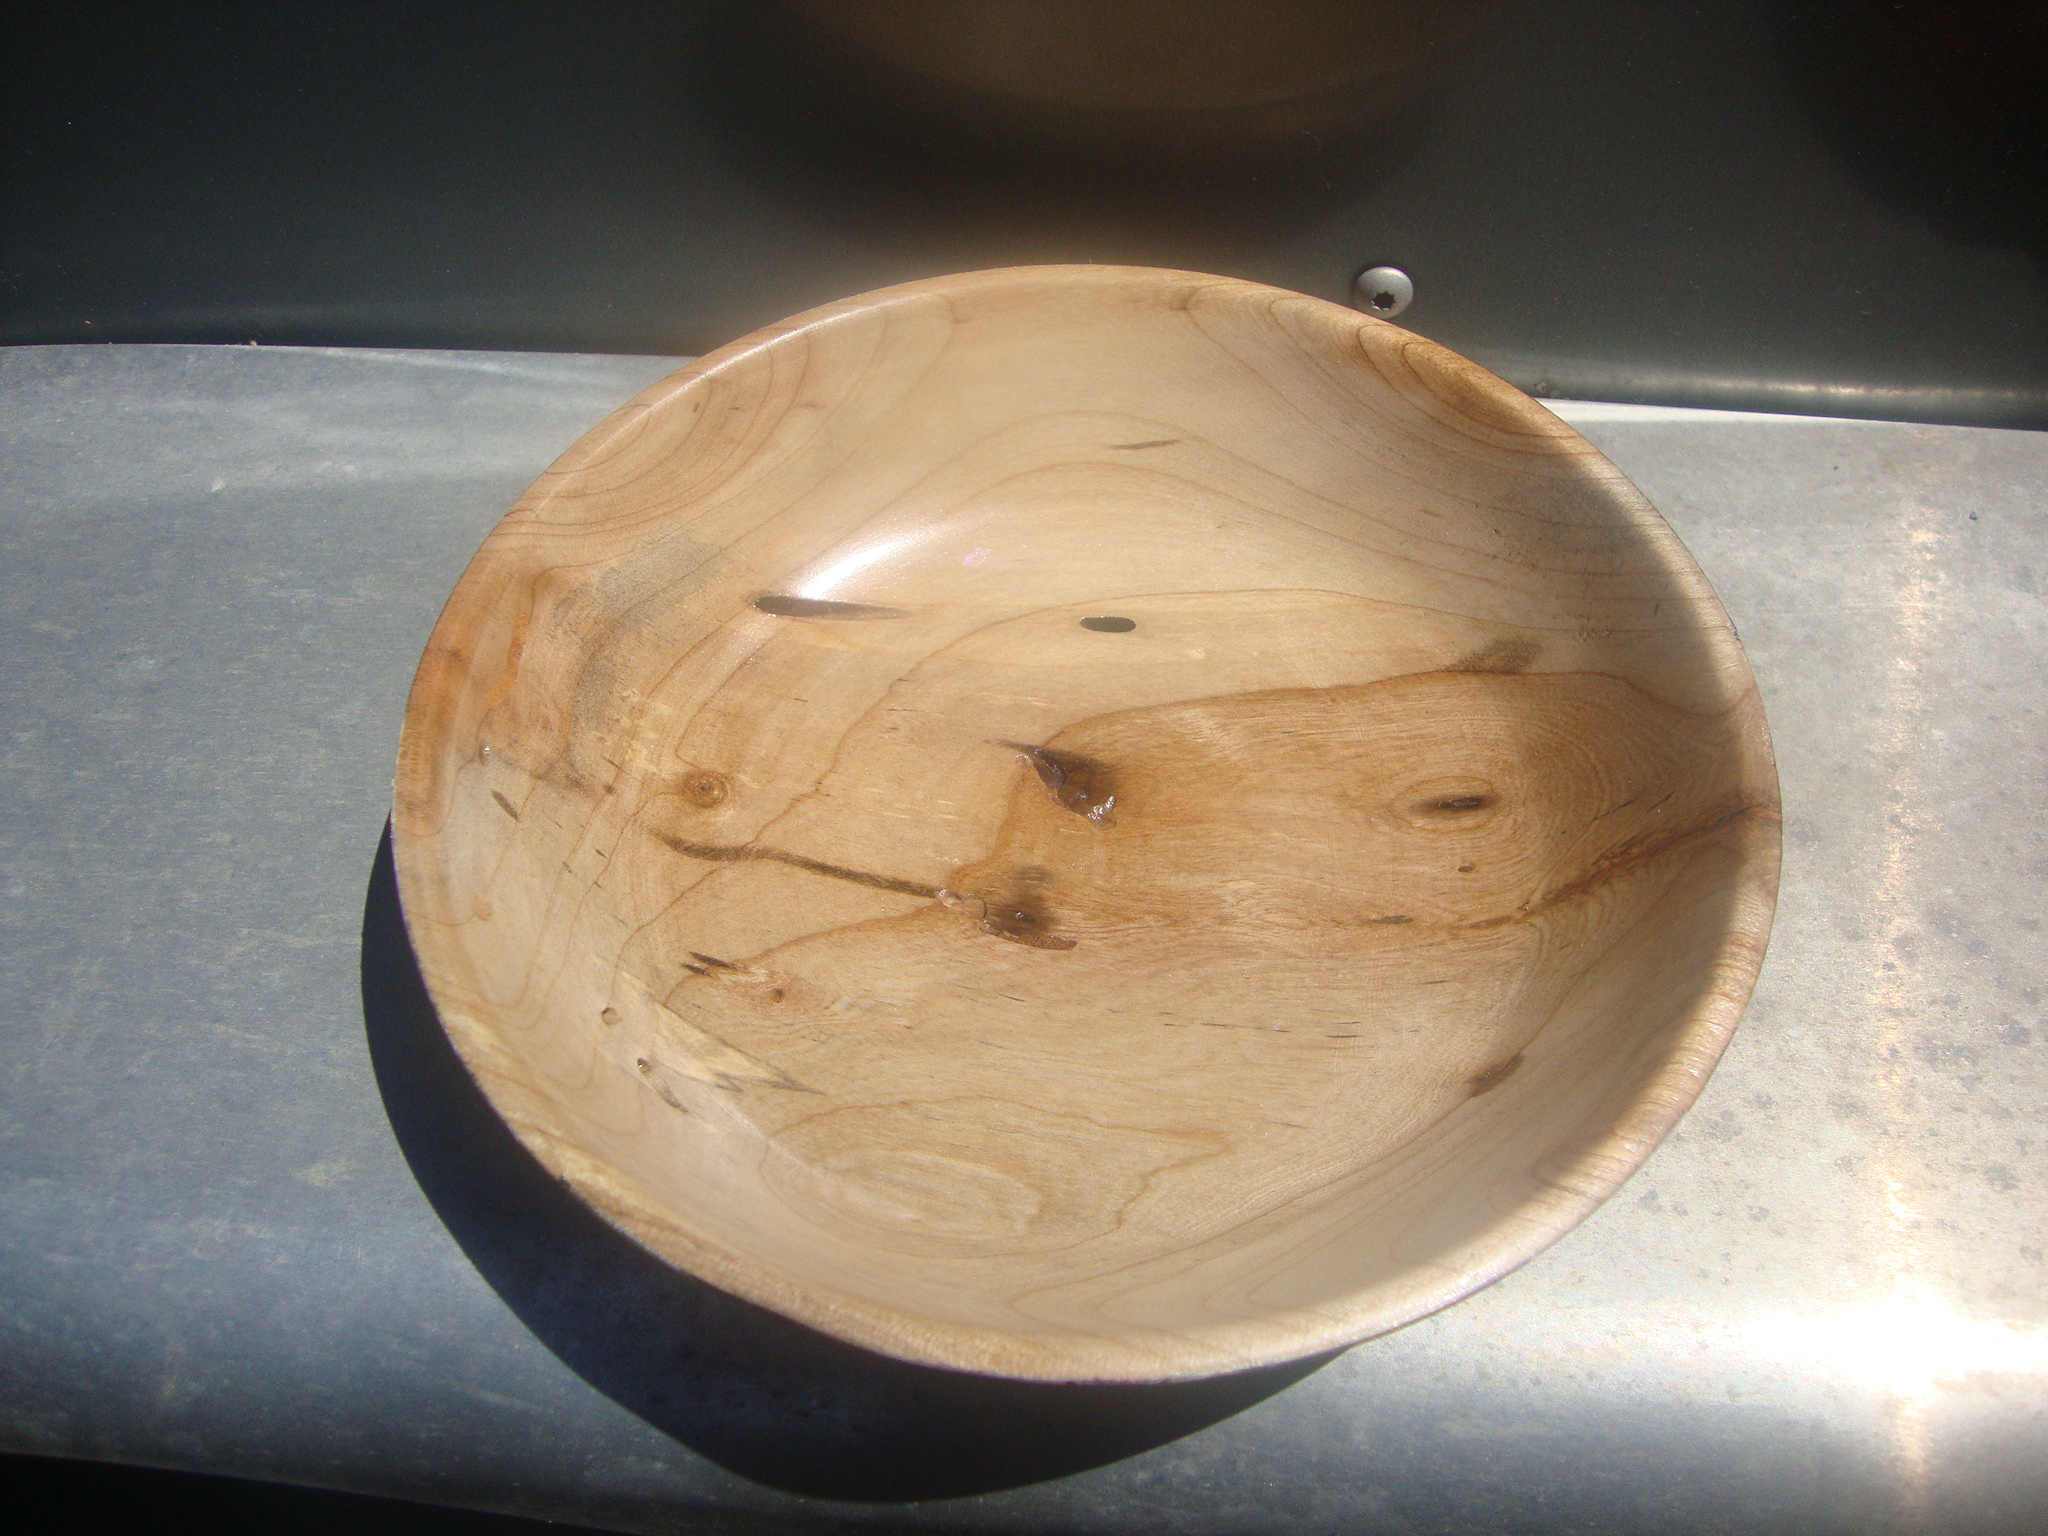
I found a really crappy piece of wood in the shop. I think it was part of the “Clearwater wood” that my daughter found on a walk, but I can’t remember for sure. What I do know is that this wood was riddled with bug damage, was incredibly dry, and really didn’t turn into anything that looked other than “brown and round”. boring…
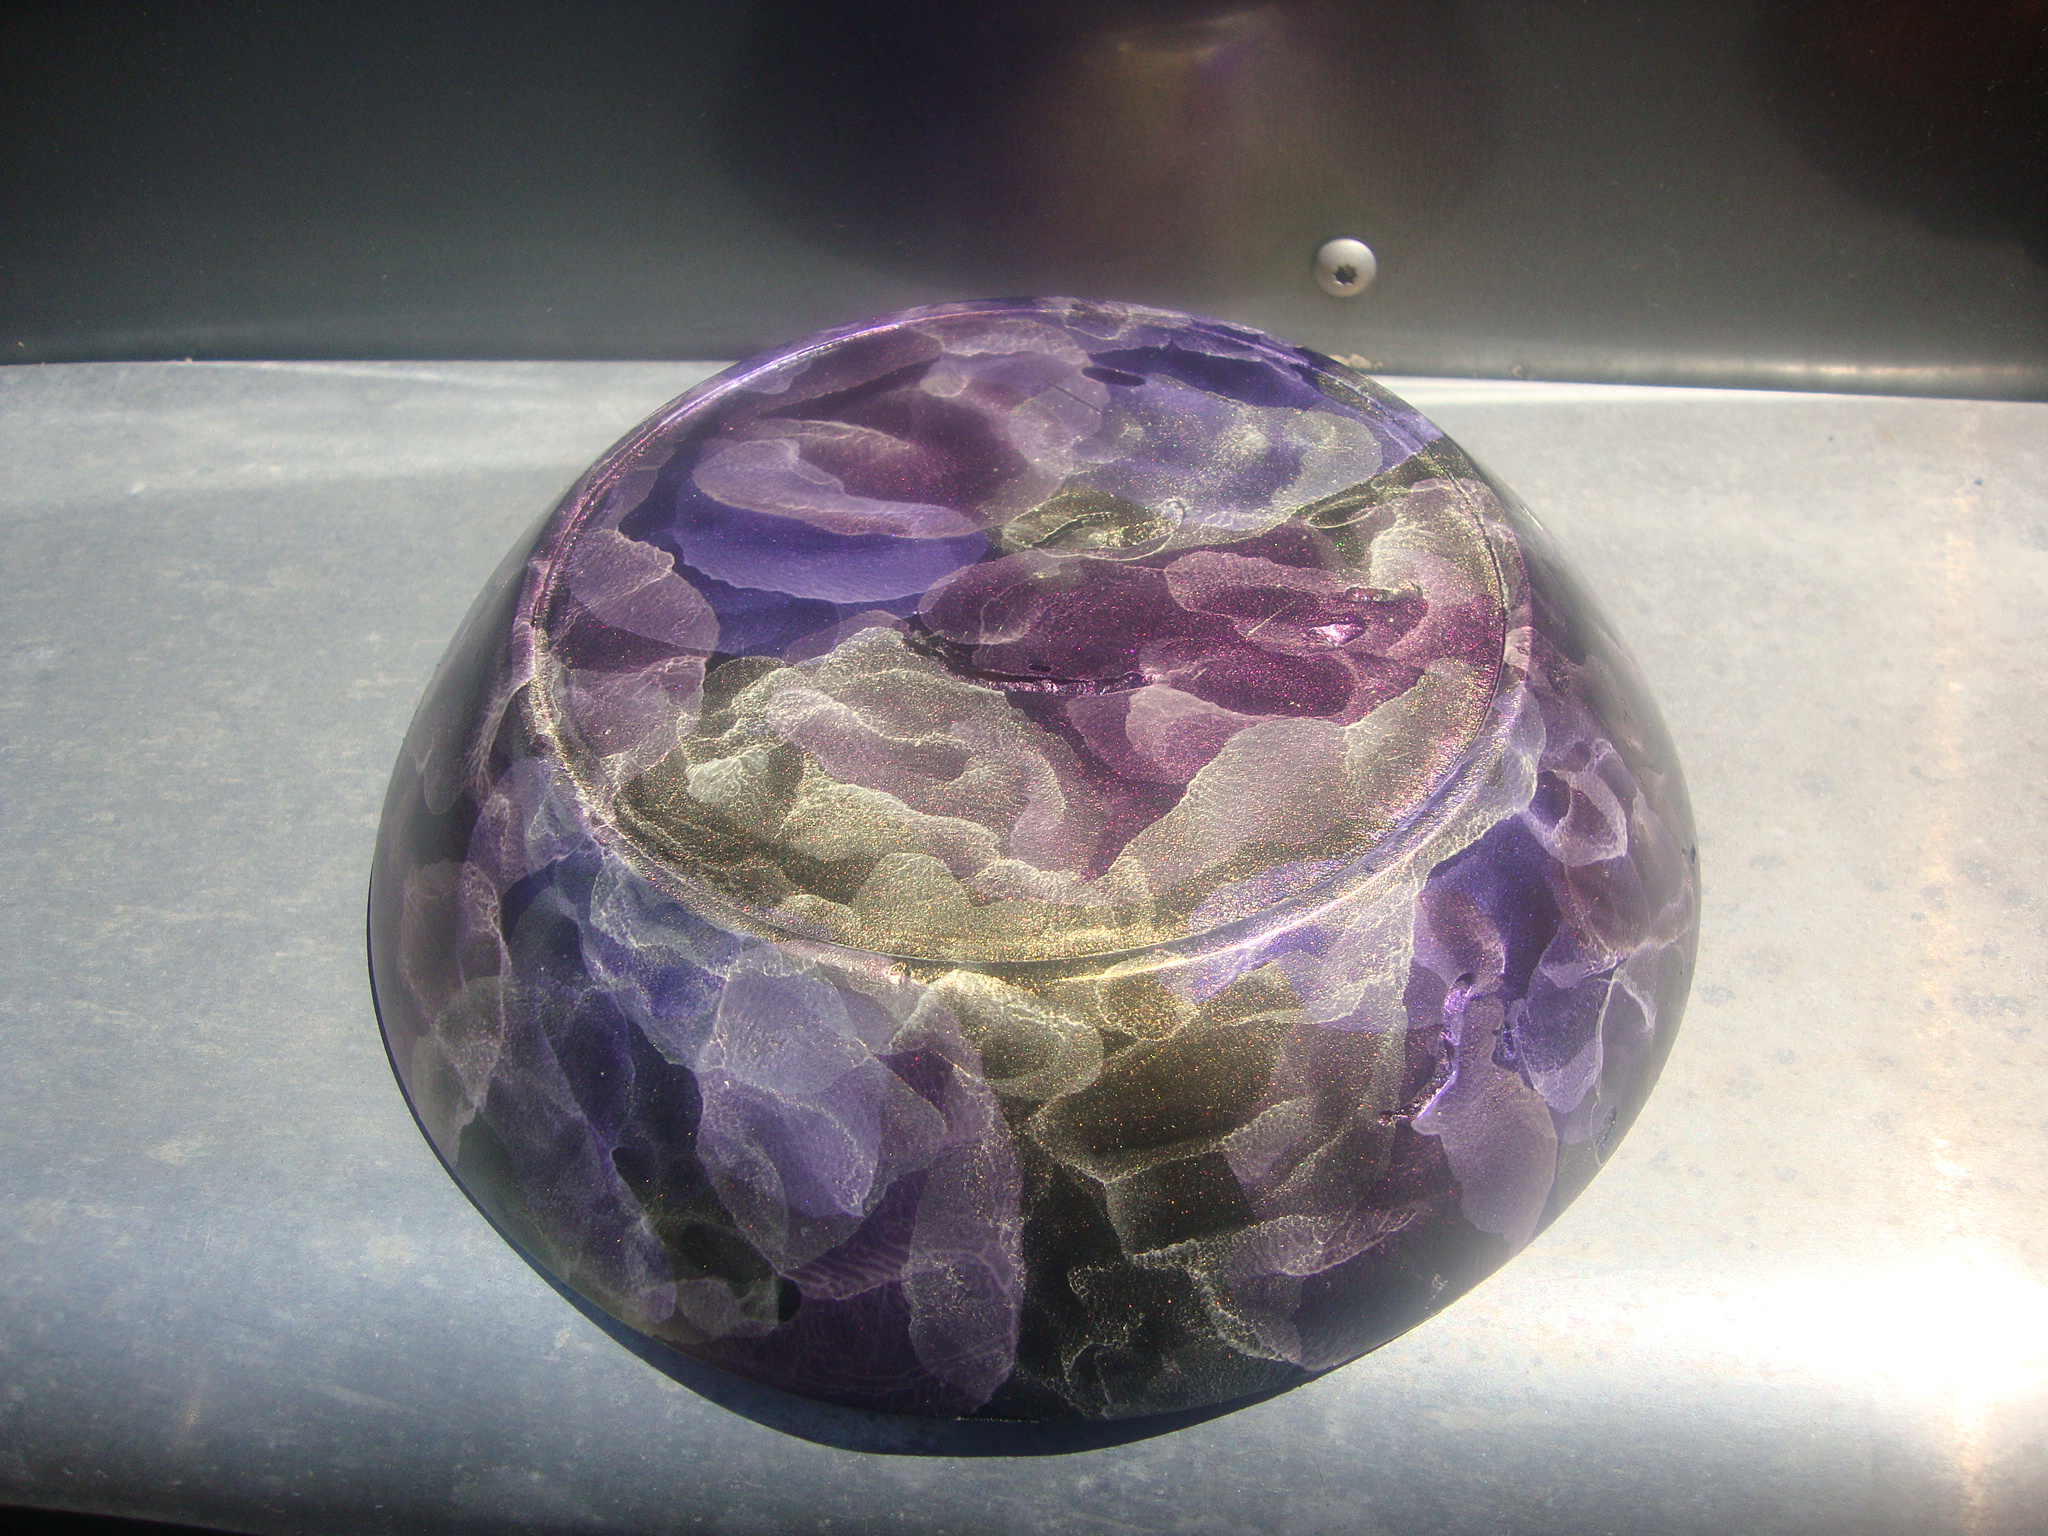
After seeing YouTube videos and another guy in the club experiment with the “cosmic cloud” coloring technique, I decided to give it a try. This turned out pretty good, considering how it started. Haven’t decided it I’ll set this one out and wait for one of the kids to claim it, or take it to work and give it to someone there who’s been (politely) pestering me to make her something.
Here is a top view, showing how unremarkable the bowl would have been if left “natural”.Here’s the underside of the bowl. Looks MUCH better!
The woodturning club that I belong to has an ongoing charitable effort going on to make wig stands that can be given to cancer patients. I’ve posted a couple of posts showing ones that I’ve made already, but don’t intend to post every single one. That would get as boring to look at as it will become making them over and over and over… This one is different. I turned a wig stand out of douglas fir, which I had never used before. When it was done, it looked ok, but there really wasn’t anything about the wood that was worth looking at. Straight grain, no inclusions, nothing. One step above looking at a 2×4. The only thing I could think of to make it look less boring was paint. Lots and lots of paint!
I remembered my daughter Megan and her history (compulsion?) of doodling on herself. Since junior high school, if she has a ball point pen, some time, and a sense of boredom, she’ll start coloring. Usually up her arm, across her hand, or if she had a pair of jeans on that looked like they needed embellishment, across her pants. We would always yell at her and tell her to stop, but I have to admit that some of the stuff she came up with was pretty cool looking! Kinda looked like Indian henna designs, but with a different flare.
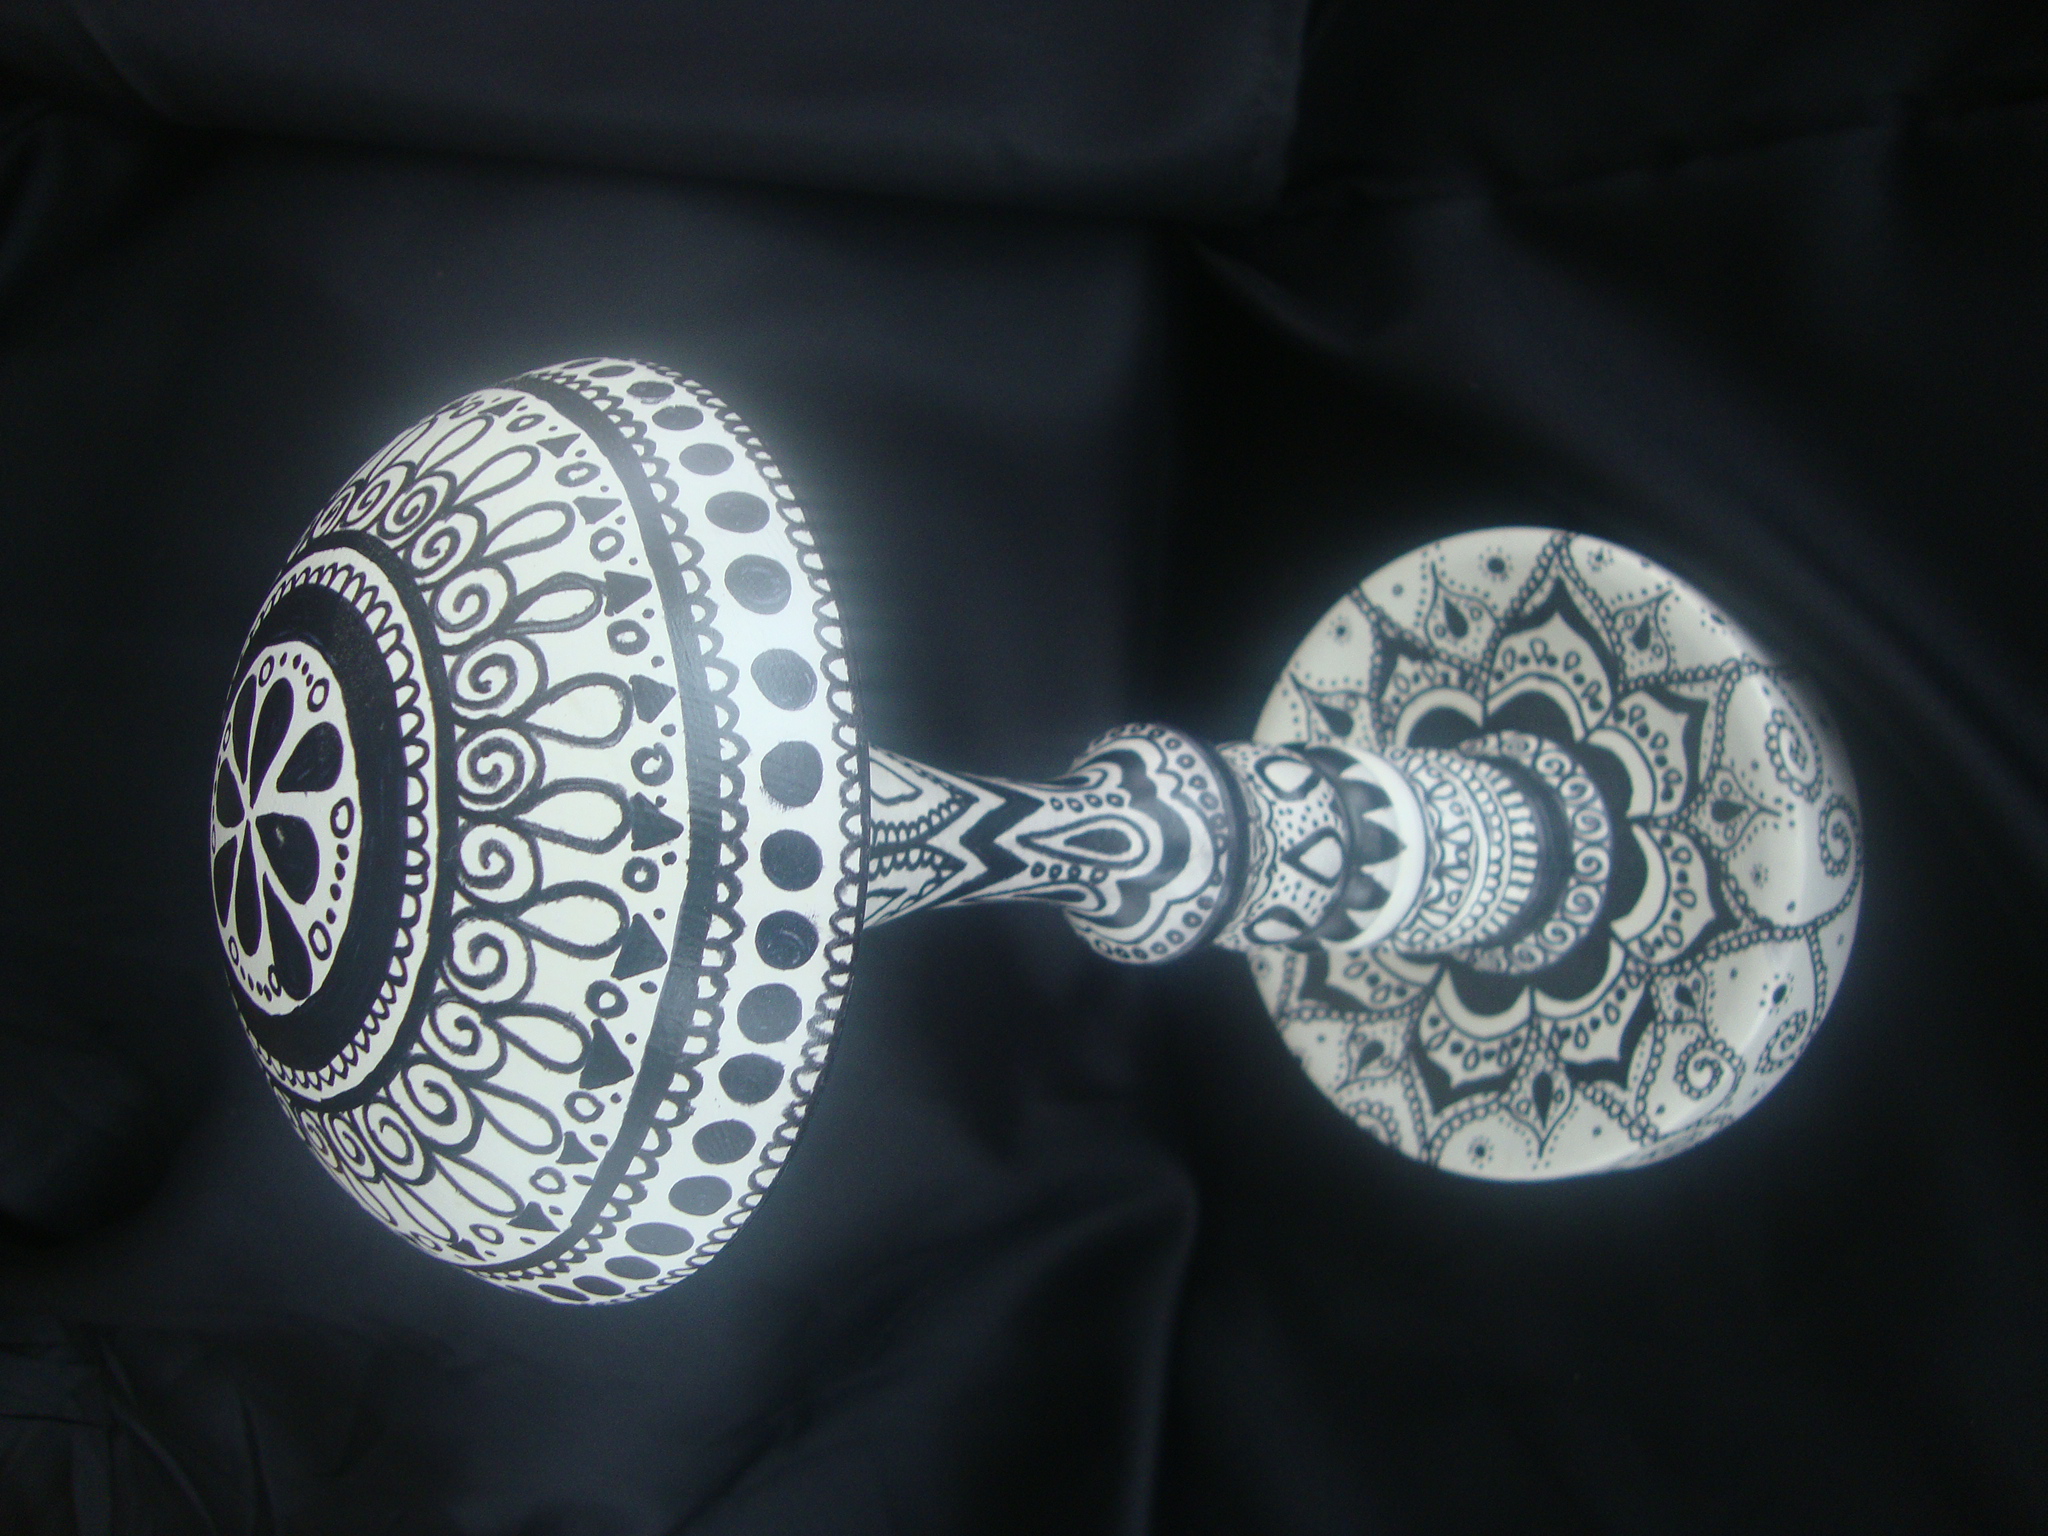
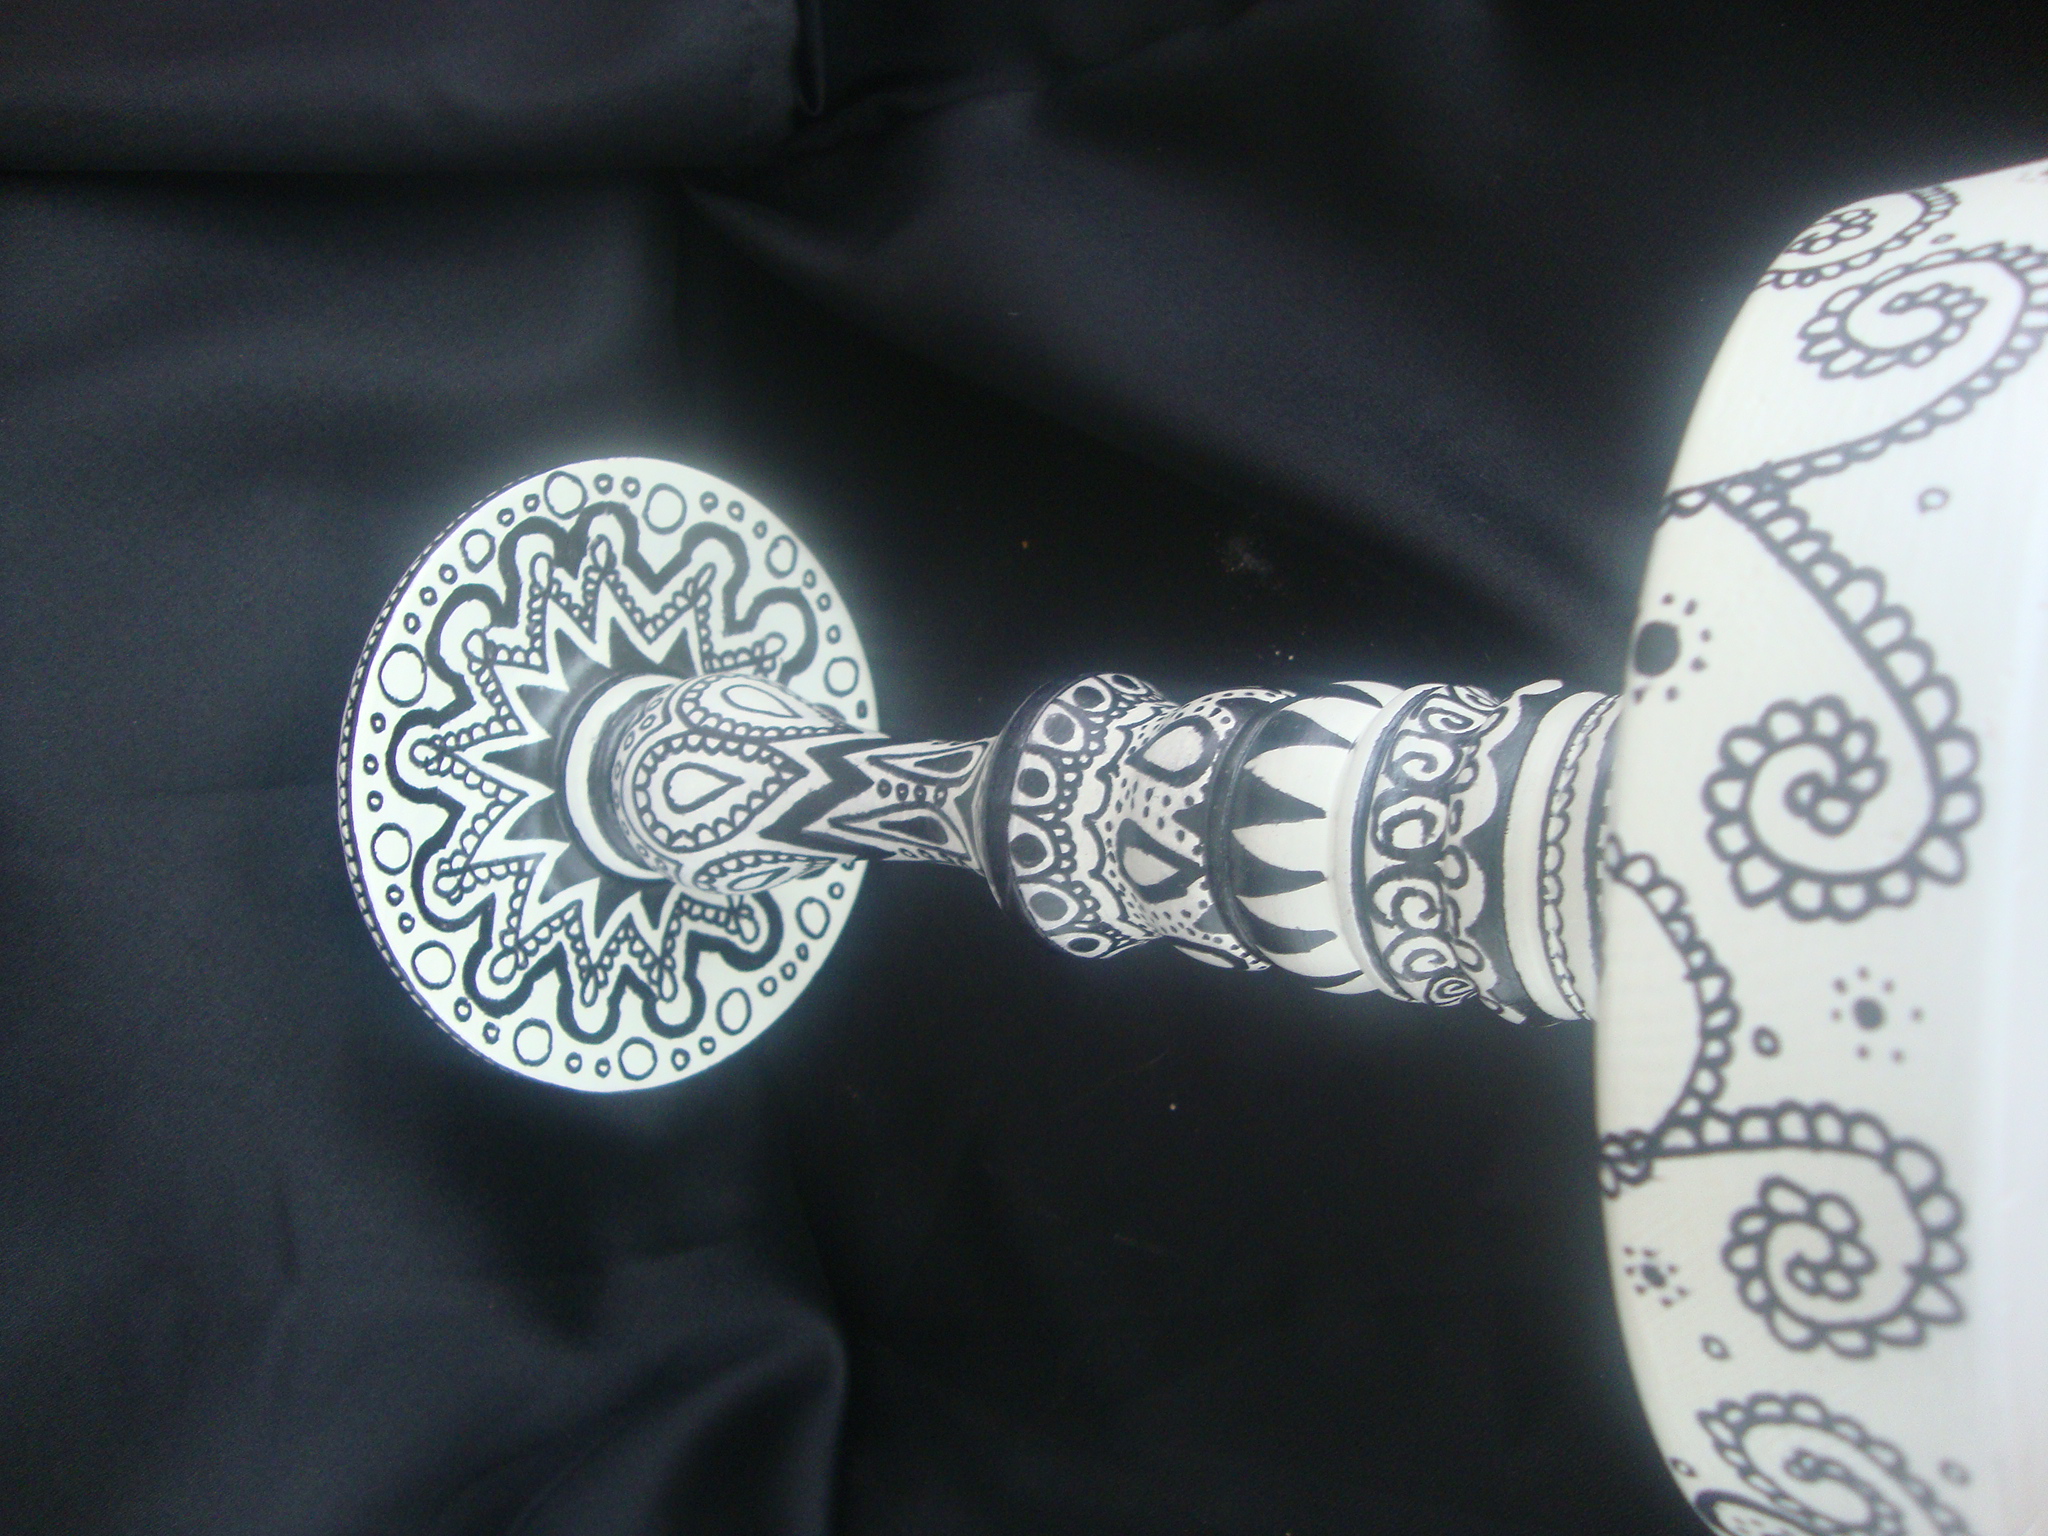
I asked her if she’d like to do one of her doodles on a wig stand and she agreed. Below is the final product that she came up with. WOW! Megan did a FANTASTIC job!
I’m sure the person who gets it will appreciate the artwork. What was even cooler to me, was that my daughter and I collaborated on making something that actually turned out very nice! Hopefully, this is the first of many to come…
Imagine coming home from work and finding your daughter spent all of study hall making her arm look eerily similar to this! Looks fantastic on a wig stand, not so much on an arm…She even did under the top.
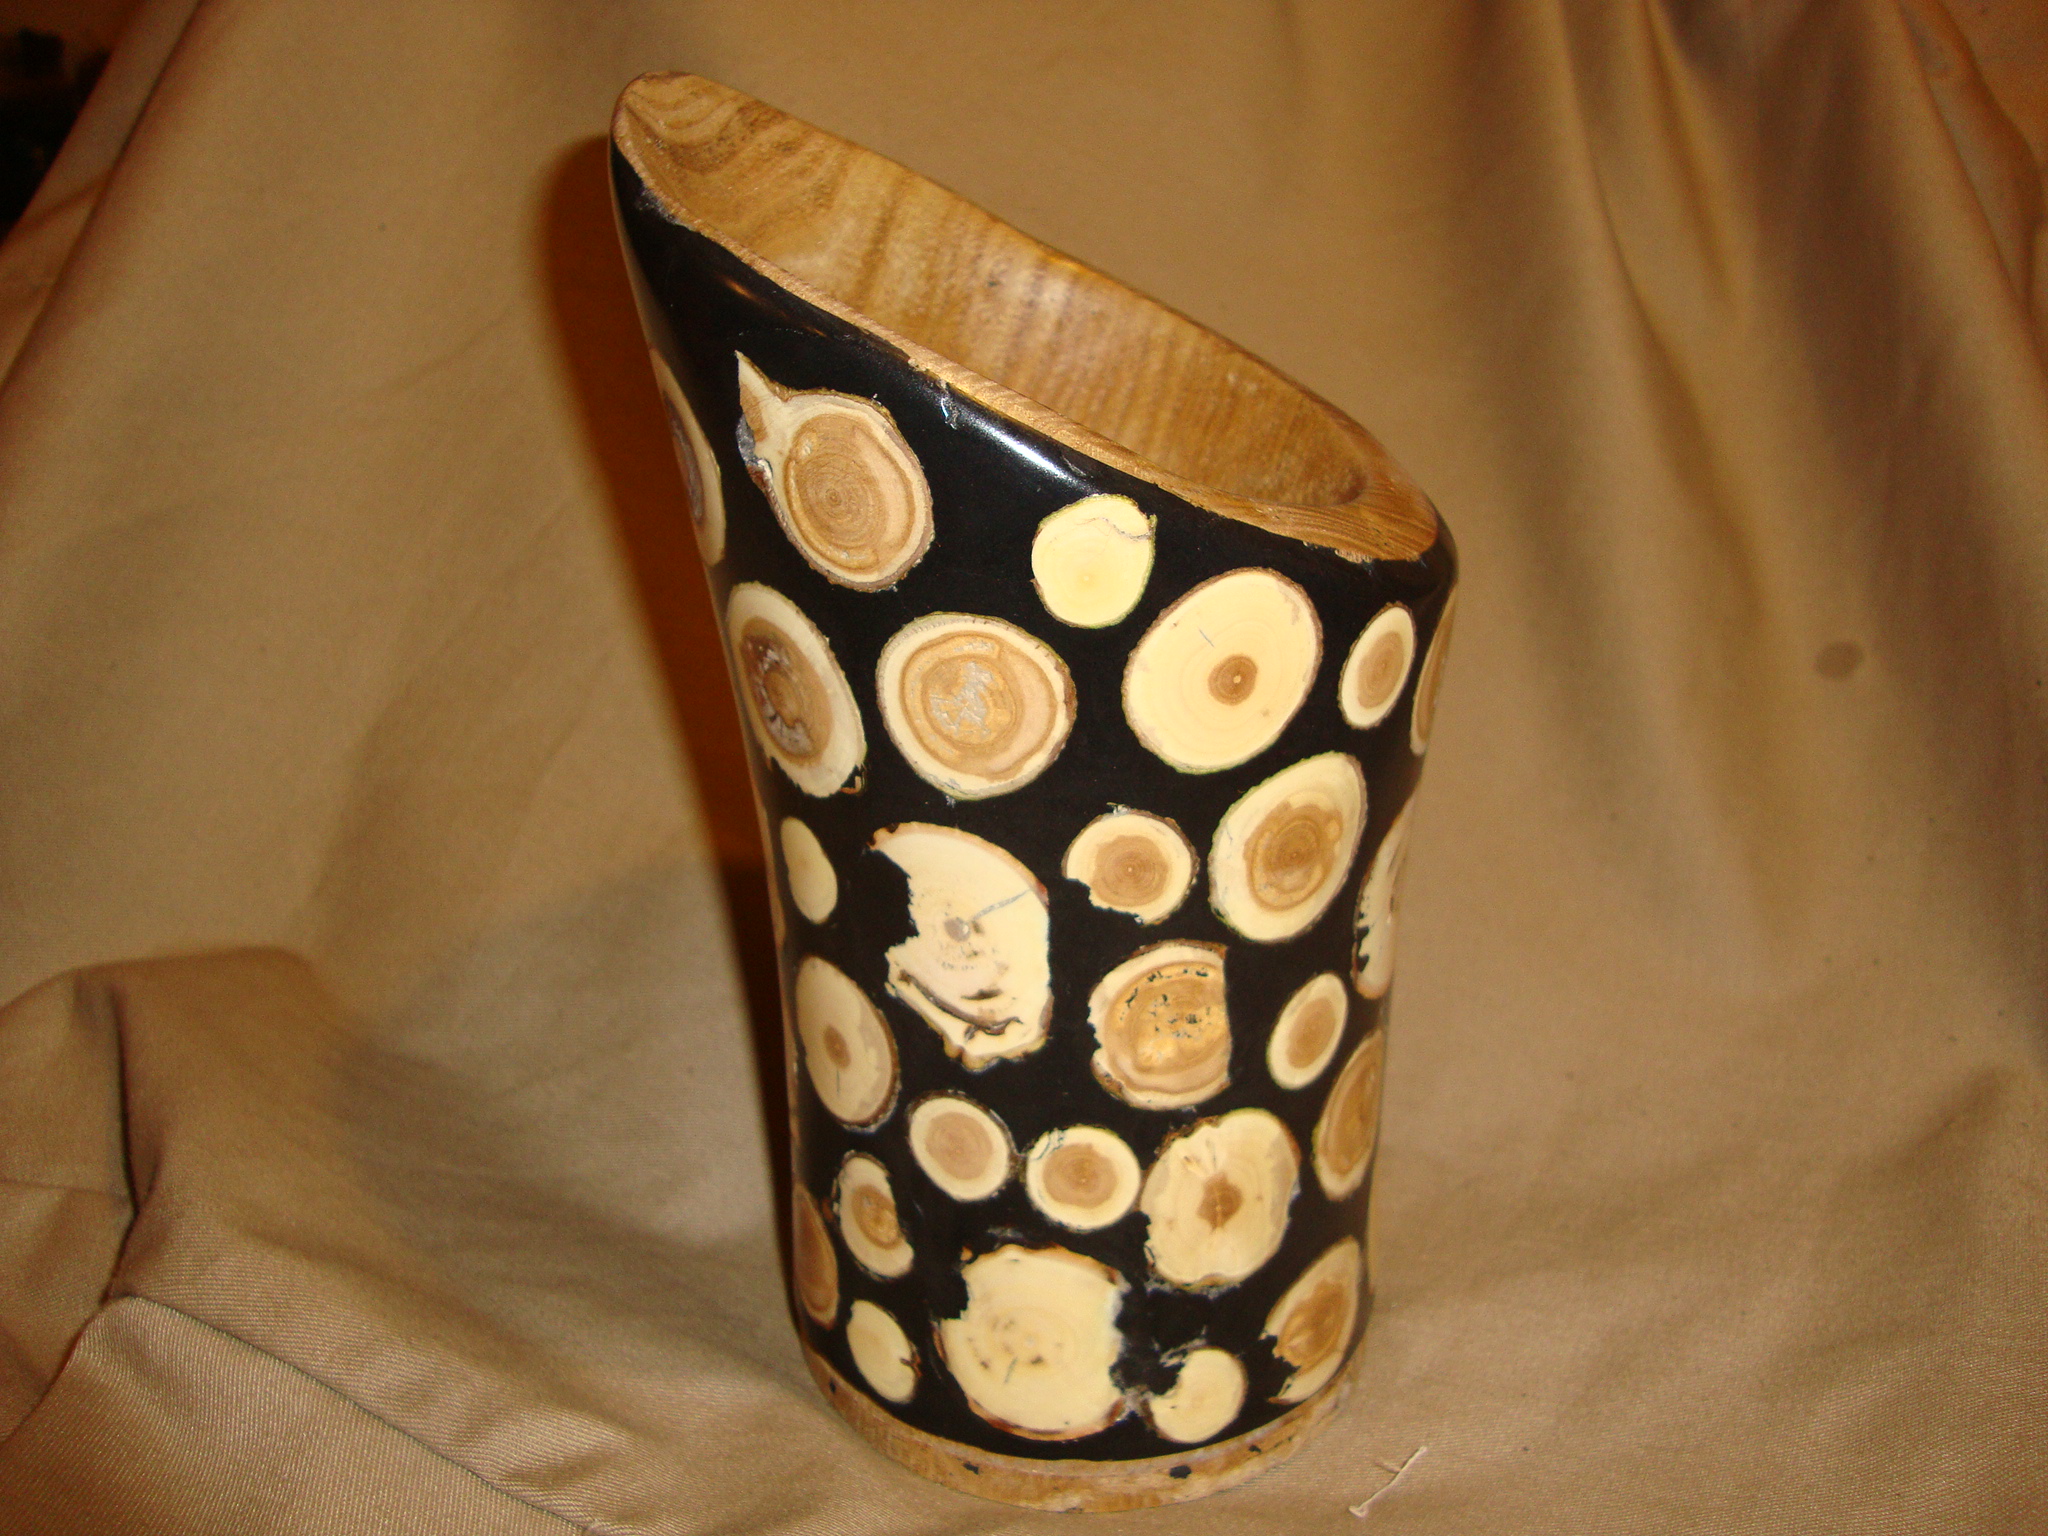
Back in February, I made a vase out of an oddly shaped piece of white oak and posted it on the blog. I liked it and had plans to give it away to a co-worker in Atlanta, but every time I looked at it, I thought, “come on, Mark, you can do better than that”! So I sat it where I’d have to look at it each day and waited for some inspiration to hit me as I walked by. It took a couple of months, but it finally dawned on me that while I liked the form of the vase, the wood grain was just too plain. Simple. There wasn’t anything to really make a person want to look at it, let alone make them want to look at it for more than a passing glance.
That’s when I got an idea.
The thought was that I would affix small, cut pieces of tree limbs to the side, “grout” it all together with black epoxy putty, and end up with something that looked totally different! Simple concept, except once again, I failed to pay adequate attention to Mr. Zoerb’s sophomore geometry class. Remember the basics? If you have a flat plane that intersects with a sphere (or any other rounded surface) the point on contact will one line, no more, no less. In woodturning, that means the piece of limb will only be attached to the vase in one thin place, leaving the rest of the material hanging over the surface of the vase with absolutely no support. Being an idiot, I figured CA glue would be “strong enough”, so there wouldn’t be a problem. I started laying in the epoxy putty and realized that there’s no really good way to squish the putty under the pieces and that it was difficult enough to completely fill in the cracks. Oh well, it’ll still be “strong enough”… Well, it wasn’t! no matter how light of cut I took, pieces flew off the lathe like I was being shelled. Many of them fractured into small pieces and some just flew into my face protector, then rolled under something heavy. I was going to quit, but there was so much money in epoxy putty already on the vase, it was becoming more of a battle of wills to complete the quest than anything else. It took over a week to get the pieces glued back on and the spaces under the pieces adequately glued with multiple layers of CA glue to hold them in place. I ended up sanding the limb pieces thinner, so there wasn’t as much wood to remove later and so it was easier to get the epoxy putty squished in.
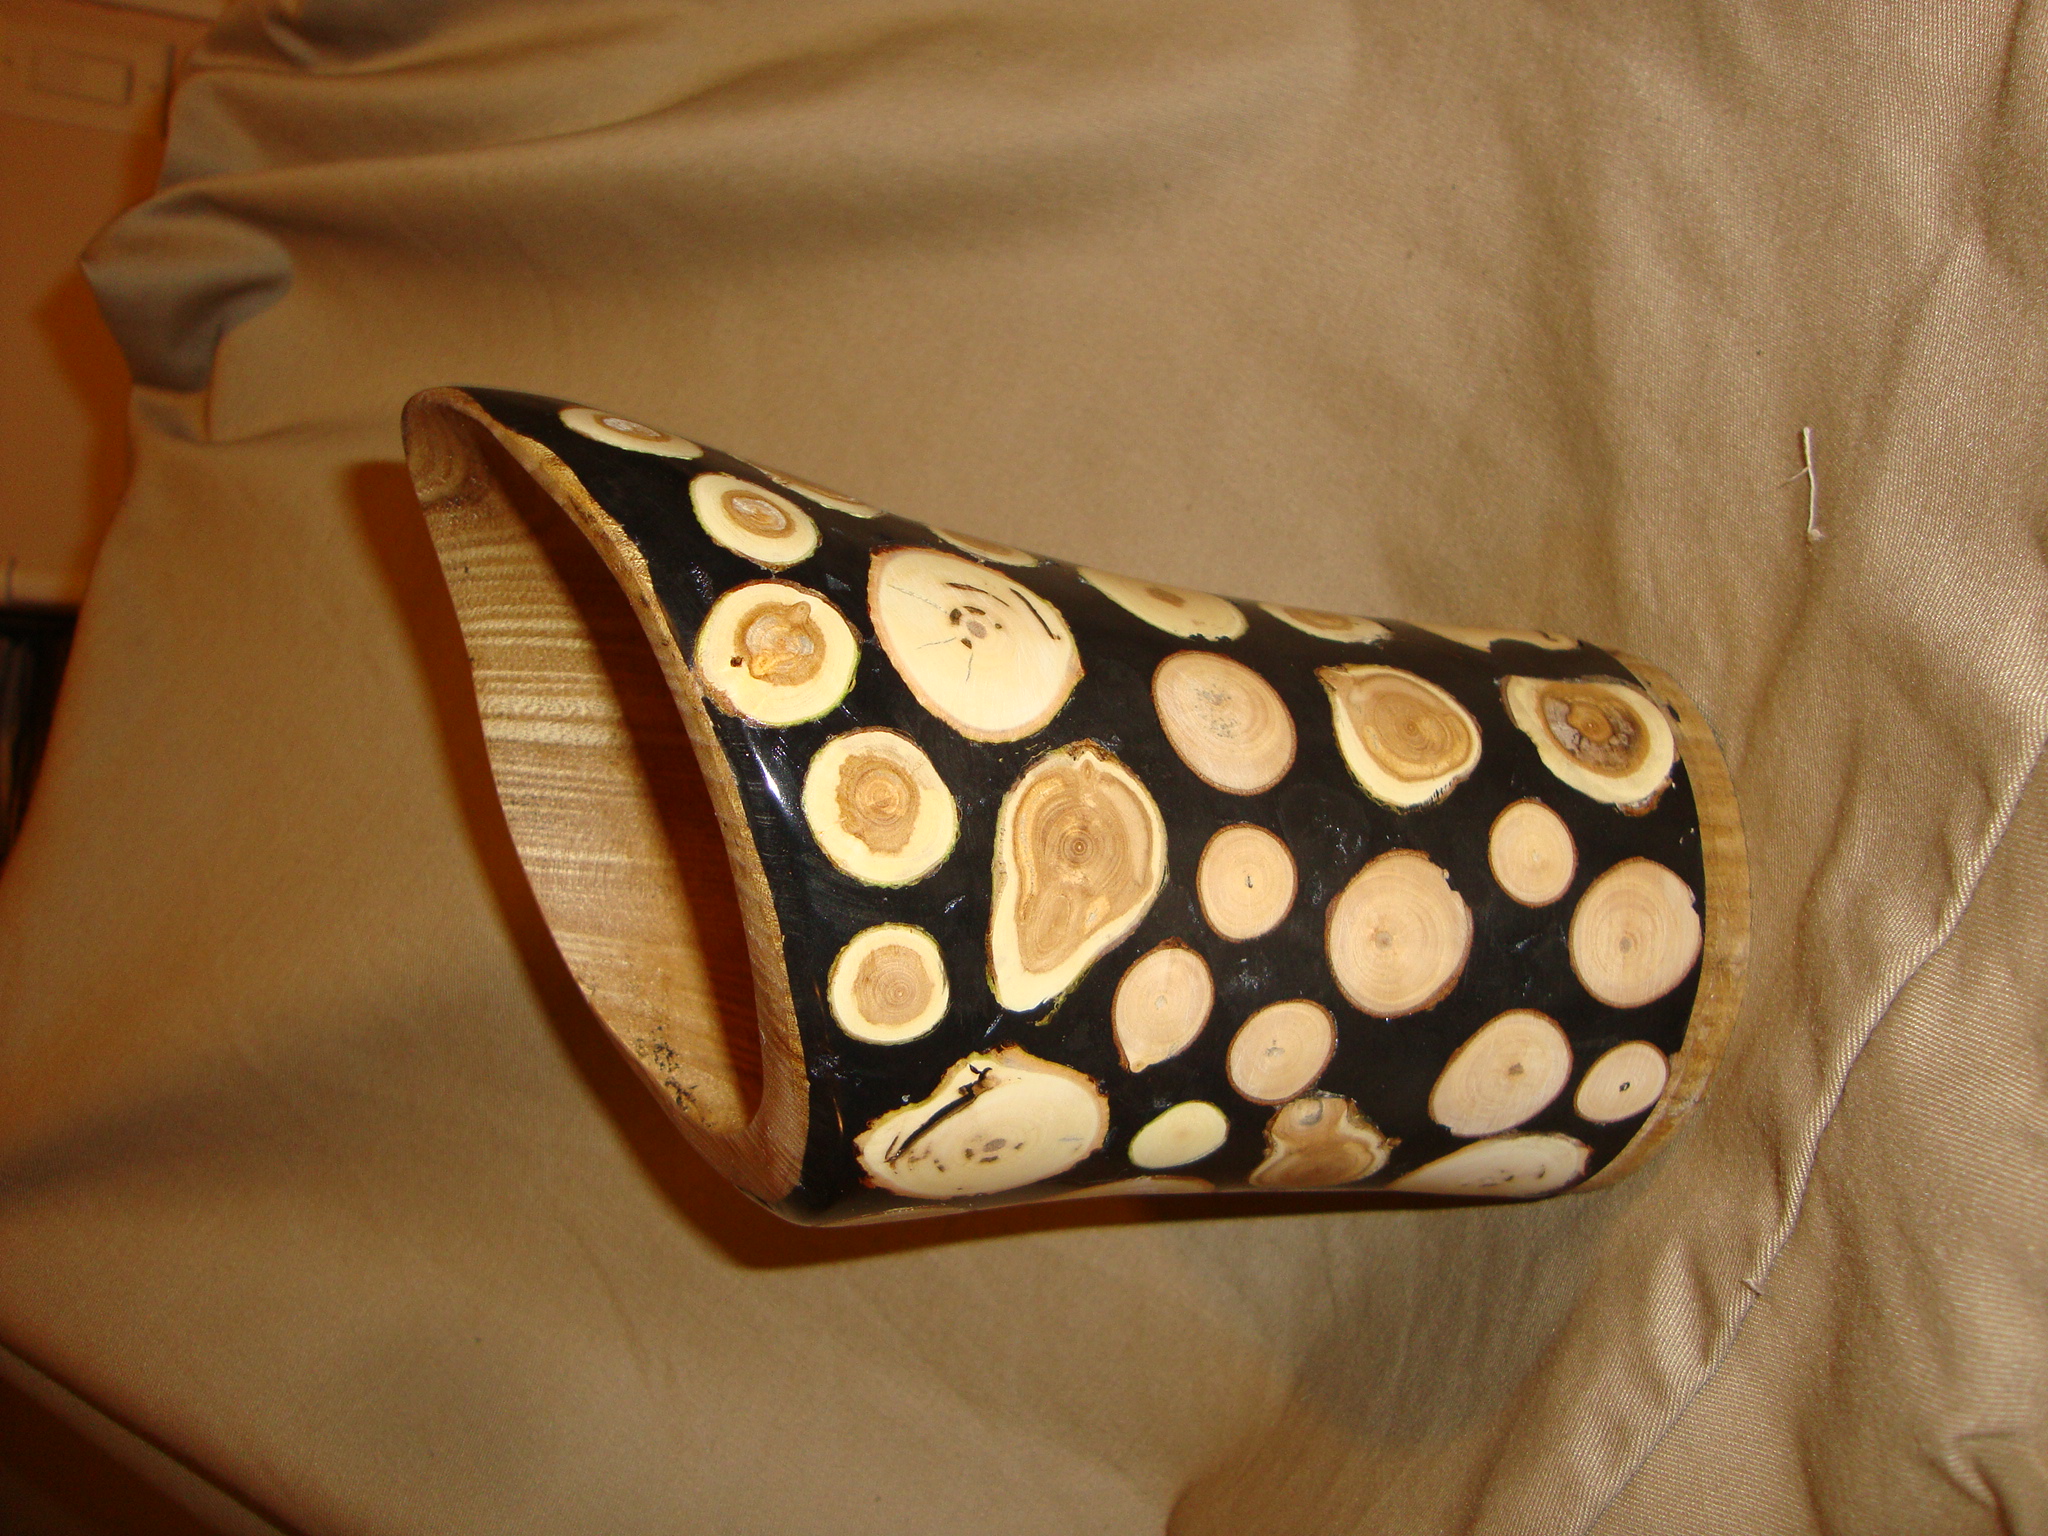
Eventually, I was able to start the re-turning process and came out with the new and improved vase below. Much, MUCH, better! Now, I have to decide it I’m still going to give it away, or if I’ll put it back in the walkway path as a trophy for having completed the quest…
Here’s a picture of the vase as originally turned.
Here’s a picture with the vase in it’s new, finished, form:
On this side, you can see where some of the pieces of limb broke and I glued the remains of the piece back onto the vase. In hindsight, I should have cut a new piece that was roughly the same size as the one that came off.Right side view. Some of the limb pieces had a crack in them, so I filled them with the epoxy putty. Kinda like how that turned out…